Removing Recalcitrant Concrete Forms — How to Adapt and Change Your Approach

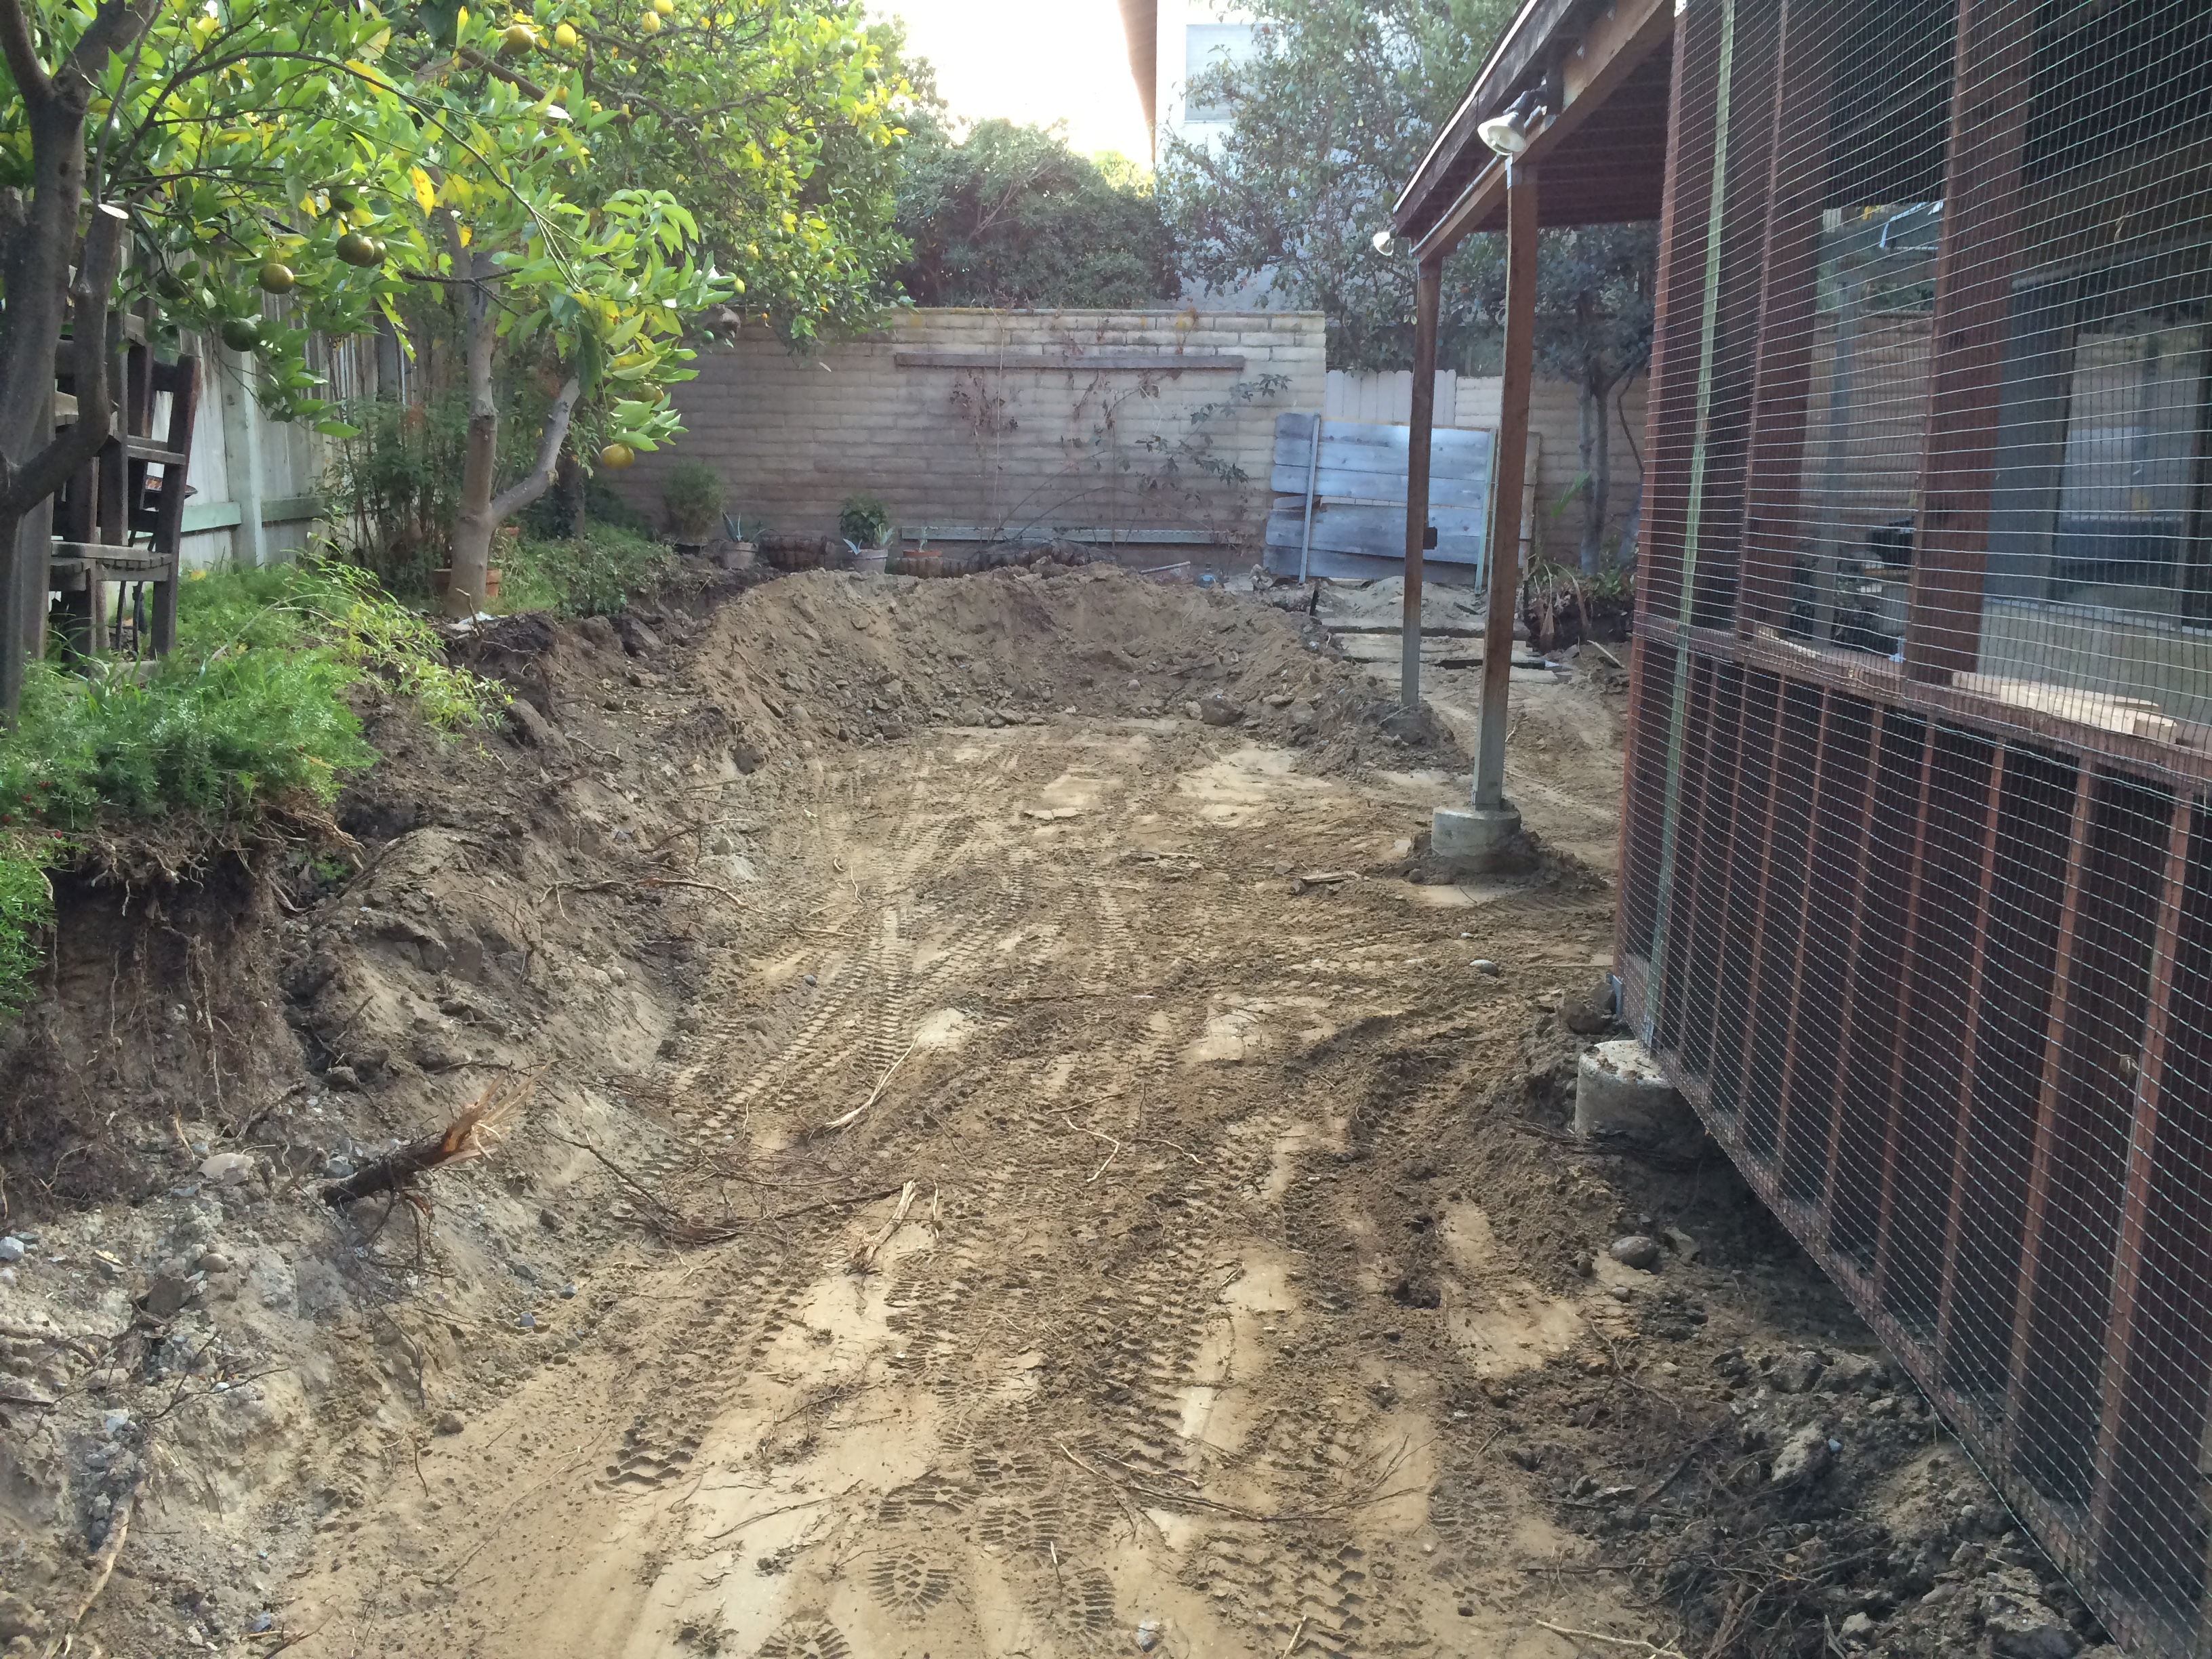
This week was a bit of an interlude. I had just finished one project (the new patio cover/trellis supports and footings), but I really wasn’t ready for the next one (building the backyard retaining wall). Nonetheless, there was a lot of work to do. I had to determine exactly where the backyard retaining wall would go based on how much dirt I had to accommodate from the net result of my adventures in grading (see previous posts). So, early in the morning, I went out with my AWESOME laser level and grade rod and determined the level of my retaining wall, and then went back to my computer model to set the dimensions of the retaining wall based on the volume of dirt I had to re-distribute. I then calculated the number of retaining wall bricks and capstone that I would need.

I also had to demo the old footings with a jackhammer. It cost $75 for 4 hours — if I would have done this earlier, when I had the jackhammer for other reasons, I would have saved the $75.  That is (part of) the price of not thinking ahead. Oh well. I also had to sort through a bunch of other demolition products, primarily lumber, so Habitat for Humanity could pick it up. To meet their requirements, I had to disassemble all of my structures (e.g., concrete forms), and also had to rid some of my other used lumber from nails and screws. I don’t want to pay somebody to take this lumber to a landfill where it will rot and pollute our environment, instead of being repurposed for someone else’s needs. My lovely wife is the great conservator and recycler, and I always follow her recommendations. Over the years, I have come to truly appreciate her wisdom and forward-thinking about our care for our environment. It makes a difference on many levels.

A big pile of busted up footings. Will I ever get rid of this stuff?

A big pile of busted up footings. Will I ever get rid of this stuff?

All the lumber I used for my concrete and footing work, ready to be repurposed by Habitat for Humanity.

All the lumber I used for my concrete and footing work, ready to be repurposed by Habitat for Humanity.

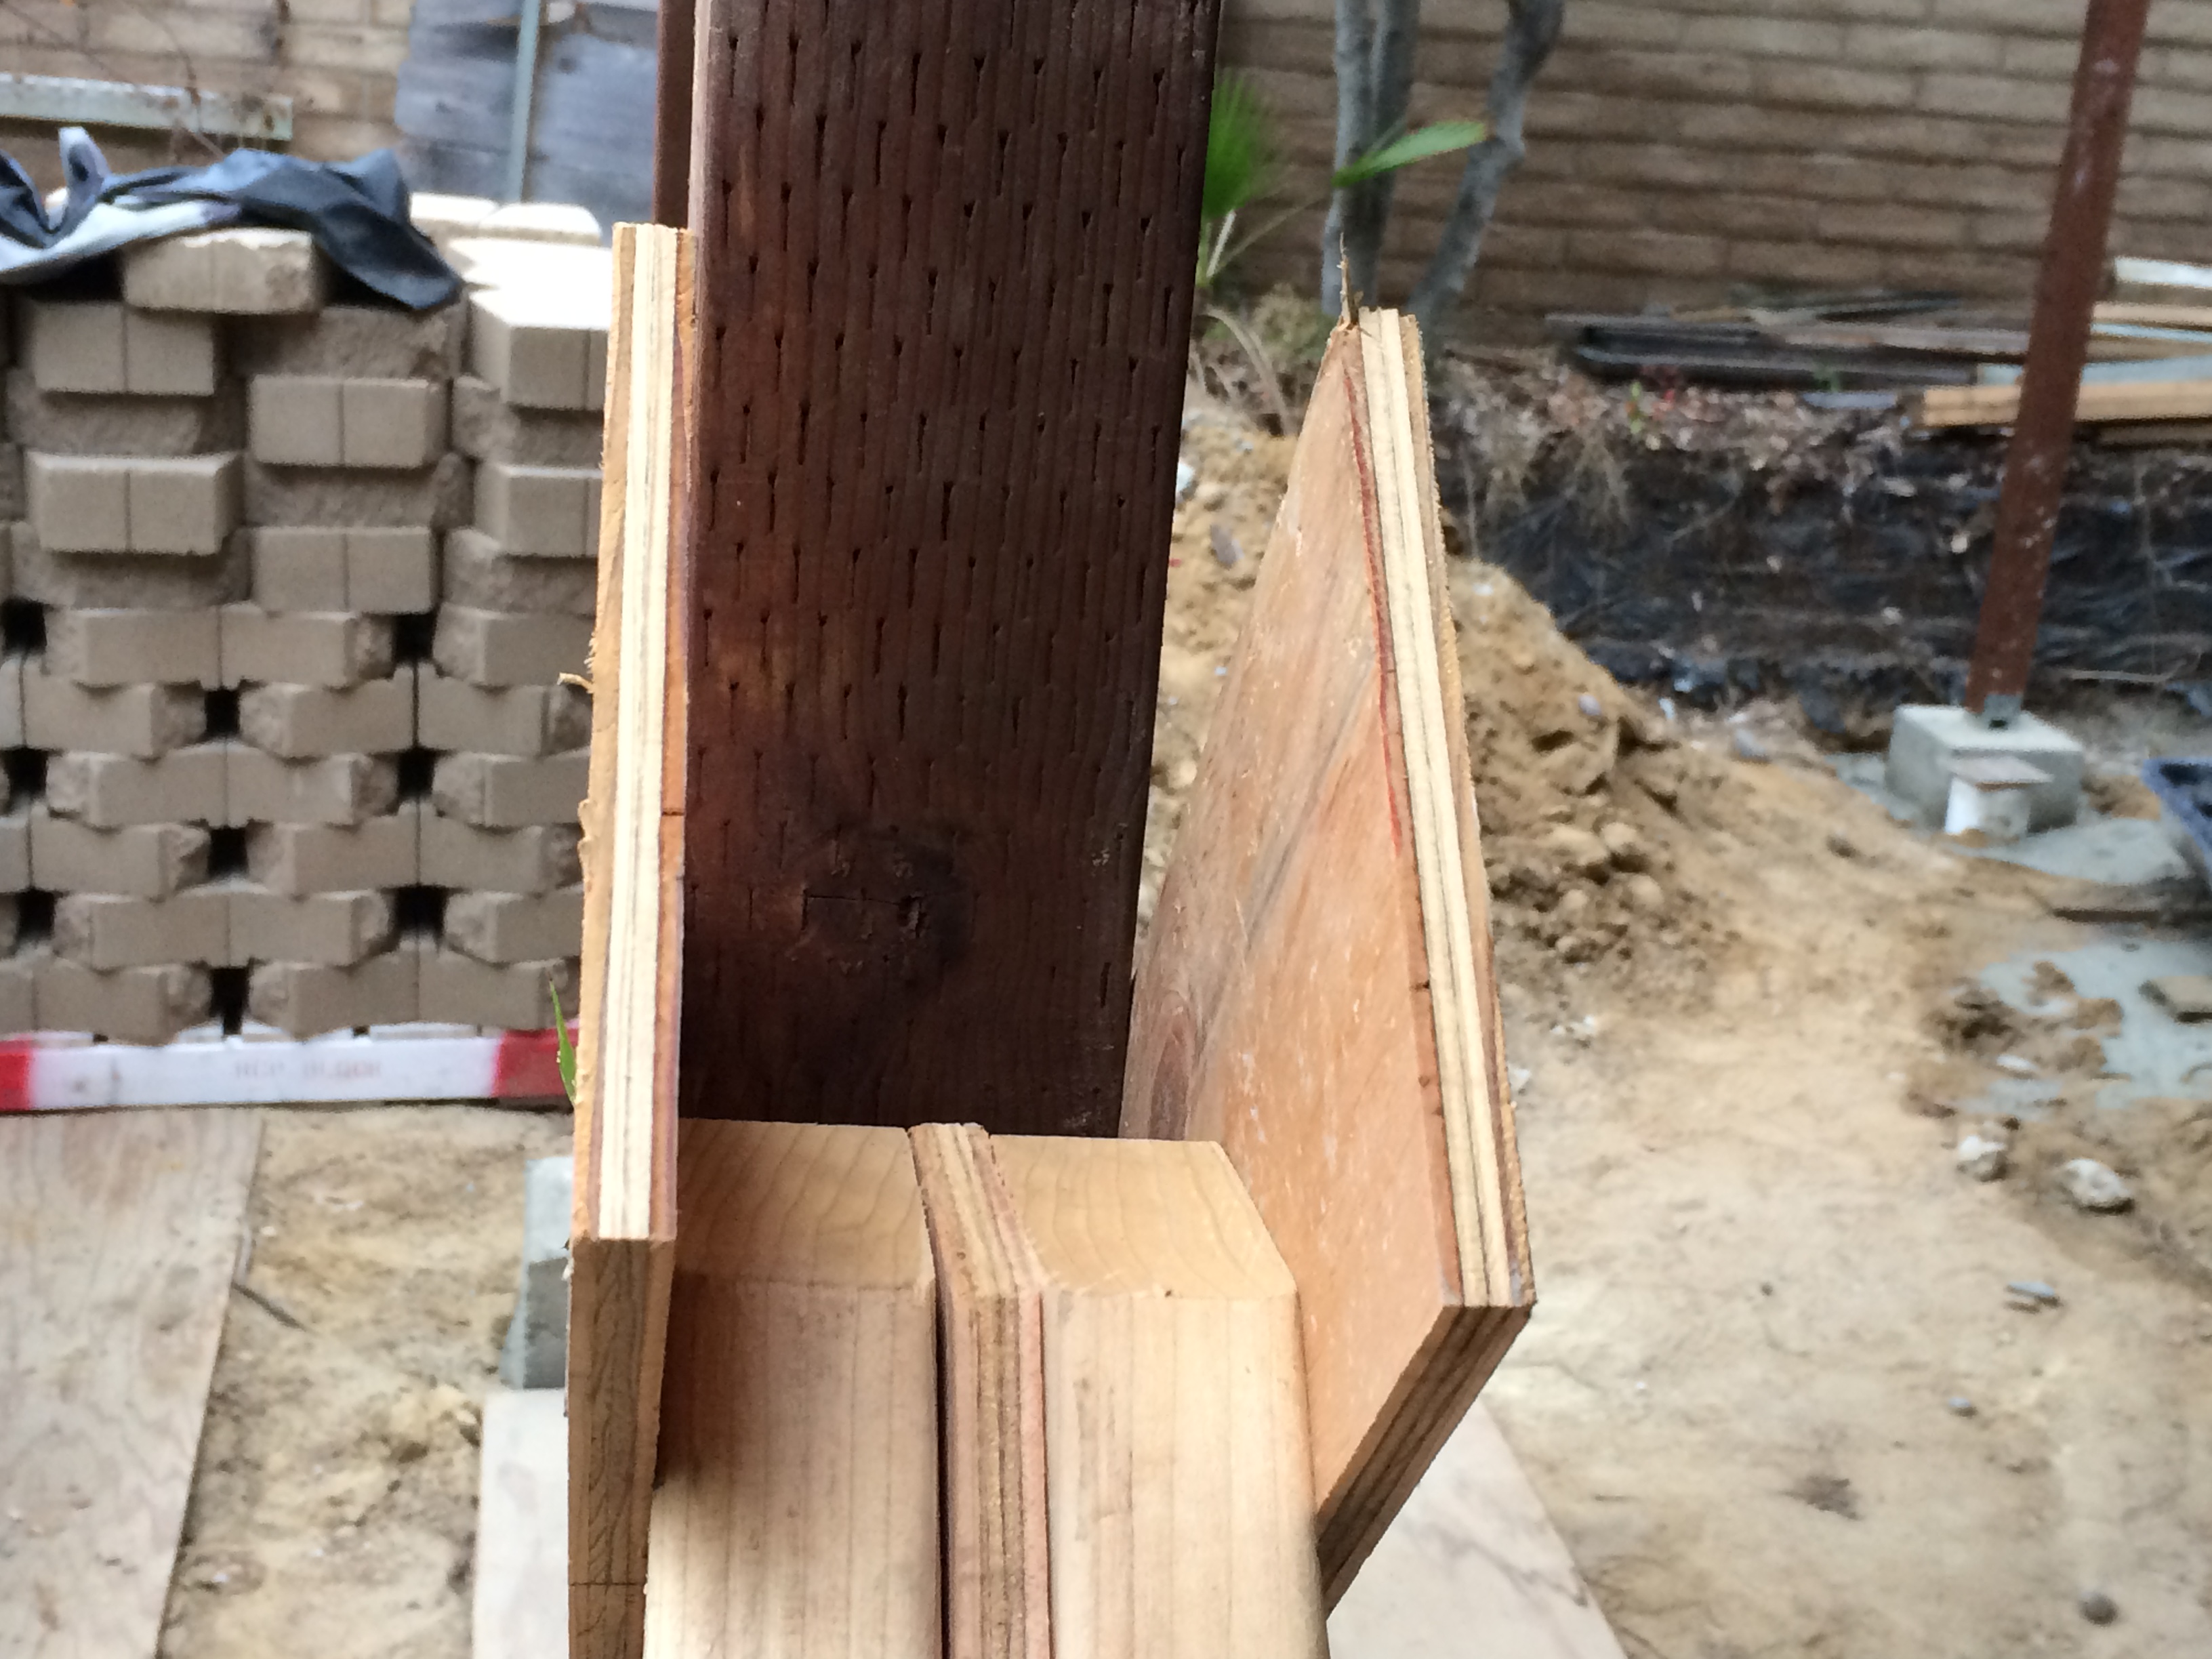
Part of my demolition activity was to remove the forms from the concrete pour. In particular, I had to remove the forms which made a recess in the concrete to fit in my footlights. These were all left in place when the outside forms were removed because it was important to have the concrete cure and gain maximum strength because removal of these forms places a stress on the surrounding concrete. Thanks to my naiveté,  I did not seriously consider the potential difficulty in removing these little forms. After all, they were just little plywood boxes held together with a few finish nails. And the concrete contractor did a good job of spraying release agent (diesel fuel — you can smell it when you pull the forms), so I figured no big deal. I’ll just yank these bad boys out by inserting a few screws and pulling with pliers.

This approach did not work out well.

Turns out that the fresh concrete has water (duh!) which gets absorbed in the wood, no matter the release agent. This causes the wood to expand, and, unless you live in a desert (I do) and are willing to wait for several months to let ALL the moisture evaporate (forget that — I have a schedule to keep and I’m impatient), then you will have to remove the forms using brute force. This was an “inside” form, meaning that when it expanded, it only forced itself tighter against the surrounding concrete. I tried a couple of methods which involved a somewhat clever use of jackscrews that would push out the form from behind, but all ended up in failure. If I would have foreseen this complication, I could have installed the correct hardware before the pour, but I didn’t, so I was stuck. In the end, the brute force method was the way to go.

Brute force means removal by destruction. Basically, you use an array of tools, (hammer, crowbar, hand-held jigsaw, drill, chisel) to cut up the form and lever it out. Without doing damage to the concrete, of course. I would cut the top and bottom of the plywood with a jigsaw and then crowbar the top and sides out. For the back, I would drill a horizontal and vertical line of holes, and then use a chisel to break the plywood along the drill lines. The remaining pieces could then be pried out. So was this DIY hell, or was it what the pros do?

In a word, yes to both.

I had a basic misconception with how difficult the form would be to remove based on overlooking the expansion of the wood due to moisture in the concrete. My initial attempts did not take this into account. After trying the alternative jackscrew approach (the screws would either strip or shear off), I found that the brute force demolition approach was not so bad. This is what I think pros do in this situation. So I eventually came up with a “pro” approach. It just took me a few iterations. And a lot of time. Which is why pros are always faster. But I had “fun” doing it, right? Truthfully, no, but I learned something, and that is one of the benefits, if not a joy, of being a DIY.

Here are some pictures and a video:

Here is an "after" picture. Note how the edges of the well are a bit rough. I'm going to have to figure out how to hide this. Hiding your mistakes is an essential part of being a good DIY'er. Hey -- even the pros do it!

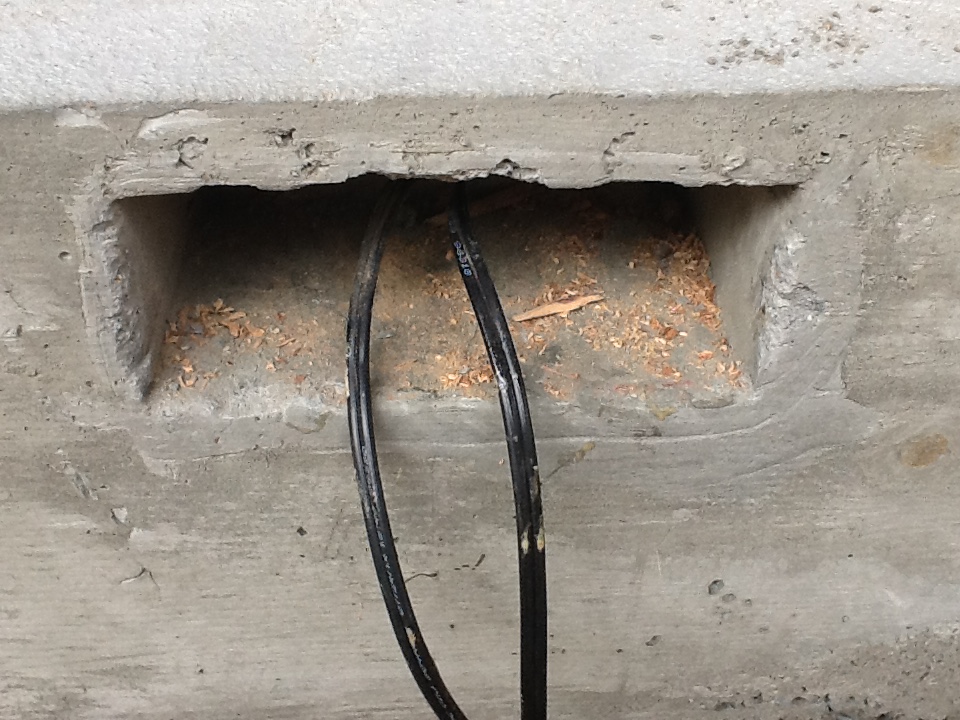
Here is an “after” picture. Note how the edges of the well are a bit rough. I’m going to have to figure out how to hide this. Hiding your mistakes is an essential part of being a good DIY’er. Hey — even the pros do it!

The detritus from the destructive removal of the concrete forms. That entire project turned out to be a "well spent" afternoon (!)

The detritus from the destructive removal of the concrete forms. That entire project turned out to be a “well spent” afternoon (!)


I’m trying to get a little more traffic on my blog and I ended up getting a domain name: http://www.diydivo.com.  It’s easier to remember, so please visit often!


Playing Footsie With Footings — Attention Shifts To The Back Yard

Now that the concrete pour for the front and service sidewalk was complete, my attention shifted to the back yard. In my master plan (that which I jealously harbor in the dark recesses of my brain), I was going to start building a retaining wall, However, when I surveyed the situation with an eye to actually start work, the ugly footings for my patio cover and trellis began to weigh heavily. Little did I know.

There were several things wrong with the way my patio cover and trellis were supported. First, many of the posts, were warped and rotted. So, at some point, replacing them was inevitable, Second, the footings were now protruding above the finished grade as a result of lowering the level of the grade to accommodate a code-compliant drainage system. This not only was aesthetically unpleasing, but was also a trip hazard. Third, embedment of the footings no longer met code because I removed some of the soil that surrounded them, so they really had to be buried deeper. Fourth, the footings were cylindrical, making it difficult to fit the rectangular bricks of the patio around them. I had originally planned to just replace the posts and live with the substandard footings. But after all the work on the front yard, I couldn’t stomach a backyard with second-rate footings. So I decided to do the “right” thing, and replace the footings.

This became a very interesting project because it was a retrofit, and thereby was not amenable to  a “standard” sequence of events. By this I mean you first do the layout, the dig and pour footings, and then build up from there. For this project,  I had to do things a bit out of sequence, which required some “backyard engineering”.

The first challenge was to remove the existing posts. To do that, I had to figure out a way how to support the existing structure with the old posts out while I was removing and replacing the footings. The second was to extract the footings. I didn’t want to dig them out, so I wanted to figure out a way to pull them out. The third was to pour the footings. I didn’t want to wait a day for the concrete to harden, because I would be only doing 2 footings at a time. So, I needed to use fast setting (high-early strength) concrete. Fourth, I had to figure out how to do all of this in the context of a one-guy operation.

Let’s face it. I love it.

To support the existing structure while replacing the posts, I came up with a system of jacks. These jacks consisted of a post made of 2x4s separated by 1/2″ plywood to give a square (3-1/2″ x 3-1/2″) bearing surface to match the beam, a “shoe” which was made of 2x4s and 3/4″ ply that incorporated an axle for the post to allow it to pivot, and some 1/2″ ply attached to the top of the post to act as a guide. I cut off a corner on opposite ends of the jack post to allow me to rotate the assembly in place underneath the beam. It’s way harder to explain in words, so here are some pictures:

Picture of the post jack. The top will be hammered into place vertically after shimming  to ensure good support.

Picture of the post jack. The top will be hammered into place vertically after shimming to ensure good support.

Picture of the shoe of the post jack. The bolt allows the jack to pivot into position, and the shoe provides a stable base.

Picture of the shoe of the post jack. The bolt allows the jack to pivot into position, and the shoe provides a stable base.


This shows the top of the jack, with the corners of the jack post cut at 45

This shows the top of the jack, with the corners of the jack post cut at 45


Next up was to remove the old posts. This turned out to be more difficult than originally planned because the connecting hardware I used was meant to stay in place. Additionally, I had to do all of this while perched on a stepladder that was placed awkwardly because of the jacks and other assorted obstacles.

To get the footings out, I wanted to pull them up, and not dig them out. After seeing a few techniques on YouTube, I came up with the idea of using a winch (come-along) and hang one end from the beam above, and attach to the footing using the anchor bolt. I repurposed a couple of heavy-duty angle braces, some chain and some shackles to hook up the come-along to the footing, and I used a lifting sling to hang the entire contraption from the beam. This is a good example of “seat-of-the-pants” engineering. I did some very rough estimates in my head: some nominal weight for the footing plus whatever load would break the footing free from the ground, I figured maybe 1000#. Then got everything about 5x that (8000# come-along, 6400# lifting strap, 5000# shackles, etc.). No calculations for how much stress would be on the nut holding the plates to the anchor bolt. No calculations on the loads I would be putting on the beam or the jacks when I hauled the thing up. Never mind that you’re not supposed to use a come-along for lifting stuff. Just get everything big and pray that something doesn’t bust. Fortunately, it all worked out pretty well, and with 8 of these things to pull out, making up the rig was a great idea and a real time-saver.

Then I had to dig, form up, and pour the new footings. My recent work with concrete forms helped because I had already come up with a design concept and had built a couple of re-useable forms that I could easily take apart and put back together. I set the form on the ground and aligned it using a DIY plumb bob (weights attached to a string) hanging from where I wanted the post on the beam. I set the height of the form to the finished grade and leveled it using my new laser level (my Father’s Day present), and then dug a hole 12″ deep by 12″ dia and slipped a tubular concrete form into the hole. Then I placed the rectangular form on top and staked it in place.

Now came the fun part. I had to fill the forms and I had to hustle because I was using fast-setting concrete mix. After some experimentation, I came up with a plan to mix 3 bags at a time in 3 batches. I would always start the next batch so it was mixing while I was shoveling the mud from the current batch into the forms. What made it even more challenging from a time perspective is that I was working with a “hot” mix with the 2nd and 3rd batches. A hot mix occurs when you start a new batch of concrete in the mixer with residual concrete from a previous batch. The residual concrete already has a chemical reaction going, and that acts as a catalyst (or accelerator) for the new mix. This also occurs on the jobsite for large concrete pours, especially if you have trucks that are cycling through because they won’t take the time to wash out the truck before putting in the next load. This video shows me in action pulling and pouring the footings:

Sure enough, by the time I had cleaned up all of the concrete mess from the mixer and tools, the new footings had hardened to the point where I could pull the forms and mount the base to the anchor bolt. From there, it was relatively easy to measure, cut, and install the new posts. Then it was on to the next set of posts. Doing two at a time, it took me 2 weekends to finish, but this was one of the few projects that I completed within my original time estimate. That’s including several trips to Home Depot (I had to get more concrete and different size posts), troubleshooting and fixing an electrical problem with the cement mixer, removing old surface mounted electrical conduit, and dressing up and re-cutting the threads on the anchor bolts which I had managed to mushroom while banging them in. The concrete had already began to set, you see. At any rate, it’s all done and it’s the first step in actually building something in the back yard. Here are some photos.

Patio Cover Footings -- Before.

Patio Cover Footings — Before.

After -- New posts and footings for the patio cover.

After — New posts and footings for the patio cover.


New footings and posts for the trellis.

New footings and posts for the trellis.


The next thing I do will be to build the back retaining wall. This will be another back-breaking, dirt digging, block hauling adventure. At least I get some good cardio and strength training! I’ll try to post as soon as I can about it!

The Concrete Pour — A Very Gratifying Moment

In the course of most, if not all, projects, there are moments when all of the hard work of preparation become manifest in a sudden and visceral way. Such is the case with my “big” concrete pour. Well, “big” is relative. Many concrete pours are measured in hundreds of cubic yards and many concrete trucks. Mine was about 10 yards, which was a pretty full truck, but, hey, have you ever had to move 10 yards of anything by hand? To me, this falls into the category of “big”.

This was “big” in another context as well. It marked a big turning point in the outdoor part of the project because, in a matter of a few hours, it transformed the front of my house from a bunch of shabby looking trenches into something that was actually warm and inviting. And that’s how projects go. Lots of preparation with little apparent visual progress, and then, boom. it’s all done.

The first thing I needed to do was to find a suitable contractor who would do the pour and finishing. I have tried to do some concrete work by myself, or by enlisting the help of some of my family members and friends. Some of these turned out OK. Others were major disasters. Bottom line is that through experience, I had learned that a concrete pour, especially of the size which I had planned, was something left to the pros. There are things that are NOT DIY and this is one of them! Concrete has a relatively short working time, and the crew that showed up numbered 9 people, if you include the truck driver, pump operator, and the owner/supervisor. No way can that be duplicated at the DIY level. I got a few bids by calling some contractors that were advertising on Angie’s list, and I chose a company that (a) showed up on time, (b) gave me an estimate that was competitive and (c) told it like it was. The owner had been in the concrete business since he was a teenager and knows concrete from the bottom-up, inside-out, over-under, well you get the idea. Here is a link to his website in case you’re interested. The owner’s name is Dave Parker and he gave me several suggestions on how to improve some significant details of my design (which I took on board). We had sealed the deal and, because I had everything set up, he was able to work me into his schedule last Saturday.

Saturday morning arrived, and it was a good thing that I am on an “early” schedule. My alarm goes off at 4:00 AM and I’m usually on the job not later than 6:00 AM, whether that be my day job or my remodeling adventure. The crew arrived at about 6:45 AM and I walked the foreman through the project. As additional workers started to show up, they started doing the layout. Although I had set the forms, they snapped chalk lines against the walls to make sure they had a good reference to work to, and did some clean-up. Eventually, the owner shows up and gives his crew some specific directions based on my walk-through with him a couple of days before. Then comes the concrete pump. Nowadays, concrete pumps are ubiquitous. No pros EVER use anything but a pump. It’s a relatively small part of the total job (for me about 17% of the total cost) and that would be about the same as the labor for barrowing the stuff around. At any rate, the concrete pump and the associated truck which pulls it takes up a significant amount of frontage. Then comes the concrete truck. Fortunately, I had made good use of my traffic barriers to block out any stray cars from the front of my house, as well as my two adjoining neighbors to fit the whole rig in. But,hey, it was early on a Saturday, so the first inkling that they had regarding my occupation of “their” parking spaces was a big concrete truck  in reverse with its warning beepers at full blast. So much for sleeping in. Such is the price of progress.

So things were getting exciting. For the rest of the event, I invite you to watch the following video.

To me, working concrete is an amazing skill. Or perhaps it is art. Your medium is this heavy, messy, wet stuff that looks like, well, you can draw your  own conclusions after reflecting on the video of the stuff coming out of the hose. Yet a good concrete finisher will direct the pour to align the edges perfectly to the forms and/or lines, and then sculpt swales and mounds to get the water to drain properly. The stuff has a certain working time, so one has to be cognizant of that and work accordingly (usually fast). However, there is a “sweet spot” of time when the concrete just begins to harden, and that’s where the magic of a good finisher shows itself. The guys I had were expert. They poked, prodded, screeded, floated, sculpted, troweled, cut control joints, finished the edges, and finished it off (I wanted a broom finish*) in what seemed to me a well orchestrated ballet. Literally, they were dancing on top of the forms and whatever else the could gain purchase on to do the finishing under the pressure of the clock. Baryshnikov would have been proud!

Here are some pictures of the finished product:

Finished  Front Sidewalk and Ramp

Finished Front Sidewalk and Ramp

Finished Side Yard

Finished Side Yard


I’m really happy about how this came out, and it represents a big step because it is not only the culmination of a lot of hard work,  but also had an immediate, positive, visual impact on how the project is shaping up.

Now… onto the back yard!

* A broom finish is where you take a stiff bristle broom and push it across the wet concrete. The result is a surface with a lot of tiny parallel grooves which produce a non-skid surface. This finish is standard for any concrete which will have foot traffic. Your driveway is probably finished like this as well, because you’re probably going to walk on it. However, on public roads, the shallow grooves of the broom would wear down rapidly. So, the builders will frequently cut big grooves with a concrete saw to not only provide traction, but also to shed water, which, when it rains,  is a significant hazard.