The House That Frank Built

OK sports fans! This moment has been many years in the making. The moment when I, and only I, will bust out the structure of our house with the intention of EXPANDING our living space and making a fantastic en-suite (master bedroom-master bathroom) in a manner that puts HGTV to shame! Because this is a big task, and I needed to focus all of my spare time on it, I haven’t made a blog entry for a while. It’s either work on the house and generate material for the blog, or write the blog and make stuff up. I prefer the former. I took 2 weeks of vacation to accomplish this bodacious task, and I got most of the way through. At least I put up the walls and the roof trusses. But it took another 4 weeks of my spare time to finish the roof structure, put the trim on, and finally cover the roof.

Phase 1: Demolition.

As with most building projects, the first part is the demolition. I know I’ve been talking about demolition a lot, so I won’t bore you with too much more of it. As with most demolition projects, the best course of action is to work from the top down, and to disassemble whatever you’re demolishing in the opposite order that it was built. Because the bedroom extension will also result in extending the roof (sleeping under the stars is OK if you’re camping), I began by stripping the shingles from a portion of the roof. My biggest concern was roof safety. If there is anything dangerous in this endeavour, this is it. So I took some time to get the proper equipment: roof jacks, scaffolding, and a safety line with a harness. Yes, it cost a few bucks, but it’s cheap insurance. As I have mentioned in previous posts, I’m a bit obsessed with safety. The other nifty tool that I got was a roofing shovel. This tool has a notched spade that you ram underneath the shingles to get under the roofing nails, and a fulcrum that allows you to pop the nails right out. The technique is to start at the top of the roof, and after you pry off the ridge shingles, you get a start on the shingles at the top and then just go to town. That being said, even with the right tools and safety equipment, it’s hard, tedious, and somewhat messy work.

Safety harness and safety line. It's kind of a PITA to work with, but it sure provided me peace of mind. This is what all the pros use now.

Safety harness and safety line. It’s kind of a PITA to work with, but it sure provided me peace of mind. This is what all the pros use now.

Roof safety: Roof jacks to provide a solid base for working.

Roof safety: Roof jacks to provide a solid base for working.

Roof stripping complete. Took me all day.

Roof stripping complete. Took me all day.


Next was the trim. One might think that removing trim is no big deal. But it was to me because I had to get way up high and had to bang and lever stuff around, keep my balance while precariously perched on the scaffolding and ladder, all the while making sure that whatever fell down didn’t fall on me. The other bad news was that we were experiencing a record heat wave, so that meant that every push and pull was accompanied by beads of sweat in my eyes, lack of energy, and dehydration. I kept trying to drink as much water as I could, but there’s really no way to keep adequately hydrated while doing heavy physical labor in 96 degree heat.

Roof overhang and trim removed.

Roof overhang and trim removed.

Now, on to the messy part: Knocking down the walls. This part of the demolition worried me a bit. I didn’t want to spend a lot of time cutting stucco vertically on the wall, but I needed to get the wall down in pieces that were not so big they would damage the subfloor when they would inevitably come crashing down. I first had to knock down the gable wall, first by taking down the triangular portion of the gable by splitting it at the top plate, and then taking down the vertical walls. Since the side walls are load bearing, I had to build a temporary structure to accept the load. Also, I only took down one of the side walls at a time so only one side of the roof was unsupported. Because I didn’t want to have to cut stucco while precariously balanced on a ladder from the outside, I decided to pull the wall down from the inside. Since I know that the easiest way to cut the stucco is when the stucco is lying flat, I decided to yank the whole wall down and then disassemble it. Sure enough, with all of that weight of the stucco, it came down with a big crash! This turned out to be a very bad thing because I, like a dummy, did not think to put temporary bracing under the joists of the bedroom floor. Here is the result:

Gable wall demo complete. What have I gotten myself into?

Gable wall demo complete. What have I gotten myself into?

Temporary bracing to transfer the roof load to the floor. Too bad I didn't complete the job by constructing concurrent bracing to properly transfer the load from the underlying joists to the slab foundation below.

Temporary bracing to transfer the roof load to the floor. Too bad I didn’t complete the job by constructing concurrent bracing to properly transfer the load from the underlying joists to the slab foundation below.

Wall before demo.

Wall before demo.

Wall after demo.

Wall after demo.

Minor damage from the downfall of stucco. I had a surprise coming.

Minor damage from the downfall of stucco. I had a surprise coming.

Joist failure as a result of not properly transferring the load to the foundation. I'm going to put a bag over my head when I call my engineer for recommendations.

Joist failure as a result of not properly transferring the load to the foundation. I’m going to put a bag over my head when I call my engineer for recommendations.

Cracked joists. I needed to deal with termite damage anyway, so really no extra work. But I sure feel dumb!

Cracked joists. I needed to deal with termite damage anyway, so really no extra work. But I sure feel dumb!

Phase 2: Build the walls.

One of the tricky things about building on a second floor is that you actually have to get the building materials UP to the second floor. This meant spending the better part of a day tediously pushing lumber, mostly one piece at a time, up a ladder and onto the second floor. I had to plan ahead to make sure that I had all of the lumber for the entire build, including the interior framing and plywood, because I did NOT want to struggle hauling this stuff up the indoor stairs after I closed in.

Lumber delivered. Now, to get it up to the 2nd floor!

Lumber delivered. Now, to get it up to the 2nd floor!

Building a standard wall for a house is pretty straightforward. You layout and cut the lumber, build and sheath the wall while flat on the floor, and then raise it up. The easiest way is to start by carefully aligning your sole and top plates, and then doing the layout of the studs all at once. This not only saves time, but more importantly, helps to make the wall square because all of the top and bottom measurements are the same. The next thing to do is to make a “kit” for all of the framing lumber. This not only includes all of the studs, but also the headers, sills, cripple, and jack studs for the window and door openings, as well as the framing for each corner. From there, it’s a simple matter of separating the sole and top plates, scattering in the pre-cut parts, and then methodically nailing them together. It’s important to follow a nailing schedule, meaning that the prescriptive codes require specific sizes and spacing of nails for a given assembly. For example, a stud to sole plate or top plate can be two 16d nails driven longitudinally into the stud (“face nail”) or three 10d nails driven in from an angle (“toe nail”). Fortunately, the County of San Diego has a convenient summary sheet of all of these requirements, which the plans inspector “suggested” that I include as part of my building plans. I took the hint.

Wall lumber cut to length and organized to form a "kit". I did this for the lumber for all three walls.

Wall lumber cut to length and organized to form a “kit”. I did this for the lumber for all three walls.

All kit parts need to be labeled so you don't get confused. These are labeled "C/O" for "cripple" stud (window), and "outside" because the top is cut at a 5º angle to allow for water drainage from the sill.

All kit parts need to be labeled so you don’t get confused. These are labeled “C/O” for “cripple” stud (window), and “outside” because the top is cut at a 5º angle to allow for water drainage from the sill.

The next thing to do is to sheath the wall. In many building situations, it’s better to put the wall sheathing on after the walls are raised because you can do some adjustments for dialing in plumb and square, and you can apply the sheathing in a fashion that overlaps the structural assemblies to add some strength. However, it’s more difficult to fool around with large pieces of sheathing, particularly plywood, when you’re trying to hang it vertically. Putting the plywood on the walls while they were still on the floor was a no-brainer for me as a one-man-show. One thing I learned about walls is that 2×4 lumber can be pretty flexible on this scale. You have to use a big sledge hammer to bang stuff around, but it’s important to square things up before you put the plywood on, because once the plywood is attached, it ain’t movin’!

Lastly the wall needs to be raised. There are lots of pictures of construction crews all gathering around a wall, and with a mighty “heave ho”, the wall comes up. Not possible with just me doing the heaving. Fortunately, there is an outfit (Qualcraft) that makes something called a wall jack. This operates much like the old-fashioned car jack that you used to hook under your bumper to change a tire. But instead of a metal jack shaft with teeth, it uses a long 2×4 piece of lumber. It’s pretty ingenious, and here is a short video and some pictures:

Wall jacks in position, ready for action!

Wall jacks in position, ready for action!

Close-up of wall jack. 2x4 screwed into the floor prevents kick-out.

Close-up of wall jack. 2×4 screwed into the floor prevents kick-out.


Last wall up, ready for trusses.

Last wall up, ready for trusses.

Phase 3: Place the trusses.

Now that the walls were up, it was time to get some help. The trusses, by themselves, are not particularly heavy, but they are difficult to handle and are fragile if they are handled while they are flat. Fortunately, the same co-workers that helped me place the big beam I needed for my garage portal were willing to spend a morning yanking these bad boys up and securing them into position. I only had 4 of these, but we had a little trial and error at first, so it took a little longer. I also had them come back to help me with the gable wall. Now, it was up to me to finish detailing the front of the roof line with outlookers and blocking.

Last wall up. Things are beginning to take shape.

Last wall up. Things are beginning to take shape.

Trusses delivered.

Trusses delivered, ready for installation.

My "crew". Their help was indispensable in completing this phase of the project.

My “crew”. Their help was indispensable in completing this phase of the project.

Trusses are up!

Trusses are up!

Gable wall and outlookers in place.

Gable wall and outlookers in place.

Phase 4: Finish the roof.

Finishing the roof was actually a two step process. I first needed to get the trim boards placed on the ends of the truss overhangs and outlookers. These are called “barge” rafters, and these were particularly long and heavy. I spent an entire day messing around with scaffolding and engineering a “third hand” to hold the rafter while I put it in place. But when I found it impossible to even the the board up there by myself, I knew it was time to call my crew back for another session. Sure enough, in about 3 hours, we were all done. Finally, I was able to get the roof sheathing in place. If this were a flat surface, this job should have taken about 3 hours. But because it was on a roof, I had to laboriously move around and reconfigure scaffolding, haul materials up and install them, and then move onto the next part. Getting the plywood up for the roof sheathing was also challenging. I decided to make a simple lifting fixture from scrap 2x4s that I screwed onto the plywood, and then used a rope to pull up the plywood. I also set up a couple of long boards to help the plywood slide up to the roof. This lifting fixture also proved valuable in placing the plywood because it gave me some leverage. Note that I had to place on piece of plywood at a time using this method, so, again it took a long time.

Another thing I learned about working on a roof is that it’s physically hard! That’s because you constantly have to fight against gravity because you’re working on a slope. Plus, there’s no shade (duh!). So, in addition to it being hot, all of that up-and-down and muscling the plywood in place really wore me out. In the end it took about a week (!) to finish the roof. But I liked the result.

Outlookers in place, ready for the barge rafters. Note the "3rd hands" to the right and left of the scaffolding on the outlookers.

Outlookers in place, ready for the barge rafters. Note the “3rd hands” to the right and left of the scaffolding on the outlookers.

Barge rafters in place. Beginning to look like a house!

Barge rafters in place. Beginning to look like a house!

Shiplap appearance boards are on the roof overhangs to match the rest of the house.

Shiplap appearance boards are on the roof overhangs to match the rest of the house.

Roof all done! Looks nice.

Roof all done! Looks nice.

The inside. This is going to be a nice bedroom!

The inside. This is going to be a nice bedroom!

The proud builder and his creation.

The proud builder and his creation.

Phase 5: Install the connectors.

Actually, installing the connectors is something that I did as I went, but I wanted to highlight the fact that the days are gone when you can simply use nails to build a house. Modern house construction uses metal connectors almost everywhere, especially between major components (e.g., foundation to first floor, first floor to second floor, second floor to roof). There are hundreds of connectors to choose from, but that was taken care of during the design phase, so the ones that I’m using are all in my plans. Each connector has a specific fastening schedule (number and type of fasteners), so you have to be pretty meticulous. I made copies of the specification sheets for each connector that I used, and highlighted each one and keep them in my permit book so that when the inspector comes by, I can show him what I’m working to. I really did learn something when I prepared for my inspections in the Navy!

Metal connectors for the roof, studs, and top plate.

Metal connectors for the roof, studs, and top plate.

Connectors between gable and front wall. I still need to add connectors between the wall and the rim joist on the bottom.

Connectors between gable and front wall. I still need to add connectors between the wall and the rim joist on the bottom.

I’m hoping the pace will now pick up with the roof, windows, stucco, and HVAC contractors coming in. Stay tuned!


The Concrete Pour — A Very Gratifying Moment

In the course of most, if not all, projects, there are moments when all of the hard work of preparation become manifest in a sudden and visceral way. Such is the case with my “big” concrete pour. Well, “big” is relative. Many concrete pours are measured in hundreds of cubic yards and many concrete trucks. Mine was about 10 yards, which was a pretty full truck, but, hey, have you ever had to move 10 yards of anything by hand? To me, this falls into the category of “big”.

This was “big” in another context as well. It marked a big turning point in the outdoor part of the project because, in a matter of a few hours, it transformed the front of my house from a bunch of shabby looking trenches into something that was actually warm and inviting. And that’s how projects go. Lots of preparation with little apparent visual progress, and then, boom. it’s all done.

The first thing I needed to do was to find a suitable contractor who would do the pour and finishing. I have tried to do some concrete work by myself, or by enlisting the help of some of my family members and friends. Some of these turned out OK. Others were major disasters. Bottom line is that through experience, I had learned that a concrete pour, especially of the size which I had planned, was something left to the pros. There are things that are NOT DIY and this is one of them! Concrete has a relatively short working time, and the crew that showed up numbered 9 people, if you include the truck driver, pump operator, and the owner/supervisor. No way can that be duplicated at the DIY level. I got a few bids by calling some contractors that were advertising on Angie’s list, and I chose a company that (a) showed up on time, (b) gave me an estimate that was competitive and (c) told it like it was. The owner had been in the concrete business since he was a teenager and knows concrete from the bottom-up, inside-out, over-under, well you get the idea. Here is a link to his website in case you’re interested. The owner’s name is Dave Parker and he gave me several suggestions on how to improve some significant details of my design (which I took on board). We had sealed the deal and, because I had everything set up, he was able to work me into his schedule last Saturday.

Saturday morning arrived, and it was a good thing that I am on an “early” schedule. My alarm goes off at 4:00 AM and I’m usually on the job not later than 6:00 AM, whether that be my day job or my remodeling adventure. The crew arrived at about 6:45 AM and I walked the foreman through the project. As additional workers started to show up, they started doing the layout. Although I had set the forms, they snapped chalk lines against the walls to make sure they had a good reference to work to, and did some clean-up. Eventually, the owner shows up and gives his crew some specific directions based on my walk-through with him a couple of days before. Then comes the concrete pump. Nowadays, concrete pumps are ubiquitous. No pros EVER use anything but a pump. It’s a relatively small part of the total job (for me about 17% of the total cost) and that would be about the same as the labor for barrowing the stuff around. At any rate, the concrete pump and the associated truck which pulls it takes up a significant amount of frontage. Then comes the concrete truck. Fortunately, I had made good use of my traffic barriers to block out any stray cars from the front of my house, as well as my two adjoining neighbors to fit the whole rig in. But,hey, it was early on a Saturday, so the first inkling that they had regarding my occupation of “their” parking spaces was a big concrete truck  in reverse with its warning beepers at full blast. So much for sleeping in. Such is the price of progress.

So things were getting exciting. For the rest of the event, I invite you to watch the following video.

To me, working concrete is an amazing skill. Or perhaps it is art. Your medium is this heavy, messy, wet stuff that looks like, well, you can draw your  own conclusions after reflecting on the video of the stuff coming out of the hose. Yet a good concrete finisher will direct the pour to align the edges perfectly to the forms and/or lines, and then sculpt swales and mounds to get the water to drain properly. The stuff has a certain working time, so one has to be cognizant of that and work accordingly (usually fast). However, there is a “sweet spot” of time when the concrete just begins to harden, and that’s where the magic of a good finisher shows itself. The guys I had were expert. They poked, prodded, screeded, floated, sculpted, troweled, cut control joints, finished the edges, and finished it off (I wanted a broom finish*) in what seemed to me a well orchestrated ballet. Literally, they were dancing on top of the forms and whatever else the could gain purchase on to do the finishing under the pressure of the clock. Baryshnikov would have been proud!

Here are some pictures of the finished product:

Finished  Front Sidewalk and Ramp

Finished Front Sidewalk and Ramp

Finished Side Yard

Finished Side Yard


I’m really happy about how this came out, and it represents a big step because it is not only the culmination of a lot of hard work,  but also had an immediate, positive, visual impact on how the project is shaping up.

Now… onto the back yard!

* A broom finish is where you take a stiff bristle broom and push it across the wet concrete. The result is a surface with a lot of tiny parallel grooves which produce a non-skid surface. This finish is standard for any concrete which will have foot traffic. Your driveway is probably finished like this as well, because you’re probably going to walk on it. However, on public roads, the shallow grooves of the broom would wear down rapidly. So, the builders will frequently cut big grooves with a concrete saw to not only provide traction, but also to shed water, which, when it rains,  is a significant hazard.

Getting Ready For A Concrete Pour

Things are beginning to shape up in front, and one of the final “projects” was going to be to pour the concrete. This is DEFINITELY a job for a professional crew — NOT DIY! I know this from harsh, personal experience. Oh, I know, the videos make it seem really easy, but trust me, striking off a mound of concrete with a screed is hard, messy work, and is actually quite comical if it’s just you and your wife doing it. OK, I’ve done a couple of small sidewalks, but this job is way too large and intricate to trust to anybody but a professional crew. Hey, at least give me credit for knowing the difference!

Be that as it may, I had my plans, so I know what I wanted to do. Well, at least I thought that I did at the beginning. More on that later. The fact is that a dedicated DIY’er can do essentially all of the prep work. This is quite a lot of work, it turns out, and while you may get some benefit of saving some money, the biggest advantage for me was giving the concrete subcontractor a lot of flexibility with the schedule. If you have a pro do the whole job (demolition, site and grade prep, base fill, building the concrete forms, and setting out the remesh), then you’ll have to wait several weeks until the schedule is clear for a multi-day (or week) job. If you do all of the work, it’s a 1 day job of pouring and finishing the concrete, which can be scheduled more easily. Now for all of that prep work.

Demolition was done previously, per several of my previous posts. And, although I did a reasonable job of getting the grade set correctly with the steer skid, I still had a fair amount of cleanup to do. The skid steer doesn’t get into the corners, plus I had to get some stumps ground after I had completed the initial excavation. Plus the rains over the winter (such as they were) ended up “displacing” some dirt which had to be “re-placed”. In other words moved around some more. I ended up barrowing out about 4-5 yards of dirt to the back.

Will I EVER get rid of this dirt?

Will I EVER get rid of this dirt?


The next thing to do was to set up a base. I had a choice between 3/4″ gravel and “class II  road base”. I decided to use gravel because I though it might be better, but it turns out that class II road base is what is typically used around here because gravel is used for areas where frost heave is a problem, and you want something to absorb the resulting ground motion. Road base is less expensive (!), and since it compacts way better, I plan on using it as the base for my brick-on-sand patio. So I find this out too late and I now have 7 yards of gravel to chuck  and spread around. C’est la vie! Fortunately this went reasonably quickly. The only hiccup was that I had to somehow figure out a way to get wheelbarrows of this stuff to the back while navigating around previously installed drainage pipes that were annoyingly protruding from the ground. My solution was to barrow a pile of gravel around the drains and then take some plywood and make little ramps so that I could gingerly push a wheelbarrow with several hundred pounds of gravel through the maze that eventually lead to the back yard. After all was distributed, I rented a plate compactor to give a good solid base.  Because the compactor wouldn’t fit into the corners, or around some of the obstacles sticking up, I had to use a hand compactor to get everything nice and tight.

That there is a cubic butt ton of gravel to move!

That there is a cubic butt ton of gravel to move!

Chucking gravel from front to back. Note the plywood highway.

Chucking gravel from front to back. Note the plywood highway.


I used a pile of gravel and some plywood ramps to navigate around the drain grates that were sticking up. I ended up raking the gravel level as i worked my way back, so it ended up all good.

I used a pile of gravel and some plywood ramps to navigate around the drain grates that were sticking up. I ended up raking the gravel level as i worked my way back, so it ended up all good.


Front entrance gravel all level and compact. Ready for the forms.

Front entrance gravel all level and compact. Ready for the forms.


While I was gearing up to move all of this gravel, I also had to buy lumber for the forms. So, I woke up early on a Saturday and headed over to the local Home Depot. Alas, it was raining, so it promised to be a mucky day outside. As I drove into the parking lot, I saw that the rental truck was conveniently parked, so I assumed it was available. I loaded up a bunch of lumber (plywood, 2x4s.), paid for it, and tried to rent the truck. I was then told it was out of commission for some obscure reason. Since my mood sufficiently sour to begin with, I vented my frustration. The customer service people were very nice, let me have my say, then proceeded to help me out with a free delivery. How good is that? So, shame on me for being a dickhead, but good for the Home Depot folks. I sent their boss a nice e-mail apologizing for my brief outburst and profusely thanking them for their excellent customer service. At any rate, I come back to the house and discover that my brand new wheelbarrow has a flat tire that will not succumb to mere inflation. So it’s back to Home Depot to get a flat-free tire. I guess it just was going to be one of those days….


My new wheelbarrow with a flat tire. Come on!

My new wheelbarrow with a flat tire. Come on!


Next was the forms. With my previous experiences with concrete, getting the forms right was always a challenge. So this time, I wanted to make them very sturdy and straight. I used 1/2″ plywood and made a frame of 2x4s to support the plywood so there would be no bending. The 2×4 frames also gave me something solid to work with so when I drove the stakes, I would be using the forms as the guide. The contractors who came out to bid basically said that this was overkill, and they may have been right. But as a DIY guy working alone, I think this gave me the best result and minimized the amount of fussing around to get the forms aligned and in place.

Frame for the form. I had to eventually rebuild this one because it was too large, but you get the idea.

Frame for the form. I had to eventually rebuild this one because it was too large, but you get the idea.

Detail of my forms. The corners are bolted together with braces that pull everything tight and square, and make disassembly very easy. Too bad I won't be using these again.

Detail of my forms. The corners are bolted together with braces that pull everything tight and square, and make disassembly very easy. Too bad I won’t be using these again.


Bottom of plywood on form extends down to allow for concrete to flow between levels to allow a monolithic slab without a lot of fuss in removing the form to finish the faces.

Bottom of plywood on form extends down to allow for concrete to flow between levels to allow a monolithic slab without a lot of fuss in removing the form to finish the faces.


One of the nuances of my design was that I wanted to place can lights within the concrete to provide lighting for the steps (as a safety feature). Although the lights that I chose were rated for casting in concrete, in the long run, that is a bad idea because when (not if) they fail, you’ll have to tear out the concrete to get to them. No thanks. So, my plan was to construct plywood molds that would result in a perfectly sized recess that I could fit the lights into. Additionally, the molds had a hole that accepted PVC conduit, so that I could run the wiring between the boxes and back out through the wires that I had cleverly routed around the house while I was digging the drainage lines to supply the power. This is 12v lighting, so no problem with running the wires adjacent to where water might be. However, on the back porch, the lights needed to be located near the top of the slab. This could be problematic with cracking, so I added a 1×1 wire mesh reinforcement with material I had left over from a previous project. I also knocked down the sharp edges of the plywood boxes to minimize stress concentrations. My hope is that, with these little details, plus the fact that I am going to tile over these fragile areas, will make everything all right.

After I had set up the forms, I and my wife had a good chance to look at what the final result might be and, you guessed it, we were having some reservations. So, we took a step back, and perhaps some steps around, and started to actually walk through the expected traffic patterns. After a few iterations, it became obvious that we had to change things around a little in the front, and that is one of the advantages of DIY. You really can change things at almost the last-minute without a great impact on cost or schedule. Had this been an agreed upon design and had I already had a contractor doing the work, changing this stuff would have been out of the question. Of course, perhaps my design was not so good to begin with, and maybe a pro would have come up with the right answer in the first place, but what fun is that? I also had to re-design (and re-build) the forms to have the proper height above the finished concrete surface and provide a gap underneath so that the pour could be continuous, resulting in a monolithic slab. Good thing I had ordered some extra lumber!

The front landing is disjointed and not ergonomic. It looked better in the model and plans.

The front landing is disjointed and not ergonomic. It looked better in the model and plans.

Just doesn't look right.

Just doesn’t look right.


That's more like it! Nicely balanced and allows access up the ramp (on the right), from the driveway apron (on the left), and from the garage.

That’s more like it! Nicely balanced and allows access up the ramp (on the right), from the driveway apron (on the left), and from the garage.


While I was doing all of this, it was time to get some bids for the work. I had a number of folks come by, and each was very helpful and offered some advice as I was finishing up. One comment was pretty much universal: “Fill in the areas where you have deep concrete (e.g. the back porch and front landing) with materials that are less expensive than concrete. Well, it turns out that I had a big pile of masonry detritus  accumulated from my previous work, so it was a no-brainer to chuck that stuff into these areas, if not to save money, than to just get rid of the stuff in a manner that did not involve surreptitiously dumping this crap into the residential waste stream over a long period of time. Which is my normal modus operandi. I learned this from my wife.

Finally, the re-mesh. This is a welded wire mesh that is used to provide reinforcement in the concrete. It is made of large gauge (#6) steel wires that are spot welded together to form a  6″x6” mesh. You can buy these in flat sheets of 5’x8′, but that is much more expensive than buying a 150′ roll and cutting it yourself. Of course, I did the latter. I had previously purchased a heavy-duty wire cutter (essential for this work) and set about unrolling the beast and nipping off sections so that they fit where I needed to put them. I ended up with a number of relatively small pieces because (a) they were easier to make flat — the roll has some “memory” so you have to bend it a little to make it lie flat — and (b) they were easier to handle and place where I needed them.

Back porch ready for the pour. Can you see the masonry detritus poking through the gravel? Also a good look at the forms and reinforcement for the can lights.

Back porch ready for the pour. Can you see the masonry detritus poking through the gravel? Also a good look at the forms and reinforcement for the can lights.

Left driveway apron all ready for the pour.

Left driveway apron all ready for the pour.


PVC electrical conduit is supported by rebar stakes so that it won't bend when the concrete is poured over it.

PVC electrical conduit is supported by rebar stakes so that it won’t bend when the concrete is poured over it.

Service sidewalk all ready. I'm replacing the square grates with round ones on the advice of the subcontractor to minimize cracking.

Service sidewalk all ready. I’m replacing the square grates with round ones on the advice of the subcontractor to minimize cracking.


Now everything was all set and the bids were in. It was time to choose a subcontractor. I chose a person who (a) provided a reasonable price (part of my day job is cost estimation, so I knew what the price range should be), and (b) would provide a schedule (e.g., meeting time, estimates), and stick to it. I believe the latter is a key indicator of future performance.

I’m meeting with the subcontractor tomorrow, and with luck, I’ll have the concrete poured by the end of the week. Wish me luck!

How Many Hats Do I Have? — A Short Essay On Project Management

Yesterday, I was picking up some materials at one of my local suppliers (Home Depot). I got there just when the store opened (0600), yet I wasn’t ready to do any “real” work until 0900. What’s up with that?

Actually I was engaged in a lot of activity because I had to rent the truck, wait for the materials to get forklifted to the truck, drive back to the house, unpack, unload, dispose of the packing material, drive the rental truck back, top it off with gas, and then drive back to the house.

Turns out, that whenever you take on a home improvement project of any size, one of the critical tasks is to get your materials. In addition, there are a number of other tasks that need to occur before you commence “real work”. (By “real work” I mean doing the deed. Measuring, cutting, digging, assembling… whatever your concept of “real work” may be.) My Dad always said: “Always have a plan.” For simple tasks, this can be a drawing on the flap of an unused cardboard box. I did this today when I was laying out a manifold for my irrigation system. For more complex tasks, you might need dimensional drawings or a 3D model. Yet, this kind of “plan” is only one-dimensional. Well, really 2-D, but it oversimplifies the task of planning. Planning includes ALL of the tasks necessary to complete a project (of any size). Here is a list of common tasks that are necessary predecessors for “real work” in the context of DIY home improvement:

  1. Define your task. This is the fulcrum around which everything else rotates. Do you want to remodel your kitchen? Do you want to have an accessible bathroom? Do you want to have a water-conserving landscape? Do I want to put in new flooring? (Yes to all.)
  2. Make a drawing. A drawing will force you to detail  critical information. What kind of cabinets do I want for my kitchen? What kind of shower to I need to make my bathroom accessible? What kind of irrigation system do I need to have a water conserving landscape? What kind of flooring do I want? How big? How much? What shapes? As you answer these questions, your design will become increasingly more detailed, and from this, you can not only get an idea of how you’re going to put things together, but also be able to extract a list of materials. This is crucial to the next step.
  3. Source and obtain your materials. I remember before the Internet that I used to spend hours roaming the aisles of the big box stores just seeing what materials were available for my project. Now, I spend hours roaming the Internet. The cool thing is that I now have access to exponentially more choices of materials, and most come with free shipping, so I don’t even have to leave the house. Stuff just shows up. As a matter of practice, I develop my material list in conjunction with the design process, so by the time I have finished the drawings, I also have my shopping list.
  4. Perform a cost estimate and obtain financing. OK, for simple projects, that may mean taking $200 from your savings account. But for bigger projects, like a home remodel, this step is more integrated with the planning process as you will be making trade-offs with your design. Cost estimation is a science unto itself, and there are some good software tools out there when it comes to estimating residential construction projects. I did a detailed cost estimate using an online program called Clear Estimates just before I had my plans approved. Not only did I get a good figure the cost of my remodel, but I also was able to get estimates for the work I plan to contract out. Now I have some benchmark costs so I can better evaluate the bids of the subcontractors.
  5. Set aside time for the project. You want to have a block of free time that allows you to have an uninterrupted workflow to make the job go faster, and minimizes repetitive set-up times. Planning when to work on the project also helps you schedule your material procurements and deliveries. Frequently, deciding on when I’m going to do a project is the first thing that I do because it helps me plan and complete all of the predecessors (task definition, design/drawing, and material procurement). Deadlines are an effective motivator.
  6. GET TO WORK! Finally!

The steps above are the essence of what is called “project management”. It’s actually pretty straightforward if the project is simple, and if the project is larger, you just have to break it down into smaller chunks until what you’re left with are a bunch of simple projects. Here is where it gets interesting. This collection of simple projects, representing a much larger project, is not just a “honey-do” list. These sub-projects are interrelated. Some tasks have to be completed before others can start. Some tasks can be done in parallel. Some tasks require specialized skills which are best left to professional contractors. So, answering the questions of “where to start” and “what’s next” can become quite complicated. Large commercial projects develop what is called an “Integrated Master Schedule” (IMS) which typically uses computer software (e.g., Microsoft Project) to logically link all of the sub-tasks and assign labor and material resources to each task. In theory, you can get an accurate estimate of how much the project will cost and how long it will take. In reality, there are ALWAYS cost overruns and ALWAYS schedule delays, largely due to the facts that (a) there is always a measure of uncertainty in planning any project, (b) the bosses will tend to be overly optimistic because they want to win the bid, and (c) the customer frequently has a change of mind, which results in a change in the plans, and things just cascade from there. I actually have experience with doing this, and I made up an IMS for this home remodeling project about a year ago. That schedule showed that I would complete the project sometime later this year (2015). Alas, the IMS was difficult to keep up to date, and since I’m the only guy working the project, I made a choice to ditch the IMS in favor of doing “real work”. Needless to say, I now only have a vague idea when I’m going to finish, and I’m not quite sure what the final cost is going to be. All I know is that I’ve been stopping by Home Depot almost every day to pick up yet another part that I seemed to have overlooked in planning.

So, as the only person who is working this project, I need to wear many hats. Designer, draftsman, planner, scheduler, estimator, finance manager, procurement specialist (shopper), shipping and transportation (bring the stuff home), warehouse manager (store the stuff), general contractor, and finally tradesperson. I’m sure I left something out, but I think that’s enough to illustrate the point.

Now, when you see a construction crew at work, realize that there is a lot of action behind the scenes that is necessary to support that work. Even if that construction crew is a crew of one.

Here are some pictures of my warehousing operation:

WAREHOUSE

WAREHOUSE

WAREHOUSE  Do you see my ShopSmith?

WAREHOUSE
Do you see my ShopSmith?


Happy New Year! Reflecting on 2014 and Looking Forward to 2015

The turn of the year is always a good time to reflect on the past year and look forward to the next. It’s a common demarcation point, and it occurs when we’re collectively given the time to reflect and plan, according to our nature. I know what you’re saying” “If you’re in retail, or emergency services, or in the military on deployment, the maybe I’m not given the time.” However, I think because of the time of year, everybody is doing it, and you can’t help yourself. Actually, serving your customers, community, or country can have special meaning at this time of year.

OK, well maybe not so much in retail.  As they say, anybody who says there are “No stupid questions!” has NEVER worked in customer service. You know, retail is a dang hard job, and I truly appreciate everybody who helps me when I’m shopping.With a smile and a kind word, you will always get superior customer service! All you have to do is to distinguish yourself from the a**hole who decided to take out their frustrations on some poor, underpaid retail associate who is constantly bombarded by yet another a**hole! But you have to remember to take the time to take the survey and say nice things. If you REALLY want to reward good customer service, then have the presence of mind to remember the name of the person who helped you, and then take the time to make a positive comment  on the survey, or the website. These people get promotions and monetary rewards for this kind of stuff. So, the lesson is: Be nice, and when you get good service, make sure you tell the boss!

Where was I?

Reflections on 2014: I had been planning my remodel since 2012, when my lovely wife and I started discussing concepts and the things that we really wanted out of  life, and how our home would reflect that. At the beginning of 2014, I had finished detailed planning and had drawings that I thought were good enough to submit to the city building department for approval. 8 months later, after 3 revisions, I finally got the building permit! Actually, I didn’t wait to get the building permit do start work. I knew that I needed to take out my patio in back, and I wanted to save the bricks and sand. That was a major undertaking which filled the dead time in between the review of the latest plan revision, and answering the comments for the next plan revision. Once I got the building permit, I started in earnest, with site demolition, excavation, and installation of underground services.

What I learned:

  1. If you don’t follow the prescribed approach in the codes, then you will have to have a licensed engineer sign off on your plans. For a small job, it’s not worth it (and they were kind enough to tell me that). Learn the codes and follow the prescriptive approach.
  2. Take each “rejection” as an opportunity to improve your design. I can say that my plans have been significantly improved by having reworked them for the building department.
  3. Detailed planning helps you build faster. My plans have speeded up my work (thus far) in ways that I could not have imagined before.
  4. Detailed planning does not account for everything. Inevitably, you run into unexpected obstacles. The fittings don’t fit like you expected. You need to change the routing of the conduit to account for other buried services. Remain flexible and adapt. “No battle plan survives first contact with the enemy.” (Field Marshal Helmuth von Moltke.)
  5. Know when to quit for the day. Something my dad taught me.  This is a big project and you have to know your limits. If you push too hard, then quality suffers. It’s OK to have goals, but sometimes (OK , frequently), the goals are too optimistic. There are only so many hours in the day, and you need to take care of yourself. So know when to quit for the day, and make sure that you leave enough time for clean up!

Goals for 2105:

  1. Don’t get injured. Building can be dangerous if you’re not careful!
  2. Keep my job. Don’t get too involved in the remodeling at the expense of the day job. Yes, I still have to pay for all of this somehow.
  3. Go to Smithfield, VA for my  wife’s 50th high school reunion.
  4. Finish the site work. I’m optimistic this will be done by March. But who knows?
  5. Move out of the master bedroom, and do the demo.
  6. Build the addition and close in. I’m hoping by July-August. Before the rains come in any case.
  7. Install A/C. That will be contracted out.
  8. Install a new roof. Also contracted out.
  9. Re-stucco the front. Yet more contract work.
  10. Paint the house. Did I mention contract work?
  11. Install new electrical service. This will be all me. Wish me luck!
  12. Don’t take the remodeling too seriously. Yes, it’s important to have goals and to work hard to achieve them, but in the end, this is supposed to be rewarding and it’s important to take pride in one’s accomplishments. Otherwise, I’d be hiring somebody to do all of this!

I wish all of you a very happy New Year, and I hope that you continue to follow my blog. I’m working on an epic post for digging ditches!  Stay tuned……

Home Fire Sprinklers — Why I Did It

When I was fiddling around in my “research” phase of what it would take to make my home compliant with contemporary standards, I stumbled across the requirement (in California at least) to have new construction homes be equipped with a fire sprinkler system. Being a veteran of the Navy, where there is a fetish about fire protection and safety — think about it, you’re surrounded volatile fuels and explosives in the middle of nowhere — it, needless to say, piqued my interest. I found out that IF you are involved in a fire (unlikely because I have been careful about minimizing the root causes of fire), then the statistics show that protection with a residential sprinkler system increases your survival rate by 80% and decreases your property damage by 70%. How could I not continue? Did I mention a fetish?

It turns out that installation of a residential fire sprinkler system is within the DIY realm. If you’re trying to go with a “modern” plumbing system, which has all sorts of headers and networks and PEX pipes, then it’s probably not DIY. If you don’t know what PEX or a networked plumbing system means, then it’s DEFINITELY NOT DIY. However, if it’s just a retrofit or a new construction, you can install a simple “tree-branch” design.

A “tree-branch” design is simply a source of water that has runs and branches to distribute the water to the individual sprinklers. The basic design mimics the design of a standard plumbing system. The source of the water needs to come from the main water supply to the house, and then branches off before the supply to the rest of the domestic water system. The sprinklers can be thought of as a “complimentary” plumbing system. So, if you can install plumbing using CPVC (Chlorinated Poly Vinyl Chloride) pipe, you’re GTG with a DIY installation. Except…..

There is a pesky requirement called a “hydraulic calculation” which involves a litany of limitations and specifications which, if followed, will ensure that your sprinkler system will spray the correct amount water over the area that it is designed to cover. There are a lot of variables, and the interaction of these variables (e.g., pressure, flowrate, pipe diameter, K-factor) can be intimidating if not fully understood.

FORTUNATELY (for me), this is right up my alley. My studies in chemical engineering involved fluid flow, so I had a good background in what the calculations were all about. I dug back into the recesses of my tiny brain, and , with the help of Wikipedia, reconstructed the seldom used  neural synapses to come up with a spreadsheet which helped me figure out the required water pressure at the street main, and the required water pressure of my design. So I called the water authority to get the pressure at my residence (105 psi) and I went merrily to work. I submitted my design, and got told that it was F/U.

First, the assumed pressure was wrong. I had to submit a request for the available water pressure at worst case conditions. It turns out that the fire department and water authority have this dance figured out. I was just not invited to it. Bottom line is that I had to request a “residual” pressure base on worst case conditions. Once I received that, I was back to ground zero. Second, I was not properly accounting for the pressure at the “second” sprinkler. Code requires that whenever you have two or more sprinklers in the same room (compartment), then you must use the most limiting flowrate from two of those sprinklers. I had to lick my wounds and remember the lessons that I learned (and apparently forgot) in my sophomore fluids flow class, and revise my handy-dandy spreadsheet to make it reflect reality.

With the new available pressure, and the right methodology with my spreadsheet, I had to re-do the entire design. In the end though, I actually was able to make the design easier and less expensive to install. The key was to make the k-factors similar. If you don’t understand what I’m talking about, then maybe you shouldn’t be designing a residential fire sprinkler system.

The upshot is that my sprinkler design was approved today. I’m actually quite proud of it because the majority of designers plug their designs into a computer program which tells them whether they are right or not. I did the calculations by hand, so I know that the design will work because I understand the underlying principles. OK, I used a spreadsheet, but I had to put the Hazen-Williams formulas in. I’m sure that if you contract a designer to provide a sprinkler plan for you, that it will be correct and will work just fine. It’s just that the designer won’t know exactly why. Let’s just keep that as our personal secret.

Here is my advice (for what it’s worth):

  • Get a residential fire sprinkler system. The cost is more than worth the peace of mind and the protection it offers your family and your home.
  • If you’re DIY, but perhaps not so interested in the nuances of hydraulic calculations, then try to hire a designer who will give you plans. Having said that, you’d better understand some of the nuances of fire sprinkler installation. There are very specific requirements for the mounting of the supply lines and sprinklers so that they don’t jump around when they get activated.
  • If you’re interested in the design, here are some references:

Residential Fire Sprinklers

Fire_Sprinkler-Installation_Instructions-English

ResidentialSprinklerInstallationGuide

Here are my plans:1370 BFD Fire Supression R 2.5

And the spreadsheet for the hydraulic calcs: 1370 BFD Hydraulic Calculation Worksheet CPVC

OK, I know I’m a geek at heart. I really do love to design and to manifest my ideas, in terms of numbers and letters (in the correct sequence) so that they can be created in the physical world. This is what I’m all about, and this is what I hope you can see as I take my next steps on the DIY highway.


P.S.  Did you notice that “Why I Did It” contains DIY backwards?

🙂

Staking Out Your Territory — How To Survey And Set The Grade

One of the challenges that any builder has is to transfer what is on the plans to the physical reality of what you happen to be working on. If you’re building a birdhouse, then you have to take the written dimensions on the plan and transfer them to the wood. Remember to subtract the width of the saw kerf! (My woodworker friends will appreciate this bit of free advice.) If you’re building a structure on a piece of land, you have to transfer those dimensions to the land. This is not a trivial endeavor,  because land is not necessarily level, square, or plumb. That’s construction terminology for orthogonal axes in a cartesian coordinate system, depending on your point of reference. But I digress.

The bottom line is that you first have to establish reference points, relative to your plans, to measure and mark your material. With wood, this pretty easy because typically  the raw material has reasonably straight and square edges. With land, you are on your own. The first priority is to establish a reference point. In the world of land surveyors, this comes down from edicts issued from backroom deals made among the wealthy and powerful who claimed the land and established certain boundaries, which may or may not have had any bearing on the indigenous people who currently occupied the land. So, because the rich and famous had guns and cannons. they displaced the indigenous occupants who had no concept of land ownership, and established the boundaries that you and I obey.   Again, I digress. Maybe this is a sign of old age.

So, if you follow the legal thread, you own property, which is documented precisely in the county records. Your deed specifies the plat (the drawing) that is the official and legal record of the land that you own. That plat has specifications which detail the dimensions of your land, as well as the precise locations of the corners of your property. If you are adventurous, you can probably take the data from the  records, and locate the surveyor’s marks on your property. If you are a city dweller, then you may see them as little nails in the sidewalk.

The builder of the house will transfer the dimensions of the corners of the property to the footprint of the house. There, the builder will begin excavation, pour the foundation, and build the house. All per the plans submitted to the city (or “building official”) and approved. It is with this thread that I start my measurements. My assumption was that the house was situated correctly on the property, and since my objective was to obtain proper drainage via a proper grade away from the house, I would use the corners of the house as the reference points.

But the problem remained: how to accurately locate the level of the land when the raw material was dimensionally random. For this, I had to learn a little bit about surveying. The basic geometry is middle school math, but the application is a bit more nuanced. How do you measure a level over a long distance? How do you mark the reference and set the other marks precisely relative to this reference? Professional surveyors use high-tech tools like laser levels and differential GPS theodolites. The equipment costs thousands and rents for hundreds. Was there a DIY solution? Well, yes. There is ALWAYS a DIY solution!

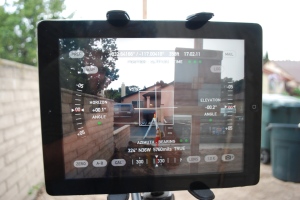
The first step was to take inventory of what I had. I had a laser measuring “tape” (I bought it when I needed to take the dimensions of the “as built” house for my plans.), a tripod, and an iPad. I checked out the apps that were available for the iPad and. lo and behold, somebody had developed a theodolite app. A theodolite is an instrument which will tell you the precise azimuth, elevation, and level from a given reference point. (If you don’t understand this terminology and how to convert polar coordinates into cartesian coordinates, then maybe surveying isn’t your thing.) The theodolite app was the ticket. All I had to do was to build a “surveyor stick”.

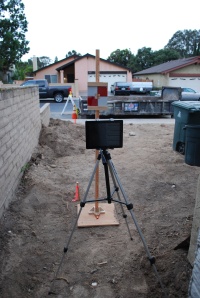
To explain: Surveyors need to measure changes in elevation over long distances. To do this, they set their measuring device (transit, theodolite) over a designated reference point, and then focus on a “stick” that is held by an assistant at the point they want to measure. That stick is essentially a ruler, which if the transit/theodolite is level, will measure the vertical distance between the observer and the stick.  If you combine this information with the azimuth (i.e., the angle from true North), you will have an EXACT location of that point on the earth. So, I needed a surveyor stick that was self-supporting because I couldn’t assume that I would have an assistant. I designed one, and the plans are here.SURVEYOR’S STICK. Once I was able to measure the difference in elevation, all I needed to do was to establish the grade, i.e., the slope, to allow the proper drainage. The slope is 2% away from the house, and 1% from front to back. So using my handy-dandy laser rangefinder, I simply multiplied my measured distance by the % slope to get the final elevation at the measured point.

All I had to do now was to research a bit of jargon with respect to grading and how to actually mark the property. The first thing I learned was that surveyors will mark the land using squat little stakes called “hubs” which are pounded level into the ground where you’re making your measurement. The vertical distance of the hubs are then measured between the hub and the reference (theodolite). You then take that difference and compare that to the plan. If the measured vertical distance is greater than the required distance, you need to fill (raise) the level of the land at that point. If it is less, then you need to cut (lower) the level. If you do this at several points, you can establish the contour (grade) that the plans specify. So at each hub, I would put a grade stake, with a mark that indicated a cut “C” or a fill “F” of a given dimension. Professional surveyors use 1/100 of a ft., but since my measuring devices were calibrated in inches, I used that standard. Whatever works.

The cool thing about all of this was that after all of the staking, I began to see the real outline of the plan manifested on my actual property. It was, perhaps, a turning point in the project because it represented a change in direction from demolition to construction. In my mind’s eye, I now have a glimpse of how the finished product will look like.

Here are some pictures:

Grade Stakes. Don't you like the colors?

Grade Stakes. Don’t you like the colors?

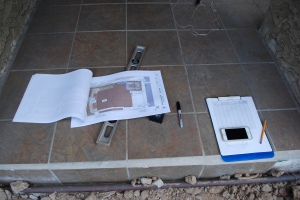
My Site Plans and Measuring Tools

My Site Plans and Measuring Tools

Theodolite App. Awesome!

Theodolite App. Awesome!

Theodolite and Surveyor Stick

Theodolite and Surveyor Stick

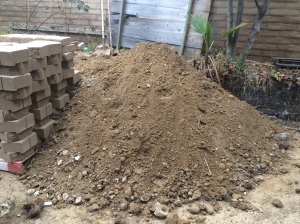
Empty dumpster. Ready for the next load!

Empty dumpster. Ready for the next load!


Some Thoughts About Having A Truck

This past weekend I needed a 4×8 sheet of plywood, and because I have a Prius instead of a truck, I had to do the good old Home Depot truck rental. Not really a bad deal, but I paid $12.00 for the material and $20.00 to rent the truck. On the surface, that may seem like a waste of money to pay more for “shipping” than for the actual product, but in the long term, owning a truck costs a lot more. My wife and I discussed this early on because I figure with a remodeling project, it sure could be handy having a truck whenever you need it. Plus it seemed like it would be a nice toy. But the numbers prove otherwise. Here is the run-down:

$10,000 for a used truck in reasonable condition (i.e., I’m not going to buy a $6,000 truck and have to put $4,000 worth of repairs into it).

$1,000 for insurance and registration ($500 per year for the two years of the remodeling project).

$2,500 for gas (5000 miles per year / 15 miles per gallon x $4.00 per gallon times two years).

$500 for maintenance

Total: $14,000

-$8,000 when I sell the truck after two years

$6,000 total ownership cost.

For $6,000 I can rent the Home Depot truck 300 times! That’s like every other day. I figure the max I’ll ever use that rental truck will be once a month, so $20.00 x 24 months = $480. That means I save $5,500 if I just rent the darned truck. That’s my new A/C system right there! (Or at least a good down payment on it.)

That being said, there are always a few complications such as somebody else has the truck when you need it. However, this is easily overcome by some planning and shopping strategy. Most DIYs get their stuff on Saturdays and Sundays, so try to avoid those times, and if you do need the truck, get there when the place opens and reserve it right away. Then do your shopping and get in and out.

Hey, trucks are cool.  Nothing wrong with having a truck if that’s what you like to drive. But unless you’re going to a jobsite every day and really using it, it just isn’t economical for a DIYer, so don’t kid yourself that you’re saving any money. It’s much less expensive, and more convenient, to have the suppliers deliver to the jobsite and on those rare occasions when you need to, just rent a truck for the specific need. Even if it is only $12.00 worth of materials. (OK, just this one time.) Besides, my Prius can hold a lot when it comes down to it. Just not 4×8 sheets of plywood!

Today Was A Banner Day!

Today, I picked up my building permit! I had to sign a bunch of stuff acknowledging the responsibilities and liabilities of an owner-builder, but I had done some research, so I have a pretty good idea of what I was signing up for.

California law allows for an exemption for homeowners who want to build on their own property. Basically, they are exempt from the requirements of the California Business and Professions Code, meaning that you DON’T have to have a license to build on your own property. That being said, there are a number of restrictions, most of which have to do with who has liability. All good stuff to know because understanding these details will help you avoid unpleasant legal actions should something go wrong. While there is a lot of legal gobbledygook involved, it boils down to some simple stuff.

(1) If you do you your own work, then you are responsible for the quality of that work, and if you sell the property, the buyers could conceivably come back after you if your work was shoddy. Unlikely in my case because I will be working under approved plans which will be inspected by the building department. Plus, I don’t do shoddy work as I will have to live with it. AND I don’t plan on selling the house. It will likely be inherited by my children (and THEY will have to deal with it).

(2) If I hire work to be done, then the work must be done by a licensed contractor OR I assume the responsibility of acting as a business and therefore have to pay for all of the liability insurance and taxes. Simple solution: Only hire licensed contractors. (And check them out ahead of time.) Yes, it may cost a little more up front, but it’s pennies on the dollar compared with an undocumented immigrant falling off your roof and permanently injuring his back. The immigrant may not do anything, but you can bet that the health care system will track you down and make you pay! This happened to an acquaintance of mine, and I felt very bad for him. But that was a big lapse in judgment on his part.

(3) There are some restrictions on selling the property or working on many properties at once. This is to discourage flippers. You have to own the property for a period of time and you can’t do it to many properties at once. Again, pretty much N/A in my case as this is really my home and not some quick-turn investment get-rich-quick scheme.

The other thing that happened to me today was that my car turned over  100K on the odometer. So I got the extra digit on the screen. It happened moments after I drove out of the civic center parking lot after getting my building permit. Coincidence? Yes,but a happy one. At least it put me in a good mood!

Energy Conservation and California Title 24

California is known for being, among other things, a “progressive” state. I won’t get into the nuances of exactly what that means other than to point out that California has some fairly stringent energy conservation laws and regulations. One of them is the Title 24 energy requirements, and the law focuses on the twin aspects of energy efficient design regulations, and compliance regulations. Energy efficiency is always a design objective for any home or remodeling project, not only to minimize the ongoing cost of utilities, but also because there is great concern about reducing our collective energy “footprint” due to the impact on climate and the environment. There is always a trade-off between the extra expense that has to be incurred up front to make a home energy efficient, and the expense one saves in utility bills which amortize this up front cost. Hey, if you spend so much making your home super efficient, but it takes 100 years to recover the expense, maybe that’s not such a bright idea.

In California, some of the guesswork about this has been regulated away. However, the way the state has done it is pretty cool (IMHO). Instead of prescribing how much insulation or what kind of roof you can put on your house, you design using a performance based approached. The state has a free computer program that will calculate the energy efficiency of your house, and you can make tradeoffs between energy efficient windows, reflective “cool roof” shingles, radiant barriers, insulation, etc.. to get within requirements. These requirements are specific to your geographic location and take into account the orientation of your house, the historical weather conditions, the length of daylight, elevation of the sun, and calculate your energy usage over an entire year in 15 minute increments (that’s  34,560 iterations). The reason I think this is cool is because I’m a geek at heart and this computer based modeling interests me. Fortunately, because I modeled my house, it was easy for me to get all of the measurements (surface areas). California also has a simulation for commercial buildings and, check this out, it uses a SketchUp plug-in called Open Studio, which is made by the National Renewable Energy Laboratory.

OK, enough of the geek stuff. The output of the program shows you how much energy you’ll be using, and it ALSO gives you an idea of what your heating and air conditioning requirements will be.  So, for me, I now can approach an HVAC contractor armed with some knowledge and make sure that they are sizing the units correctly.

As I mentioned above, another thing the program was useful for was to do some design tradeoffs. I had originally planned to replace all of my windows with vinyl high efficiency window. One thing that I noticed was that (a) these things are darned expensive to have installed (figure minimum $500 per window), and (b) it’s pretty difficult to get the right materials. Replacement windows are DIFFERENT from new construction windows, and while you can work your window opening to accept a new construction window, it’s difficult and expensive to do. None of the retail outlets sell replacement windows. I did some serious research and the only thing I came up with was to find some contractor who could buy the windows for you, and maybe you pay him a little bit and he puts your windows on an order he’s doing for somebody else. I swear, there must be some sort of conspiracy! So I had resigned myself to get a contractor to come in and do the stinkin’ windows. In the course of finalizing my plans, I had a professional inspector come in and give me the low down on the condition of my home because I didn’t want any big surprises (more on that later). He asked me about the windows, and when I told him I planned on replacing them, he strongly advised against it. Although I have single pane aluminum sliding windows, he said that all they needed was a good refurbishment, and that the energy savings were minuscule because of climate we live in. In addition, vinyl windows started to exhibit problems in as little as 5 years (in his experience). So, I went back to the energy simulation program, put back in my original windows, and darned if he was right. Hardly ANY change in energy efficiency. THAT saved me about $8000!

I won’t get into California Title 24 lighting requirements too much. I will only mention two things. (1) Incandescent lighting is an EXTREME wast of energy! An incandescent light should be re-named a light emitting electric heater, because that’s what it is. Go with high efficacy lights such as LEDs or Compact Flourescent (CFL). (2) California Title 24 requires that you have special fixtures that accept a specific light base (GU 24) for all permanent lighting (like all of those recessed ceiling lights I want to put in). This is because the regulators wanted to make sure that the owners wouldn’t just go out and buy typical screw-in lights when the “fancy ones” burned out. Unfortunately, the market for these special light bases and fixtures is limited (to new construction in California), so the industry has responded by making a whole BUNCH of high efficacy lights with the screw base (Edison). Now, I don’t have much of a choice in lights because of this response to the code by industry. It turns out that the new requirements for 2018 will allow screw in high-efficacy lights. BUT, I’m being permitted under 2010 requirements, so I’m stuck. My plan is to get a bunch of really cheap GU-24 CFLs to put into my lighting and have the inspector sign off, then when he’s gone, buy a bunch of GU-24 to Edison adapters and get the screw-in lights I really want.

So, to conclude, if you have a “geek streak” and are interested in learning about energy efficiency,you might want to consider one of the computer models that give you an accurate picture of what your energy improvements, and savings, might be. It makes it easy to compare energy upgrade costs versus utility savings, and it can give you some really good information when it comes time to discuss options with contractors. Since it’s a requirement in California, you’re either going to have to DIY, or pay somebody to do it. For me it was worth the effort to DIY, and I now have a good plan for making meaningful energy efficient improvements for my project.