After hearing the bad news that our cruise was cancelled, we were, naturally, very disappointed. Stella and I look forward to our vacation cruises almost from the time the last one is over. Stella researches all the options, we discuss possible itineraries, and we set about planning and preparing, usually over a year in advance. It really is our time together and as we age, we want to enjoy our golden years while we’re still relatively healthy and young. This is a missed opportunity for us that we will never get back.
That being said, there was little time for us to go around feeling sorry for ourselves. At least not right now. Even though we had plane reservations, there was still lots that could go wrong, and what with the rapidly deteriorating travel situation getting back to the US, we really needed to catch a few breaks. So, we decided to relax and recover as best as we could on Sunday so that we would be ready for our long journey home on Monday. Door-to-door, the trip was going to be 24-25 hours, and that’s if everything went as planned, which was by no means a guarantee.
Instead of being too adventurous, we just stuck around the hotel on Sunday touring the grounds. I got caught up on the blog, we tried to sleep a lot, had a few drinks with lunch, then an early dinner to catch a few more hours of sleep until our 1:00 AM wake-up call. The hotel was very nice, and in fact the food was truly one of the best restaurants we had been to. As in better than what I can (or am willing to) make.
The Santiago Sheraton. Really nice hotel.
Lunch in the lounge. May as well have some fun!
Dinner before our flight. This hotel has one of the best restaurants that I’ve been to.
1:00 AM came early. In fact, I was so restless that I woke up at midnight and went ahead and got a head start so we could both shower and finish packing back up. We kept our (now useless) cruise documents in case we needed them later to sort out the refund/compensation situation after the dust settles, and with heavy heart, we packed those away. We met the taxi to take us to the airport and we were there about 2 hours earlier than we probably needed to be, but the traffic was light and it was a good risk mitigation step that was paid for in sleep hours, which we weren’t going to get much use of anyway, so it was a good investment.
Santiago airport at 3:00 AM. Pretty architecture.
We went on an airline that I never heard of: COPA (Compañía Panameña de Aviación). It’s the official Panamanian airline based in Panama City, Panama, and it literally connects all of the Americas – North, Central, and South. They fly only 737’s the fleet is very new, the aircrafts were clean, the service was good, and they were on time. It was founded back in 1947 by some Pan Am execs, and it’s a pretty big operation, on par with other airlines like United, Lufthansa, etc.. It sure outlasted Pan Am!
We had 3 legs on our trip: Santiago, Chile to Panama City, Panama, to Orlando Florida, to San Diego. The layovers were adequate, but we literally walked off each plane and went right into boarding the next, so not really any down time at the airports. The total in-flight time was about 16 hours, and while we tried to get some sleep, that was only in fits and starts. Exactly what one would expect during long flights.
Starting our journey home…
We did catch some breaks on the aircraft. None of the flights were totally packed, so we were able to weasel our way into getting an aisle and window seat with an empty middle so we could stretch out a little and maybe sleep a little better. The other great news was that there were zero weather delays and no mechanical problems. All three flights went like clockwork. Yaay!
If there was one anxious moment, it was the connection in Orlando. We had to go through immigration and customs, and their international terminal is a little wanky and it was difficult for us to figure out where to go. At first, I couldn’t figure out the gate for our next flight and there was nobody at the information desk and the arrival/departure screens only listed flights at the international terminal. Then, I remembered that I had the Flight Aware app on my phone, so I was able to look up the gate. Alas we had to get on a tram and then trek to the opposite side of the airport. Compounding this was the fact that we had to go back through TSA screening, and due to the air travel fiasco caused by the administration’s lack of planning and poor crisis management, we had a 45 minute wait getting through security screening. Looking at the bright side, Orlando was not one of the 13 airports that were designated for travelers flying in from Europe that needed extra health screening. These airports became “chokepoints” of the grandest kind with waits up to 3 hours, causing missed connections, and causing potentially infected people to congregate for hours at a time en-masse, only to be dispersed as potential vectors around the country. Glad I was not part of that mess!
Crowd at Orlando TSA security checkpoint. Yikes!
Yet, the delay almost made us miss our connection! They were getting ready to close the doors when we ran up, out of breath. Good thing they didn’t take our temperature at that point!
We returned to San Diego safe and sound, and thus far, are thankfully asymptomatic. We’re going to stay at home and find out what the quarantine recommendations are and, if we are subject to those, we will do so. We’re also going to have to keep our heads about us and get caught up to speed with developments and act accordingly.
Home Sweet Home!
I’ve given some thought to how one should approach an existential crisis such as the one we’re currently undergoing, and I’ve come up with some ideas:
Don’t panic. Be confident in your ability to weather the situation and don’t succumb to a “herd” mentality. Don’t go out and buy a bunch of toilet paper. That does nothing to contain the virus. Think about how to do without. No toilet paper? Use a washcloth and throw it in the washing machine. Out of hand sanitizer? Learn how to wash your hands properly with soap and water. It’s much more effective than hand sanitizer anyway, and way cheaper. Out of disinfectant spray? Improvise with bleach and water. Out of bread? Learn how to bake it. Use your skills and/or learn new ones to make do. This is going to be a rough few months (at least) but the likelihood of us running out of water, electricity, and food is pretty low, and if you’re fortunate enough to have shelter, that’s really all you need.
Think ahead. Plan as best you can to socially isolate yourself and prepare yourself for the possibility of catching the virus and getting sick.
Stay informed. Listen to the news and web sources to get the best information that you can from multiple sources and make thoughtful decisions based on that information. There’s lots of good info about how the virus is spread, data based predictions about what the various scenarios are, and how our actions as individuals can influence the outcome. “The consistency of the data tells the truth”.
Be compassionate. There are lots of people who will suffer. Many have limited choices and resources if they can’t go to work, either due to quarantine or furlough. Consider getting involved in relief efforts either through direct action, or through donations. We need to help each other out and take care of each other.
Be optimistic and keep your sense of humor. These will be trying times, but we as a people have been through these crises before, and we will not only survive, but we will come out stronger and the better for it. Life is not fair. It does not matter what circumstances you find yourself in. What matters is how you respond. Have faith.
Well, we’re finally underway! The weather here in San Diego is unusually rainy, and the forecast is rain throughout all next week. We need the rain but it is a bit dreary. We’re very much looking forward to some sunny tropical weather!
A Rainy Start
Because San Diego is a popular cruise ship port, we like to try to either start here, end here, or both. Because we’ve completely exhausted the “both” option years ago, our choices become more limited and what we’re left with are the “repositioning” cruises where a ship will go from working one itinerary to another. For this particular cruise, the ship was working South America during their “summer” (December through March), sailing back and forth from Buenos Aires, Argentina to Santiago, Chile. We did that cruise a few years ago, so now we’re picking up the ship in Santiago, working its way up the West coast of the Americas on the way back to San Diego. After we disembark, the ship is scheduled to go on from San Diego, to Vancouver BC and start working the Alaska circuit for the “our” summer. But we have to get to Santiago first, and that means a long plane ride.
Despite the rain, our spirits were up and we headed off to the airport to begin our first leg of the journey from San Diego to Dallas-Fort Worth where we would pick up the international flight to Santiago. With the COVID-19 epidemic causing a crisis in the travel industry, we expected that fewer people would be travelling and that was somewhat true. Our seats were in the back of the bus, but fortunately, there were a few open seats, so we hogged a window and isle and had the middle free. A good deal in coach! Nevertheless, while the plane was not packed, it wasn’t exactly empty either. I was a little surprised given the general sense of panic I’m seeing on all forms of media, but I suppose that it takes a few days to adjust given rapidly changing situation.
At the airport
Airport is not too busy.
Our airline itinerary.
We made it to DFW without too much trouble, and we had a layover, so we got a bite to eat and had a short birthday celebration for Stella.
Stella’s Birthday Dinner.
Getting Ready To Board Our International Flight
We boarded our international flight uneventfully. It was on a Boeing 787, and we paid a bit extra to get upgraded “economy plus” seats. For these long hauls, the “business class” has these fancy “cubbies” that you can sleep in, but they are nosebleed expensive. Turns out that the economy plus is what I would otherwise call “first class” – free booze, upgraded meals, separate service, nice roomy seats that recline without banging the person in back of you. The real deal. Totally worth the extra bucks on a 9 hour overnight flight!
Just as we were settling in, the purser came over the intercom and announced that if you were going to embark on a cruise ship in Santiago, that your cruise was cancelled and you needed to deplane. Crap! This was what we were trying to avoid by carefully monitoring the situation, almost hourly. But we’re in a crisis mode, so best to accept things as they are and go on. Just as we get all of our stuff together and head for the exit, the purser comes back on the intercom and announces that the previous call was only for those that got some sort of message from their cruise line. Several of us were going on the same ship so we quickly compared our texts and e-mails and confirmed that we were not affected. So back to our seats we go. I decided to follow up and called the cruise line directly. The person I spoke with then said that Royal Caribbean was canceling all cruises for the next 30 days, following what the Carnival line did the previous day. So, in a panic, I told this to my fellow cruisers and we started to head out again. Finally, as luck would have it, we had a crewmember going to the ship on our flight, and she was in direct contact with headquarters, who gave us the straight story: The cancellation only applied to ships sailing out of the US and any ships underway, or sailing from foreign ports would continue with their original itinerary. So we’re on again! Back to the seats we go.
Since there actually were some folks who had to deplane, we sat around for about an hour. Once we pushed back and we started taxiing, I though all would be well, so I sent my boys a “wheels up” text. That turned out to be premature. The captain came over the intercom and reported that we had a brake overheating problem, so we went back to the gate to have maintenance take a look. It turned out to be a stuck brake caliper, but since the airplane had many (32 of them), we could disable one and still fly. After another hour, the captain came back on the intercom and announced that the maintenance crew could not complete the repair, but that there was another plane that we could use, so we deplaned, this time for real, hustled over to the other aircraft, and waited an additional 90 minutes while they preflighted, fueled, and catered the airplane. We boarded, got settled, and got going, this time for real. Whew!! It’s amazing what a couple of shots of bourbon will do to improve your disposition! Life is good.
Dinner On The Airplane.
Beginning Our Descent To Santiago
Our flight landed around noon, local time, and we de-planed and made it to the gate. We had to go through a basic medical screening right away, but it was pretty, well, basic — taking our temp and answering a few questions on a medical form. From there, we went through immigration and customs, and, lo and behold, a person from the cruise line was waiting for us to get us a ride straight to the hotel. We arrived at the Sheraton, Santiago, one of the best hotels in Santiago, and were treated as you would expect to be at a top notch hotel. We got in our room, and I had a nice lunch with a well-deserved beer (or two), went back to the room for a nap, then it was down for cocktails and dinner.
Arrived In Santiago.
Beer at The Hotel.
Stella and I went to the lounge and ordered the “official” alcoholic beverage of Chile, picso, which is a type of brandy distilled from grapes. It’s highly regulated (distilleries must grow their own grapes, and it can only come from certain regions) and it was wonderful on the rocks! Really looking forward to our vacation!
Then the phone call came.
At first I didn’t answer it because I didn’t recognize the number and I figured they’d leave a message. Stella then looked at her phone and the 3 digit prefix was the same as our travel agent, so I figured I’d better call back. It was, indeed, the travel agent, but I only got to voicemail, so I quickly walked over to the Celebrity Cruise folks, who were still in the hotel lobby. Lo and behold, our cruise was cancelled 2 hours earlier! We found out that there were two other cruise ships in quarantine at San Antonio (our cruise port), so things were degrading fast. Time to get out of Dodge!
I called the Royal Caribbean hotline (parent company of Celebrity) and a representative quickly answered and made travel arrangements for our return. These aren’t as nice as our incoming flight, but the fact that we have them at all makes us extremely fortunate. Additionally, since we aren’t coming from an area that is on the prohibited travel list, we won’t be travelling into one of the DHS designated airports designated for extra screening. I’m hoping we won’t have to go into ordered quarantine when we return to the states, but we will be self-quarantining for 14 days. As of this moment we are asymptomatic, so perhaps luck is still with us.
We decided to make the best of it, have another pisco on the rocks, and have dinner at the hotel. The restaurant was actually quite fabulous, and we were overlooking a very large gathering of a wedding cocktail hour before the reception. Sadly, all of these gatherings, at least in the US, are not going to be happening for a while as we collectively hunker down and settle into a hermit lifestyle.
So, having previous risk mitigation and contingency plans in place, we are well positioned to execute our “plan B” and get our butts home.
Your wishes for good luck are much appreciated and are paying off!
One of my “successful” DIY projects was a paver patio I built when I was living in Chesapeake Virginia. In fact, you can still see the results of my handiwork on Google Earth. The address is 1901 Shady Cove Ct. (if you want to check it out). Building a paver patio is DEFINITELY in the realm of DIY. The question is, do you want it do look like DIY, or do you want it to look professional? I always choose the latter. And I think that all serious DIY’ers aspire to create works that equal the quality of, if not exceed, those that can be professionally built. I guess that strays into the realm of “artisan”, but let’s keep the discussion on the practical side.
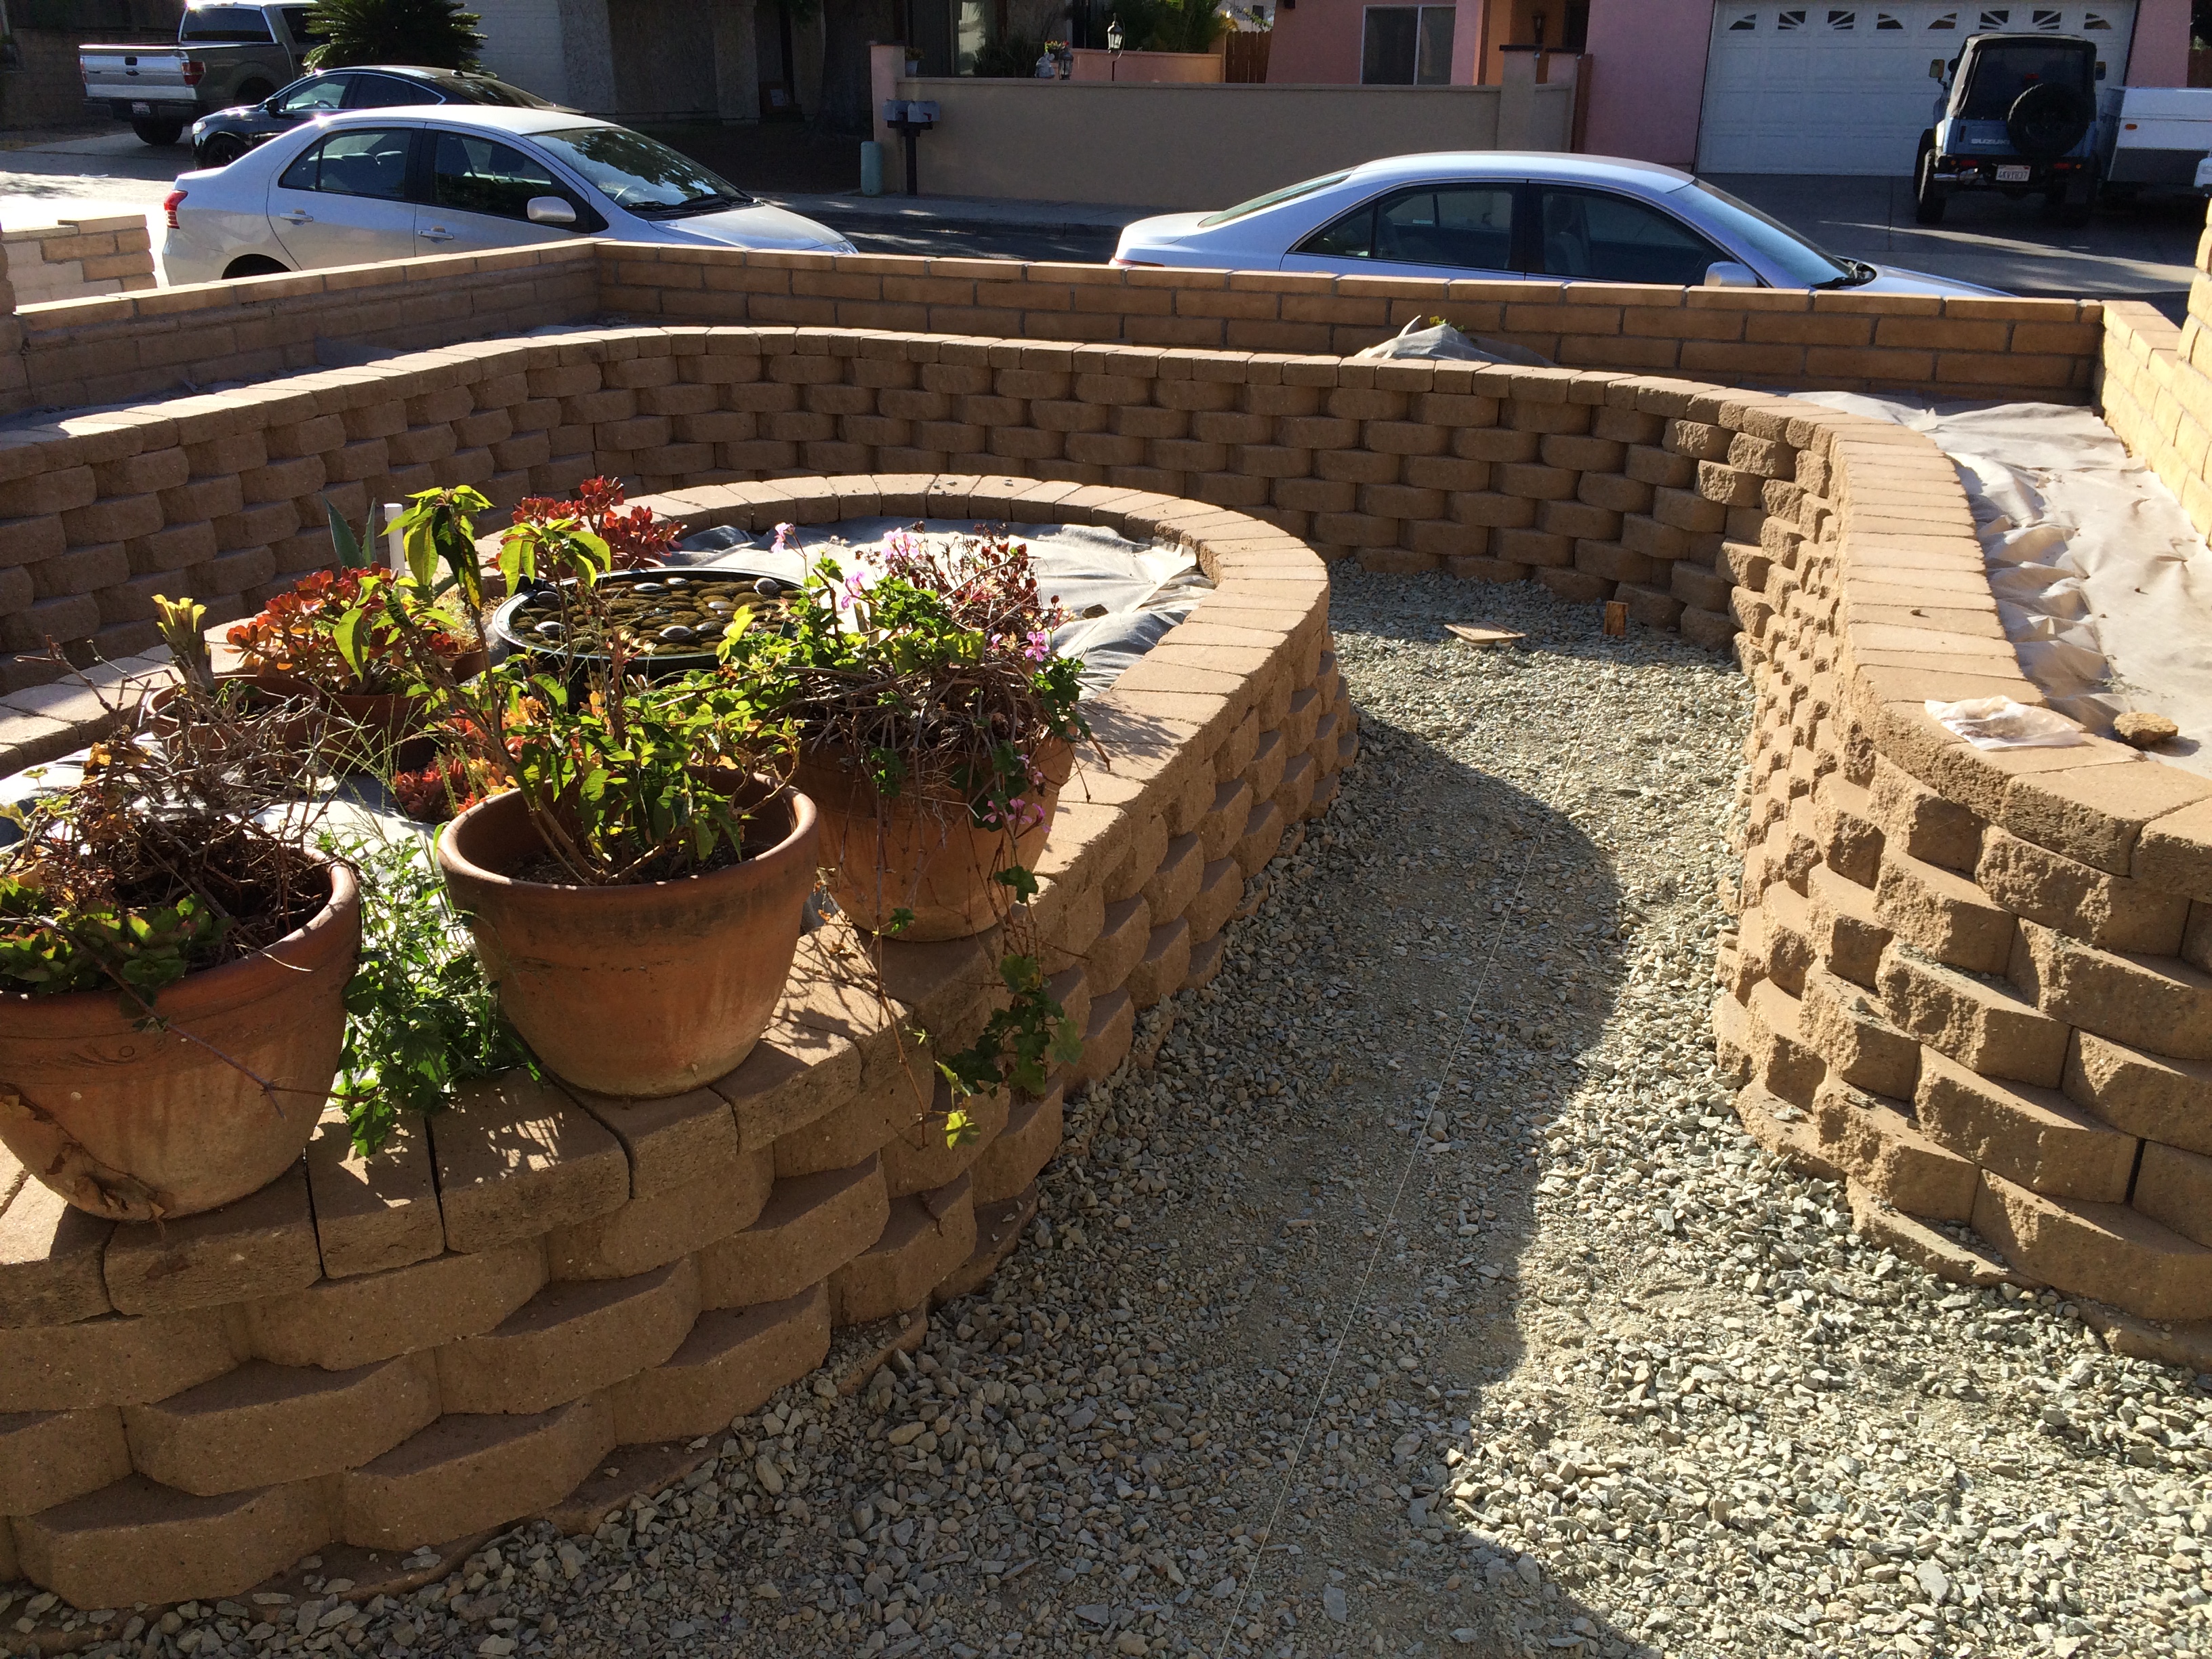
We start with the basics. Looking good is one thing. Looking good and lasting a long time is quite another. In my second attempt at building a paver patio, which happened to be at my current address, I took a few shortcuts. While the initial results were nothing short of outstanding (hey, this was the second time I was doing this, right?), over time the patio deteriorated. I didn’t put in a proper aggregate base, and I didn’t seal it, so the ants came in and undermined the sand under the pavers which caused the pavers to sink and the ants to rise up and threaten our very existence. Additionally, the level and slope did not provide proper drainage. I spent a lot of time and effort (and $) fixing the level and drainage problems, as profusely documented in other posts on this blog, but I want to now focus on slope.
It is important to make sure that the ground has at least a 2% slope away from the foundation of the house to allow for proper drainage and water shedding during a heavy rainfall. While we don’t get a lot of rain here in San Diego, when it comes, it comes in gigantic buckets. So my landscape has to be able to handle large rates of rainfall, as infrequent as they might be. A 2% slope is more than adequate, but how, exactly, do you do this?
Making an accurate slope starts with defining a reference point. In the case of a slope away from a house, the reference is, well, the house. Convenient references are typically siding or the weep screed on stucco. Since I have stucco, I’m using the weep screed. Because stucco absorbs water, the top of the finished grade must be at least 4″ below the weep screed. Adding 2″ for the pavers, 1″ for the sand base, and 4″ for the aggregate base means that the ground must be 11″ lower than the weep screed. That’s fine for the level at the foundation, but my drainage grates are 10′ away from the house (120″) meaning that I have to subtract an additional 2-1/2″ to from the 11″ to get the required 2% slope away from the foundation (120″ x 2% = 2.4″). This means that the ground must be 13 -1/2″ lower than the weep screed at the line of my drains.
Now, you have to transfer these measurements to the surface of the soil. You can use a tape measure to transfer the marks from the weep screed, and then use a line level to transfer that mark to the reference you’re using for the slope, and measure down from there. However, that’s not very accurate, and it’s pretty fussy, especially for a DIY’er. A far better method is to get a laser level and a grade stick. It used to be that these setups cost thousands of dollars. But now, you can pick up a good rig for around $375.00. OK, that’s not exactly cheap, and if you’re doing just one job, then maybe renting is a good idea. But if you are doing remodeling as a DIYer working alone, this will come in mighty handy. Plus, isn’t collecting cool tools part of the DIY experience? I can always justify the expense by how much I save in labor costs. But I digress. Here is what you need:
Laser level tools. Make sure you get a grade rod calibrated in fractional inches. Most surveying grade rods are in decimal feet, and that can be a pain to convert, unless you’re a professional surveyor, in which case you don’t bother converting and leave that to the other trades.
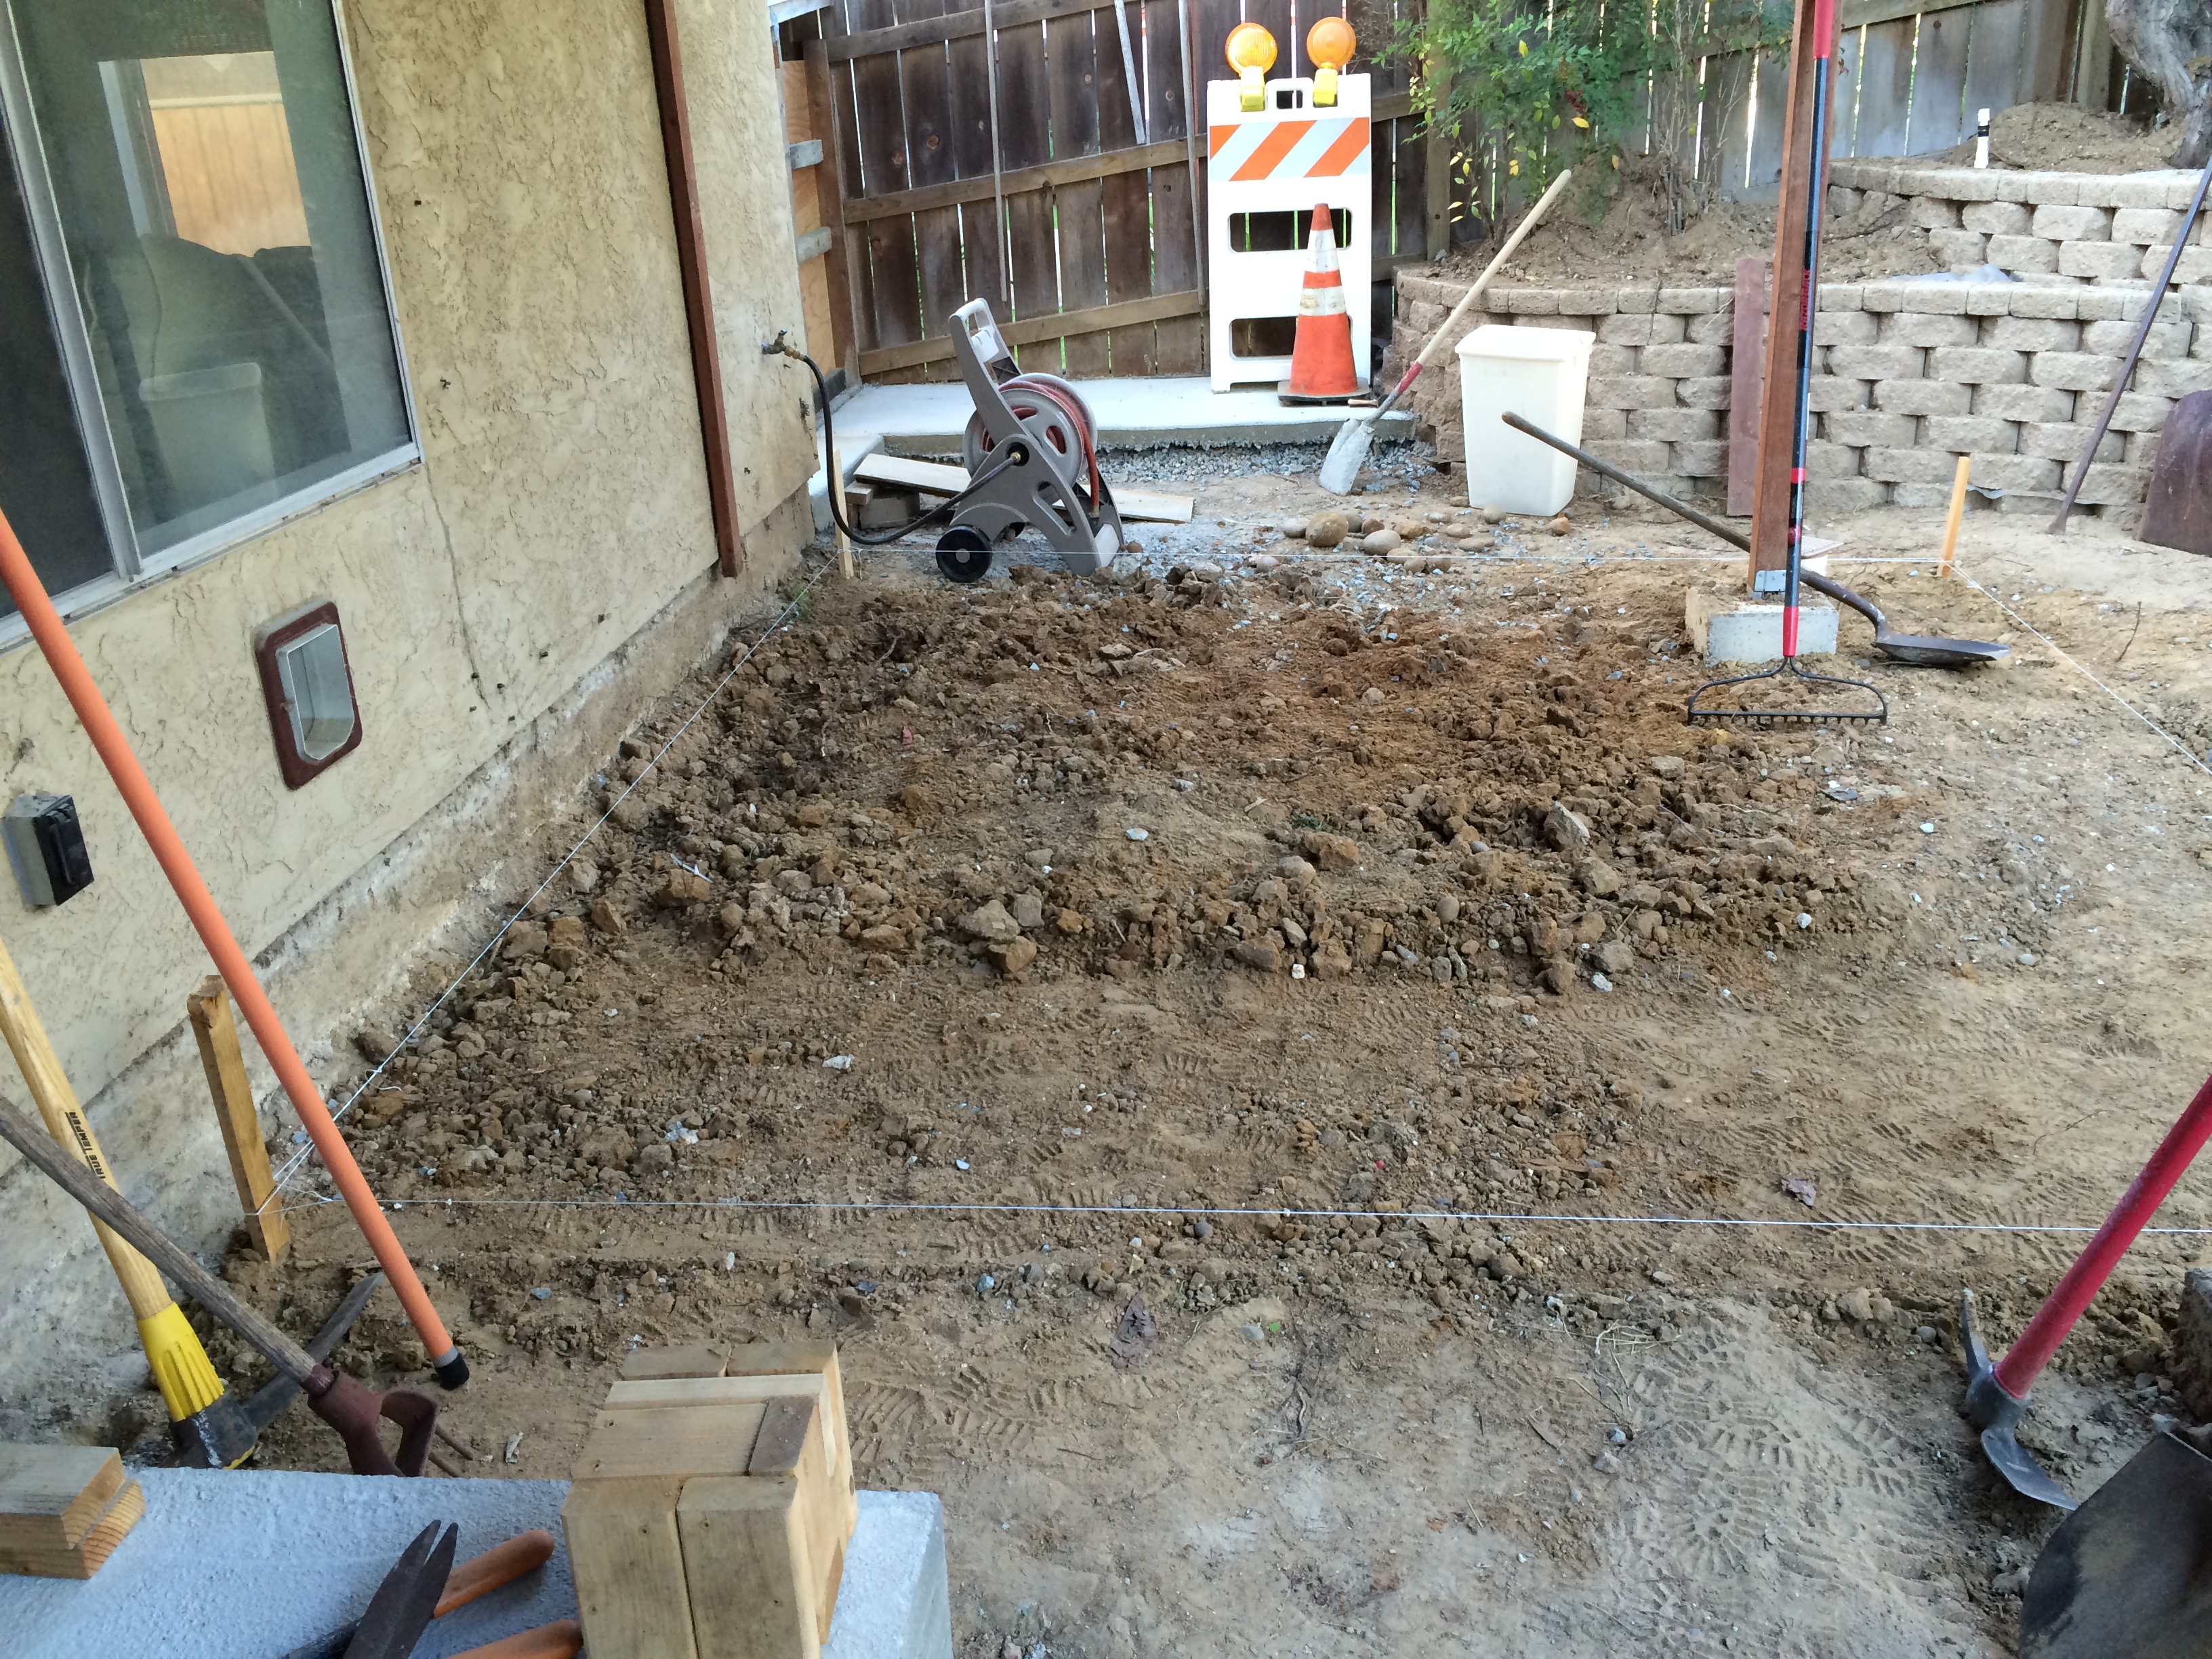
Onto the task of transferring these measurements. After a lot of thought, I came up the idea of pounding in grade stakes close to the foundation, and then doing the same where I wanted the low point of the grade to be (near the drainage grates). I would then connect them with strings, and I would have an accurate grid to which I could properly set the grade. The only problem was that if I used the calculated level of the ground, I would have to be fussing with marking and stringing at ground level. Totally a non-starter. What I came up with was to offset the level by 4″. This corresponds to the depth of the aggregate base which I plan on putting in. I would then use a wooden “block” that was 4″ in height to run along the string, which would establish the proper level of the ground with the correct slope. Here is a video and some pictures.
Now that the building lines are set, I have to remove additional dirt to get to the correct level.
Look at these dirt clods. I needed a pick to break them apart!
More petrified potatoes. Fortunately, these are very popular as free giveaways on Craigslist. I don’t have problems getting rid of these.
This shows how I graded to the lines. I ran my 4″ block along the lines and then established the correct grade at the lines.
I then eyeballed the grade and leveled everything out. Pretty nice, eh?
Unfortunately while digging (again) I had some trouble locating previously buried services. This is a repair job of my blasting apart my pristine new greywater irrigation system. Fortunately I know how to fix this stuff.
Here is the truck used to deliver the 15 yards of aggregate base.
And here is the aggregate base in all its 15 yards of wonderfulness. This is really going to suck.
Here is a cool video on how to tighten, and easily loosen, building strings.
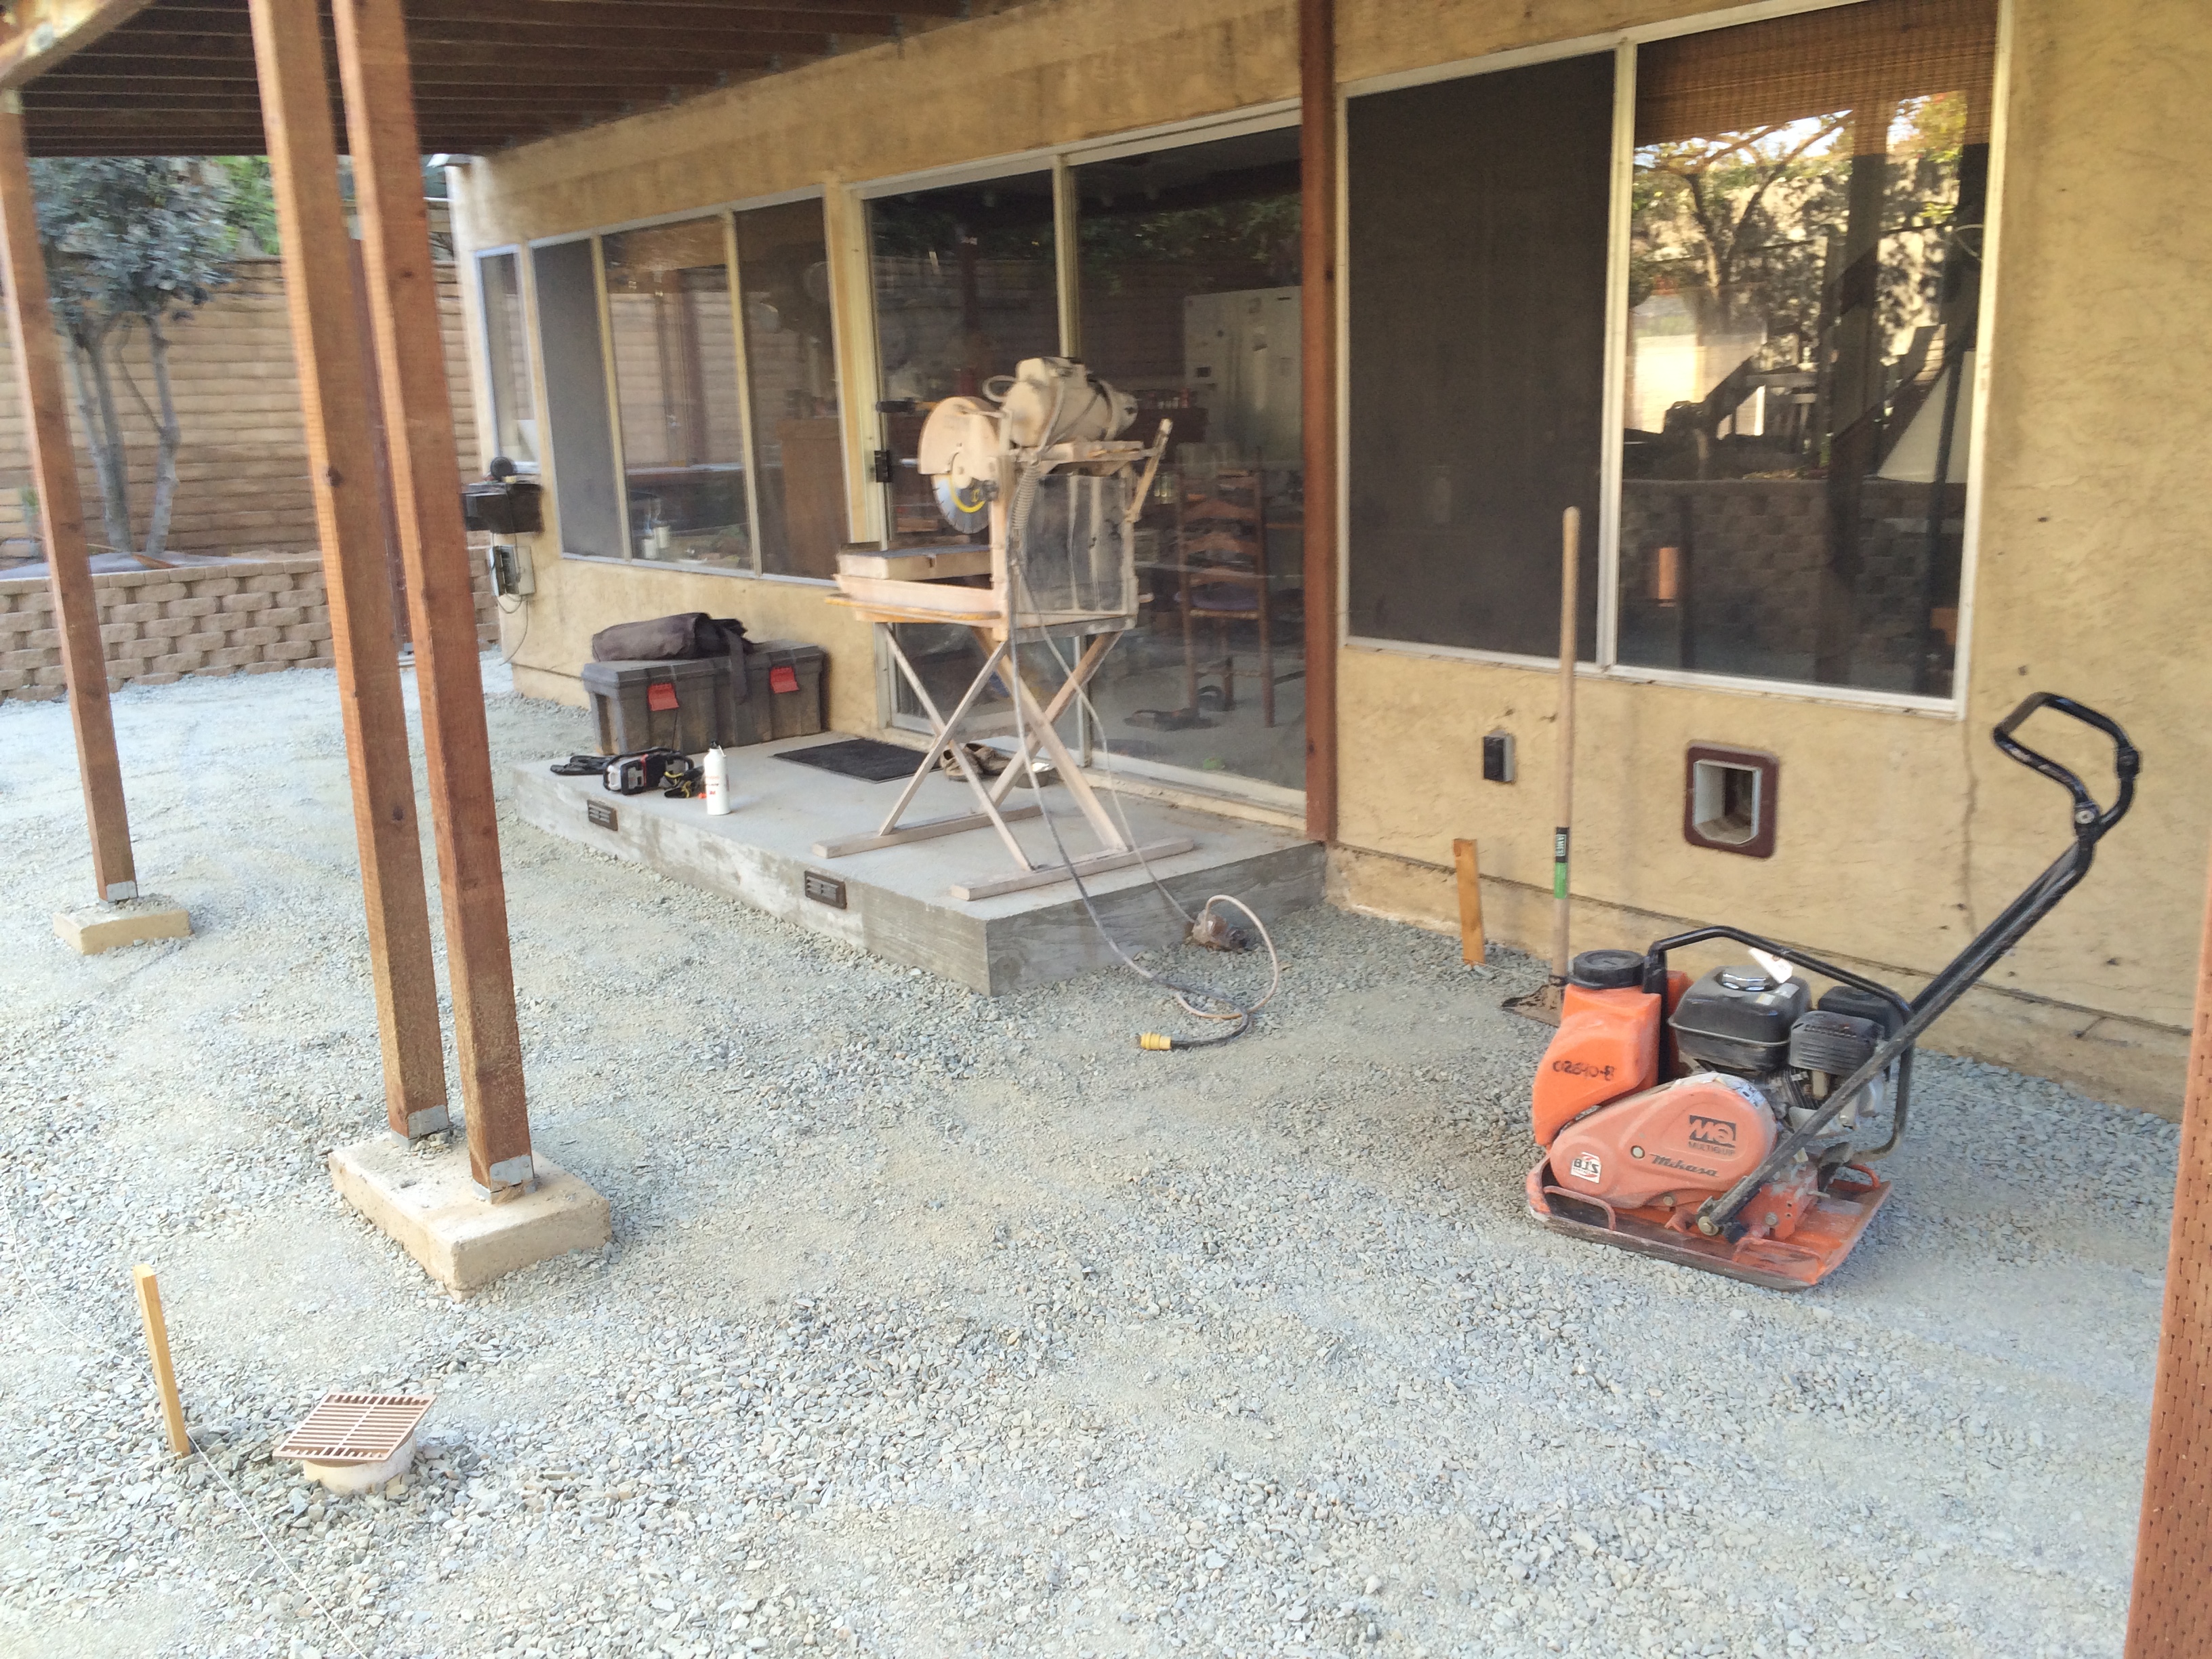
Now that the proper grade is established at the ground level, the next step is to add the aggregate base. The best aggregate base to use, at least in Southern California, is something called “Class 2 Road Base”. This is a mixture of aggregates from 3/4″ gravel down to dust. Plus it had recycled concrete. And it’s cheap(er). Best of all it compacts to a very stable base which is perfectly suited to a paver patio. Because I had the true genius of using a 4″ offset for my building strings, “all” I had to do was to trundle in the aggregate base and make it level with my strings. However, all of my genius could not overcome the basic fact of having to muscle the 15 yards of aggregate that was required to fill my front and back yard to the required 4″. Once the aggregate base is in place, it MUST be compacted. The best way to do this is with a plate vibratory compactor that can be rented. The aggregate base that I’m using compacts really well because of the different aggregate sizes. It really makes a stable, sturdy base on which to lay your pavers. Here are some pictures of the finished product:
This is the fill all compacted. The orange beast in the foreground is the plate compactor. Also notice the wet say in the background. This tool is essential in making nice cuts for your pavers.
Side yard all nice and compacted.
Front yard all ready for the next step. I’ll be filling this with decomposed granite (DG) and will stabilize it with a goop which promises to be resistant to erosion. We’ll see…
The next thing to do is to lay out the sand on which you’ll be placing the pavers. After doing some research on the Internet, I found a really nifty way to get it perfect. Obtain some 3/4″ PVC pipes, which have an outside diameter of 1″, and lay them down at 4′ intervals. Then dump your sand between the pipes and screed it off with a 2×4. The original video on the Internet showed an 8′ spacing, but they had 2 people working the screed. So I chose to shorten the distance to make it easier for a one-person crew. Working as one person sometimes requires a different approach than what a professional crew would do, so just “doing it like the pros” is not always possible.
One-person screed.
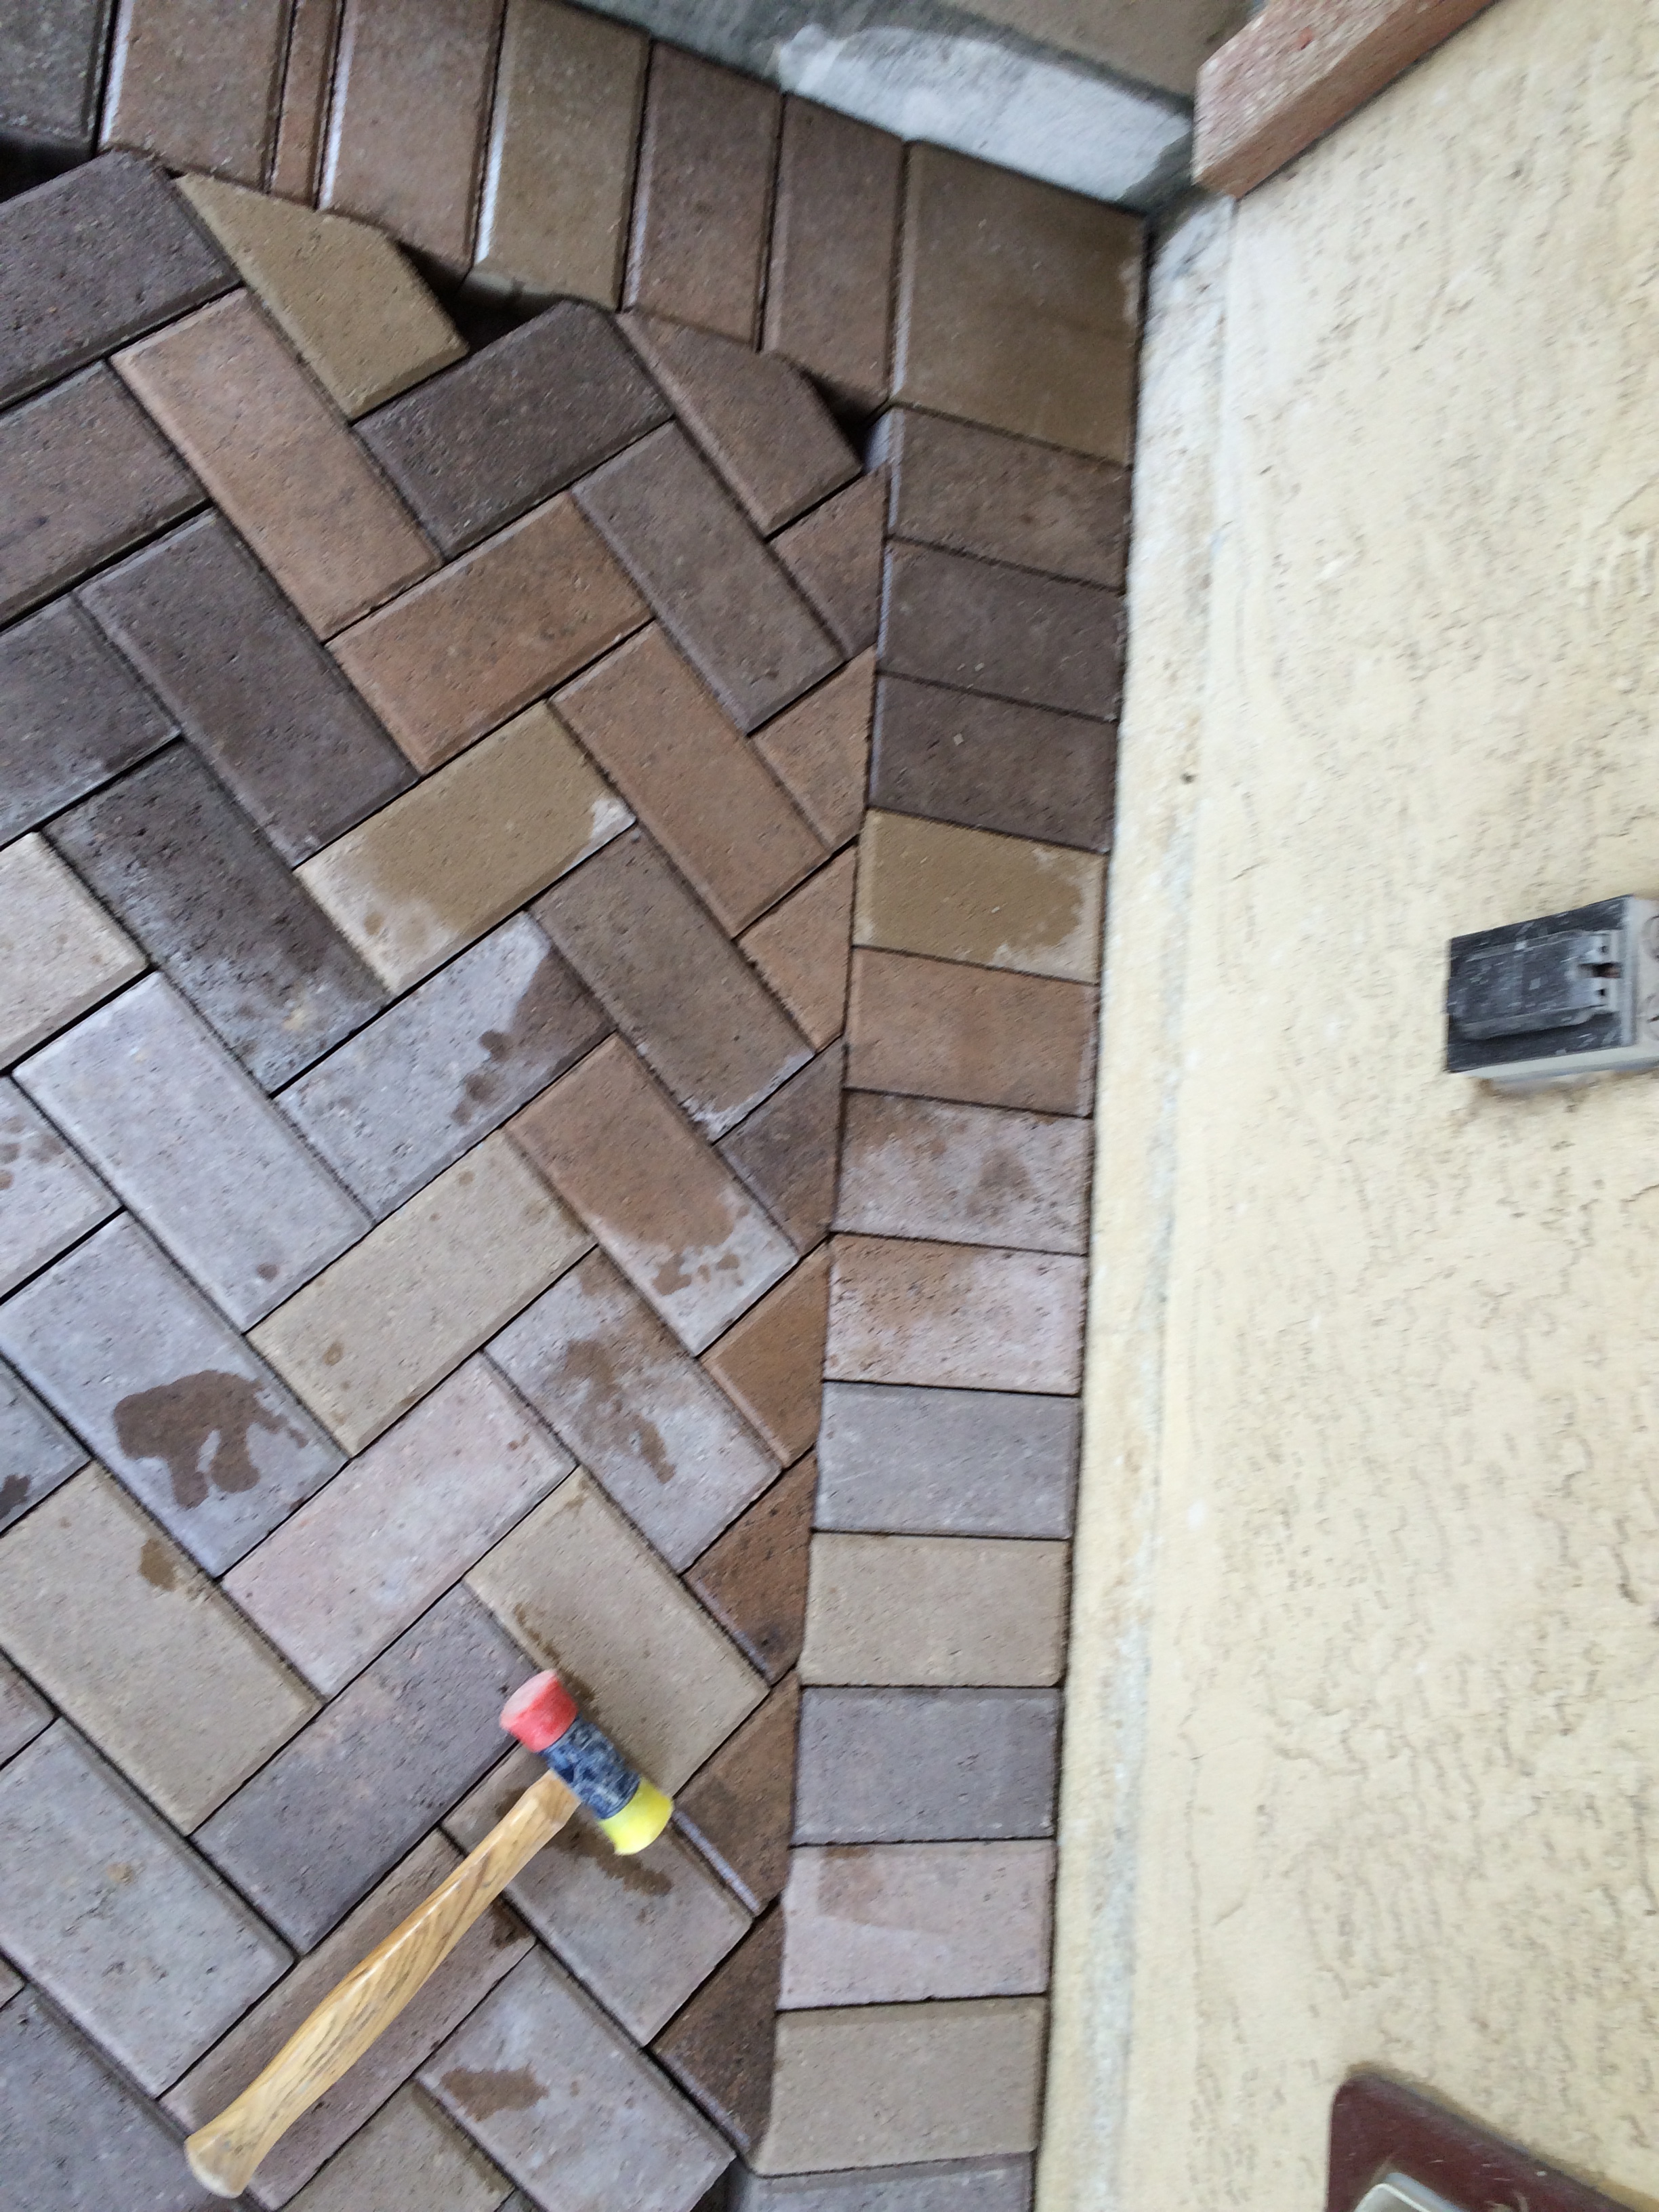
Everything is now ready for actually laying the pavers. While this can be a big payoff, because it’s so easy as compared to setting the grade and leveling the aggregate base, you have to be careful to set up that all important first course as accurately as you can. Once again, we need some reference points, and the most common one is the foundation of the house. In my case, since the patio occupies the entire back yard, I chose to use the corner of my foundation. The first bricks to lay will be the brick edging, which are bricks that are set perpendicular to the wall. For the corners, I used some 8″x8″ paver blocks, which made the corner transitions easier than cutting up 4″x8″ bricks on the diagonal. More of that to come. Now to set the pattern which you’re going to use for the “field”. Many patterns (basket-weave. running bond, 90º herringbone) should fit right along your edging, and you can merrily brick away. However, I chose to use a 45º herringbone pattern because (a) looks really cool, (b) aligns with the cardinal compass points relative to true north on the property, and (c) is a bit more challenging.
To line up a 45º pattern, the first thing to do is to set up a building line with some masonry string and blocks. This line needs to be parallel to the edge you’ll be working, and should be offset such that the filler bricks are relatively easy to cut and fit. I’ve seen some videos of how to set this up on the Internet, and while watching the process is instructive, these videos miss the obvious when it comes to determining the offset. It’s really quite simple: since the bricks will intersect the edge at a 45º angle, you’ll want to cut off the corner of a brick so you can flip the pieces around and complete the pattern. Here is a diagram:
Diagram of how to set up the first course.
A closer look at the diagram shows that the offset is the hypotenuse of a 45º right triangle, whose two legs correspond to the width of your brick. The hypotenuse is the square root of the sum of the squares of the legs (Pythagorean theorem, yes?), So since my bricks are 4″x8″, the offset is √(4² + 4²) = √(16+16) = √32 = 5.65. That works out to 5-5/8″. (If you really want to be nerdly, the closest fraction is 21/32 which is right between 5/8 and 11/16, so you could use your tape measure to get spot on, but in reality, 1/8″ is pretty good.) Why do I discuss this? Because I’m a nerd. And proud of it! That bit of mathematical nuance out of the way, it’s time to lay some brick! Take your bricks and align the corners diagonally with the mason’s line. You want to lay a fair number of bricks to establish a good course to build from, as shown in the picture. I set about 10 pairs (20 bricks).
Now we get to a point where we have to start thinking about the order of things. Specifically, you need to think about how you’re going to set the sand base, then lay the brick, without stepping in the sand base (which defeats the purpose), or disrupting the bricks that you’ve already set. You can (indeed must) walk on the placed brick, but you must step gingerly so as not to disrupt the bricks on the edges. So the brick path you step on needs to be at least 5-6 courses wide. You can start from one edge and build out until it’s wide enough, and then you’re home free.
Stepping Stones. Lay enough brick so you can step on it (carefully) and work your way out.
One of the critical observations in doing masonry work is to realize that masonry is the art of adjustment. Constantly. Bricks are not exactly the same size. Foundations are not exactly straight. So, one has to constantly compromise. In laying this particular herringbone pattern, I noticed that the bricks tended to become misaligned, probably due to the fact that the bricks came in contact with the edging at their corners. This meant that only a slight misalignment in the angle of the bricks will make a big difference. The way to notice this is to look at the gaps between the bricks. If there are excessive gaps, then it is likely that the bricks are misaligned. This is where your rubber hammer becomes your friend. Simply tap the edges of the bricks and they will tend to lock together and self-align. To a point. If you’re not vigilant, then things can get away from you and you might have to pull some of the bricks up so you can align them. Bottom line: constantly pay attention!
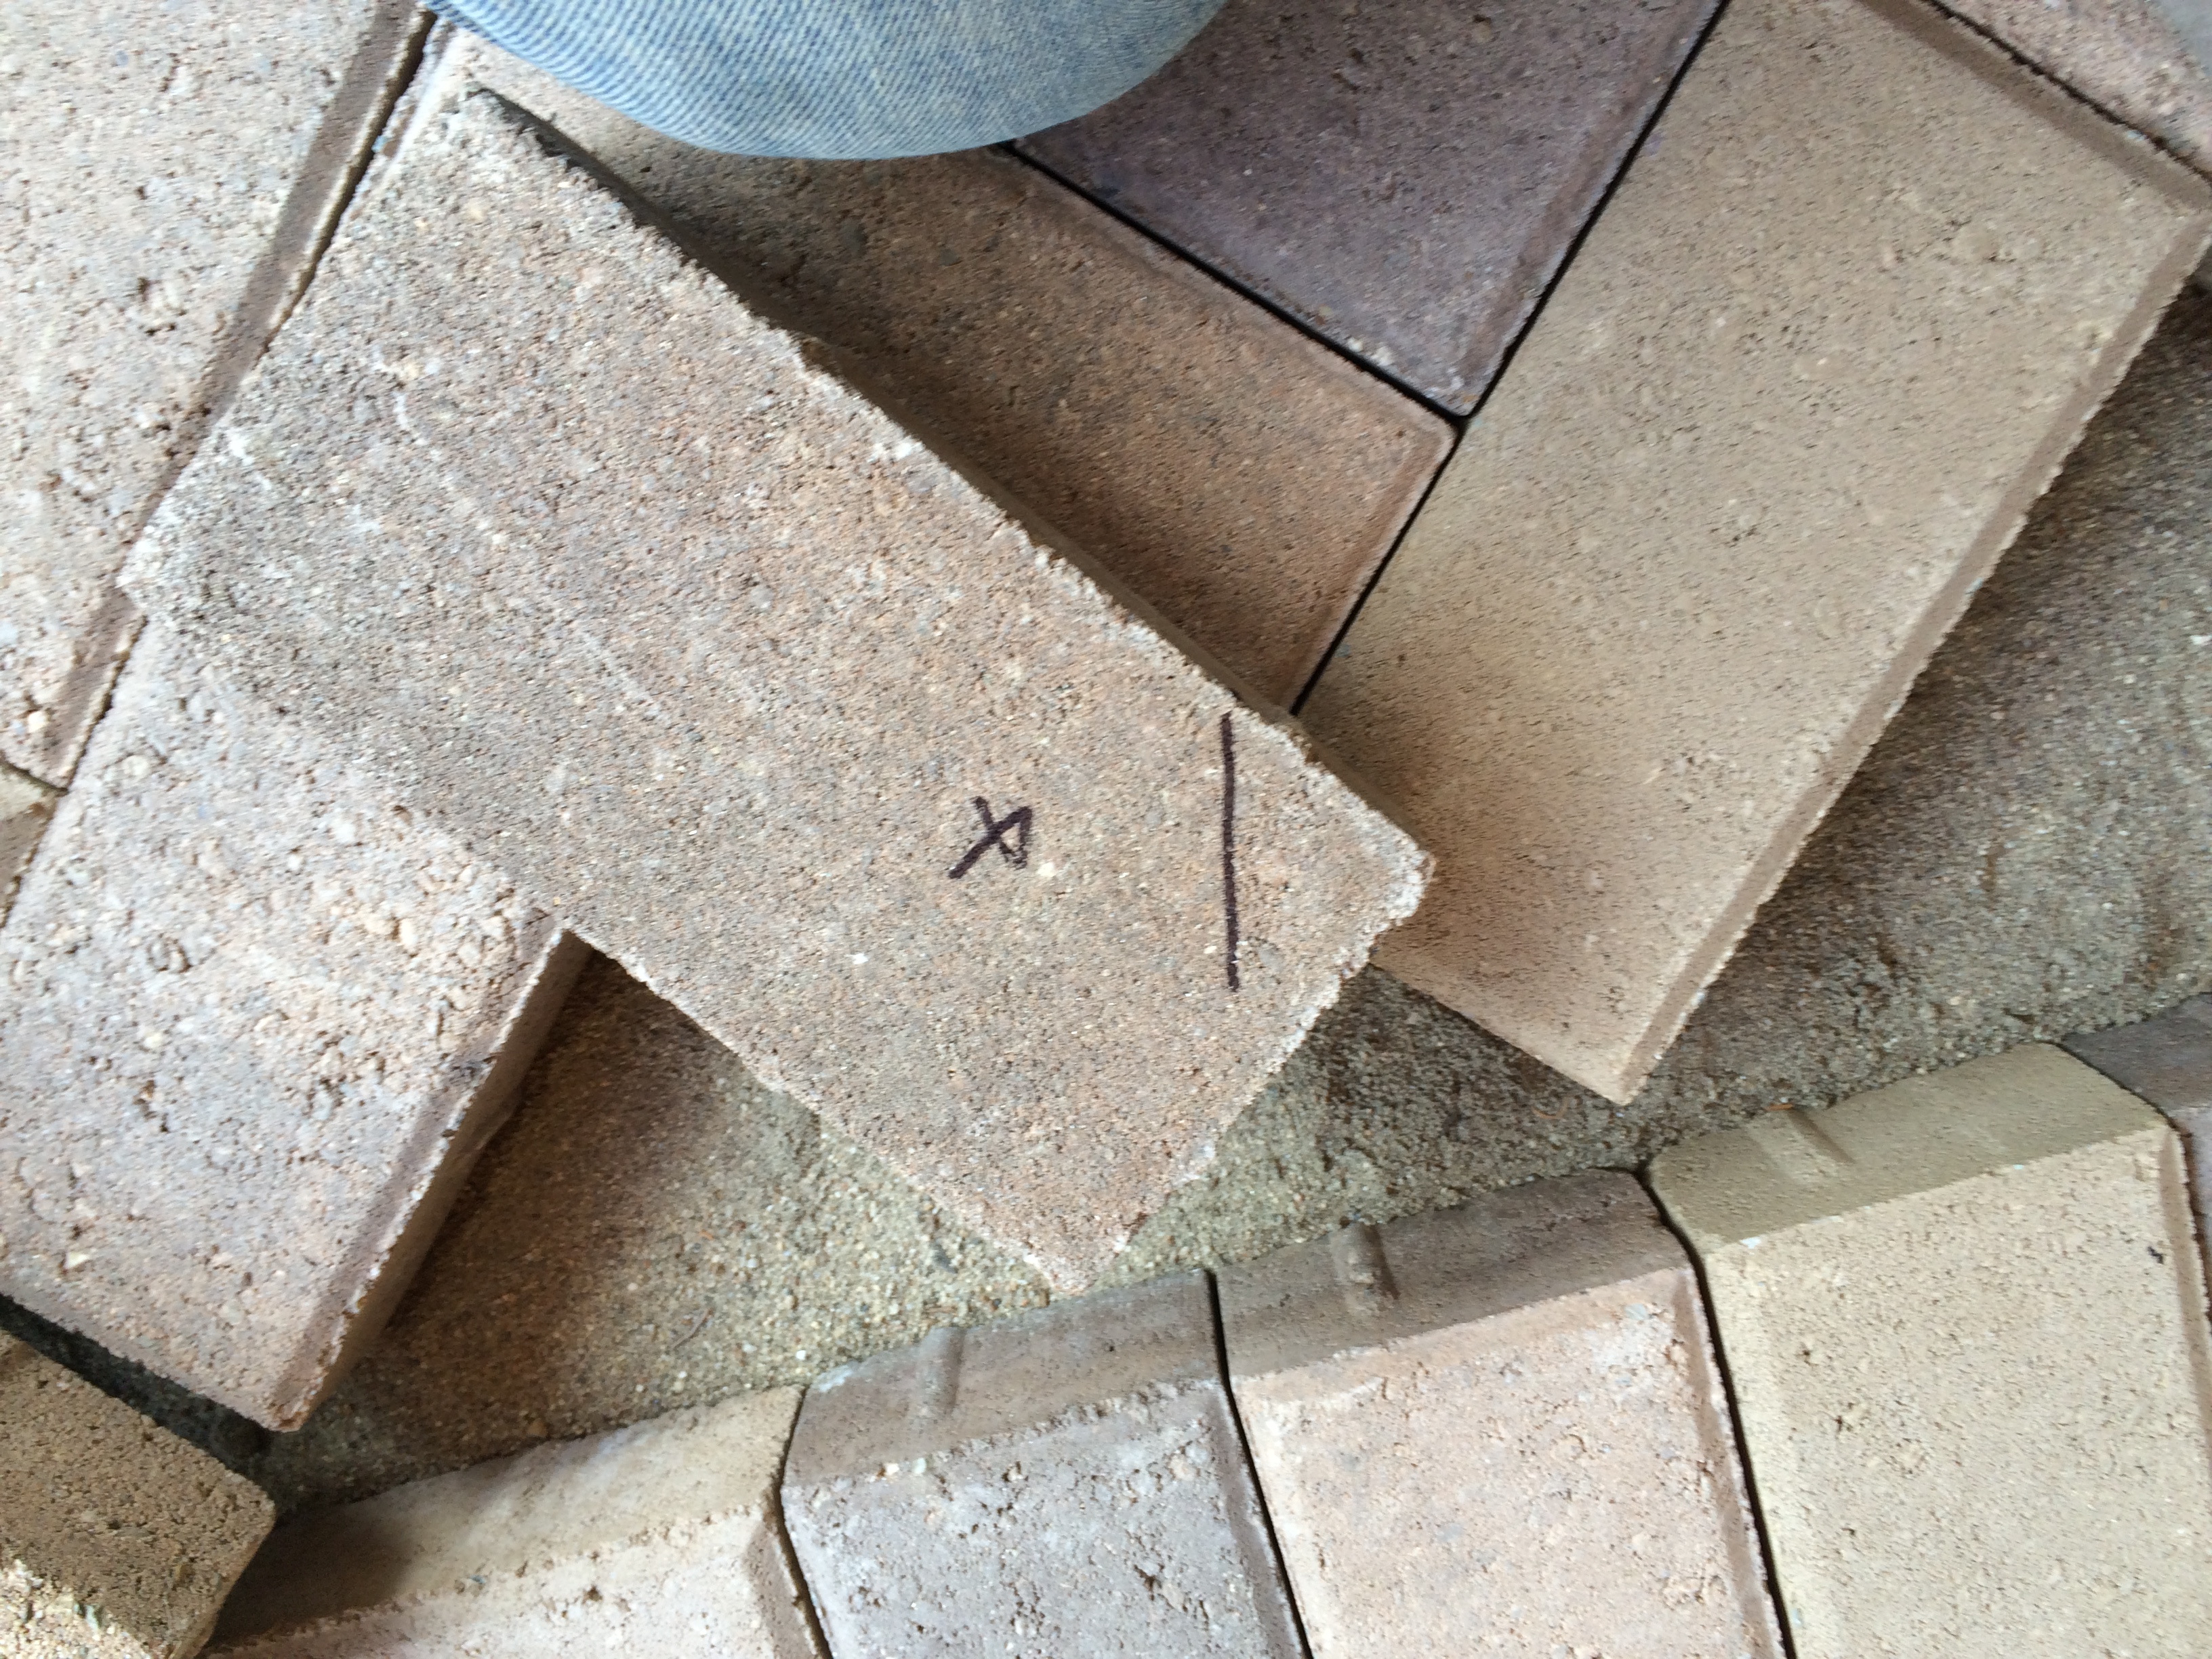
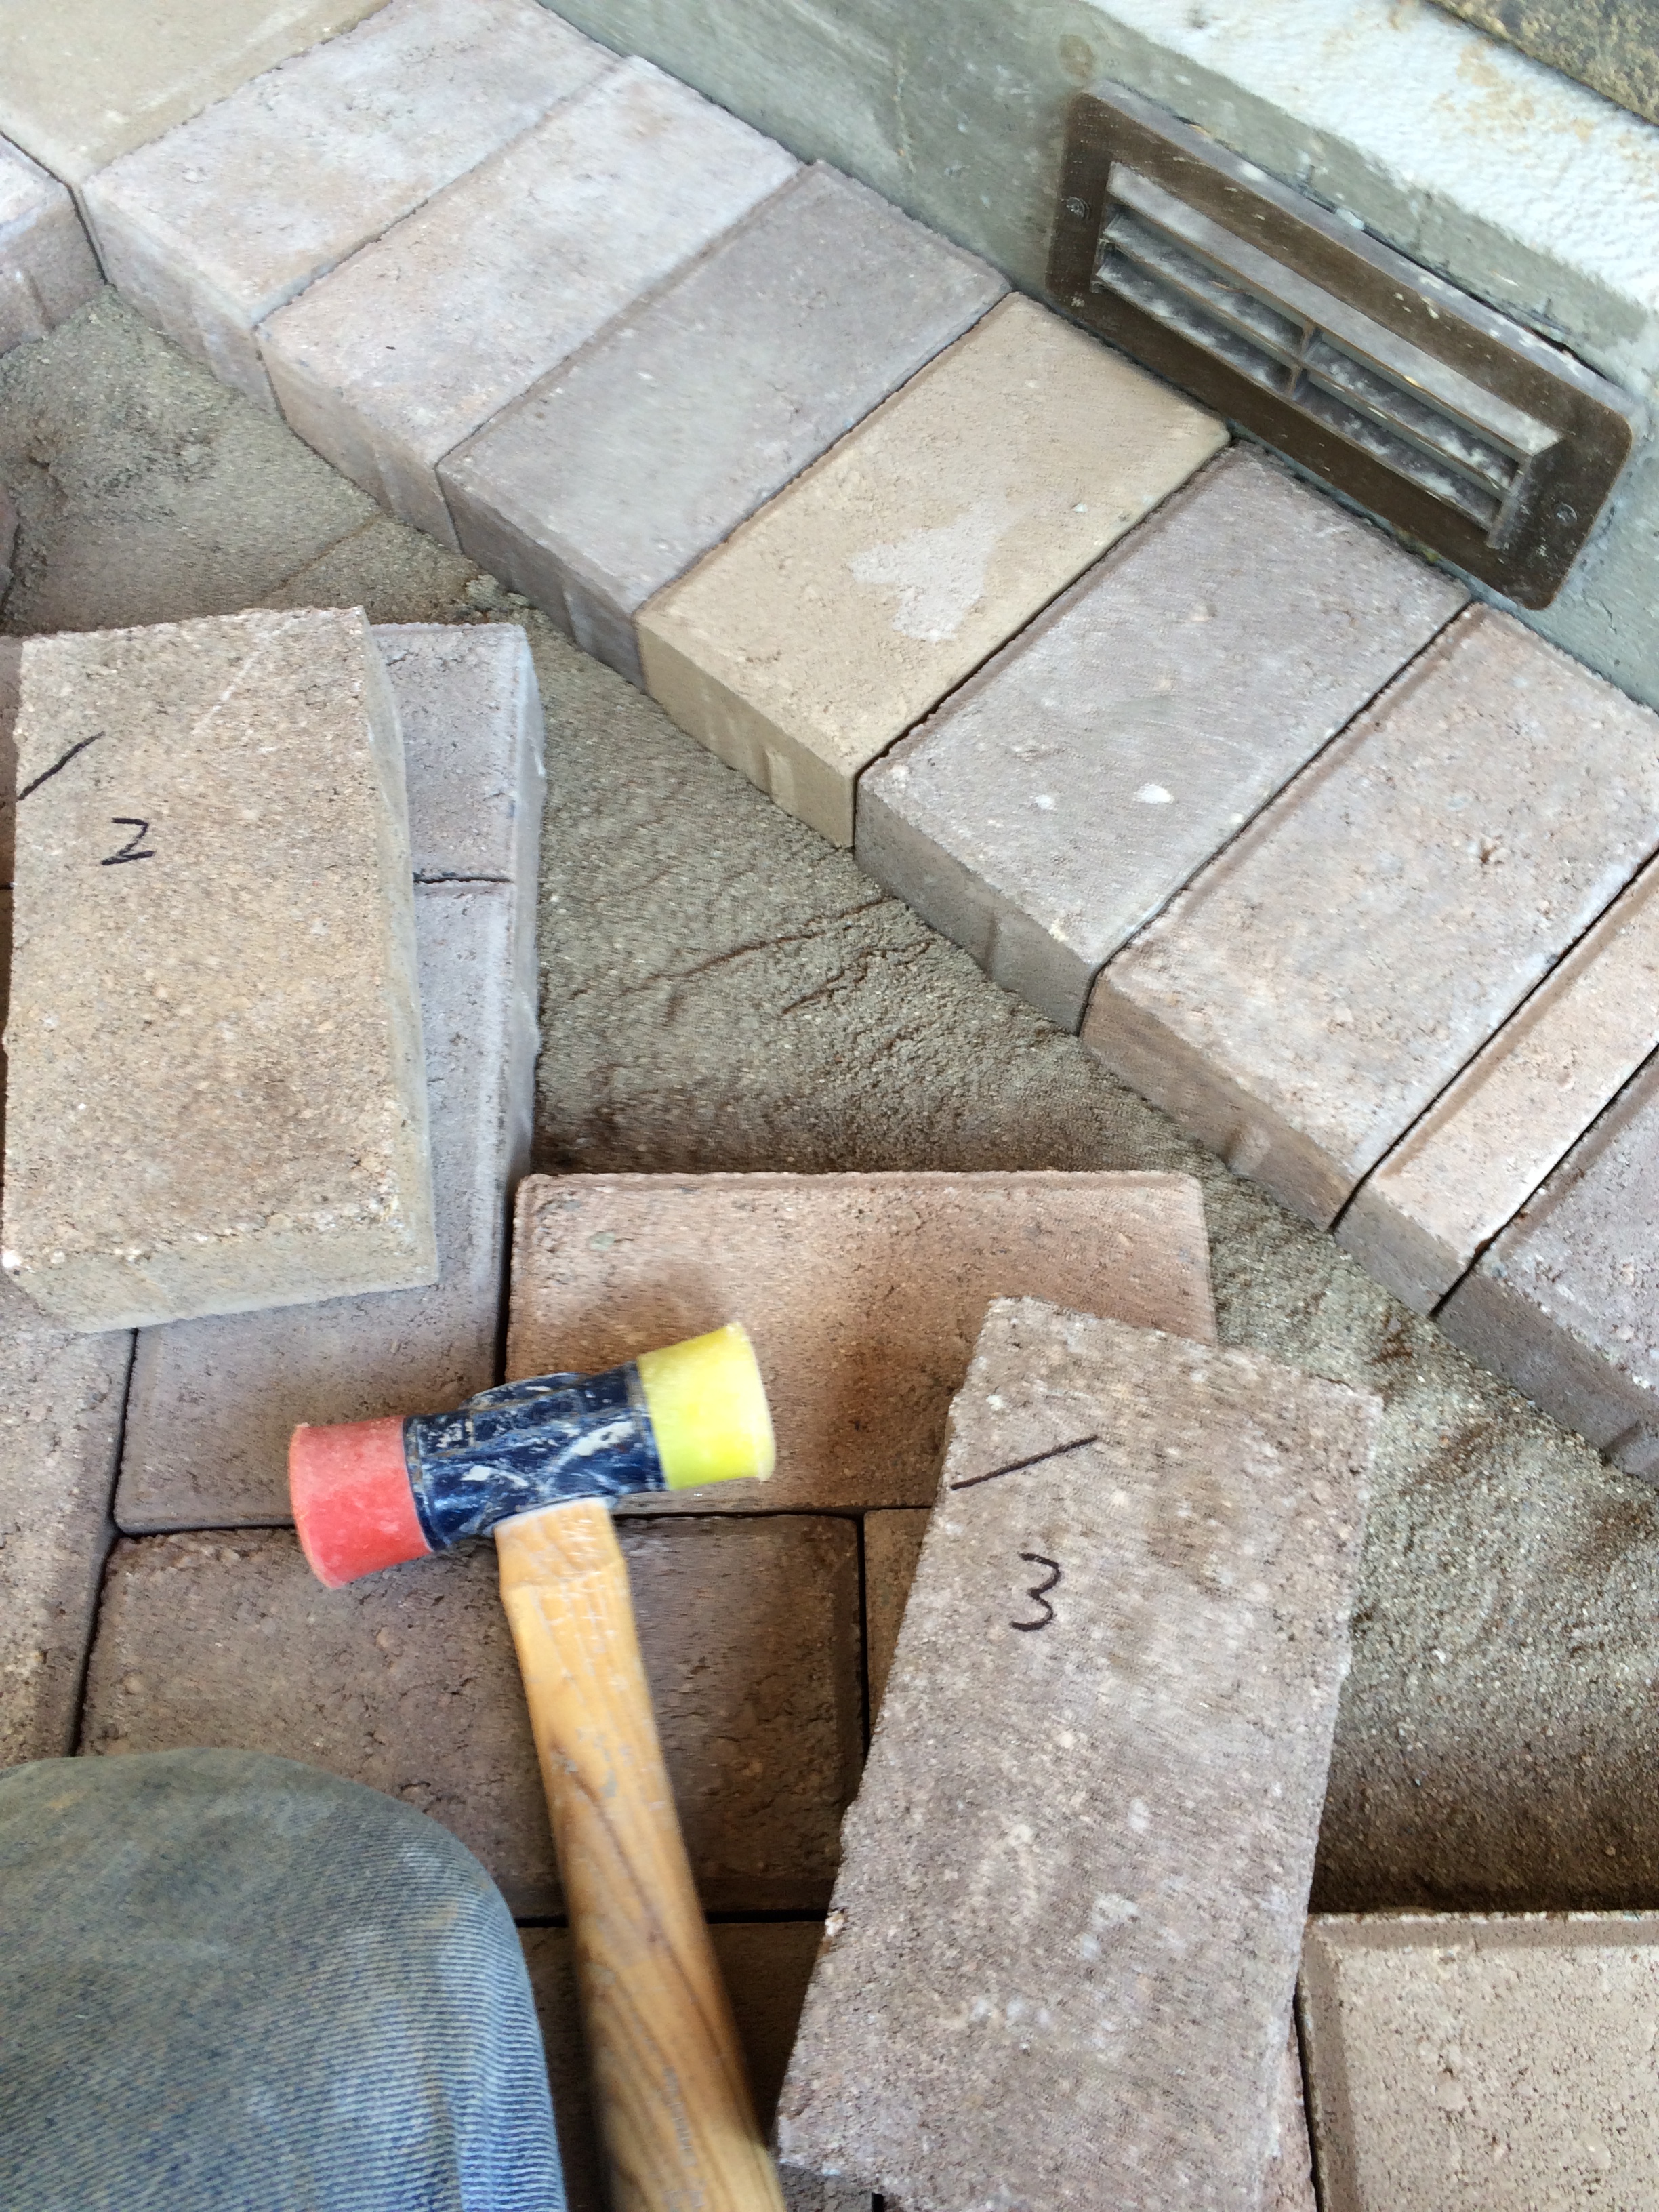
It turns out that laying the pavers, as whole bricks, is only half the job. The other half comes when you have to cut the bricks to fit along the edges and any other protuberances, such as post foundations and drainage grates. This is where a diamond blade wet saw comes in handy. Although one can dry cut the bricks with a grinder, the wet saw makes the cuts much more accurately, resulting in a very nice, professional look. The cost of renting this type of saw is totally worth it, especially when compared to the effort you will expend in putting all of the pavers in. The technique is to fit a brick where it would normally go, and then mark where it contacts the edge with a sharpie. Turn the brick over, draw a line between your two marks, and you now have your cut line. I also number the cuts so I can cut in batches to save time, yet keep all of the pieces organized. You’d be surprised how much they all start looking alike! Remember — mark the BOTTOM of the brick. Having a bunch of numbers on the top of your bricks will elicit some uncomfortable questions by your guests after you finish.
Step #1: Line up your bricks.
Step #2: Mark where the brick intersects the edge.
Step #3: Connect the marks to make a line.
Step #4: Number your bricks so you’ll remember where they go.
Step #5 Cut the bricks. See how handy the numbers are?
Step #6. Set the bricks in place. Looks nice!
Now that the bricks are in place, they should be set into the sand base. This is best done with a plate vibratory compactor. This is a little like a lawn mower, except that it’s heavy and has some weights that rapidly spin, causing the plate on the bottom to buzz in a heavy manner. This is, perhaps, one interpretation of getting “heavily buzzed”. At any rate, the bricks will settle nicely into the sand base and start to lock up with each other, stabilizing the entire assembly. That’s all good, but in order to completely stabilize the structure, you must add sand. These pavers are specifically designed to have small (1/8″) gaps between them — in fact, there are little tabs on the sides of the brick to optimize this spacing and keep it uniform throughout. Because the gap is small, and the friction of the sand is what is used to lock the pavers in place, it is important to use “joint sand”, which has the right grain size and sharp edges. The process is to spread the sand all around, sweeping it back and forth a bit to get it to go into the gaps, and then take the plate compactor and run it over the bricks again. This will shake the bricks and the sand will rapidly and completely fill the gaps. (Heavily buzzed with “joint” sand — hmmm…. maybe that’s what makes them act like bricks.) You’ll want to sweep and vibrate one more time to make sure the gaps are filled all the way to the top. You will likely now have some excess sand on top, so it will need to be swept off. I used the extra sand to make a sandbox for our outdoor cat, Tiger.
Here is our outdoor cat, Tiger, in the supervisory mode. He is a feral cat that we tamed, and he comes in to eat and when the weather is bad, but we could never litter train him. So….
Tiger’s Toidy. A pristine sandbox in a secluded, private location. It pays to be a cat!
Finally, the last step: sealer. Sealer is important because (a) it penetrates the sand, discouraging ants and other bugs from coming up through the gaps between the bricks, and (b) penetrates the surface of the bricks to make the cleanup of spills, including such things as grease from your grill and bird poop, much easier. Putting on the sealer was not particularly difficult, but it was important to flood the bricks, and especially the gaps, to get good penetration. I used a roller attached to a pole and it worked pretty well.
This particular job took a lot of time, particularly in some unseasonable heat, but I took some vitamins and had a few extra cups of coffee, so the following video outlines the process from start to finish.
As a bonus, I now have completely cleared my driveway which, for the past 18 months, has served as a lay down area, particularly for the bricks and sand I harvested from the original patio. I finally feel as though my outside projects are near conclusion. Here are some more pictures:
Driveway with all the junk and lay-down for the patio. I removed the patio bricks 18 months before and they’ve been sitting there until now when I could reinstall them.
After 18 months, the driveway is clear and I can now park my cars! Unfortunately, this is a temporary situation as I will be starting on the inside of the house and will need this space for another lay-down area. 😦
So, the next few steps will be to finish off the outside, and that begins with a terrific outdoor space called a “catio”. More to follow….
Thus far, most of my posts have been focused on progressing the home remodeling project as a whole. However, as with any thorough home remodeling, there will be a few things that will be seeming unrelated to the main project, and these stem from the inspections that occurred in leading up to the start of the overall project.
In this example, I had a plumber come in and inspect my domestic water drain lines (not to be confused with site drainage for runoff). I actually did this quite a few months ago because I wanted to know if I had any major work lurking in the background and would have to perform additional digging to fix my drain lines. The good news was that my drain lines were in excellent shape. No clogs, build-up, roots, or other “growies”. In fact, I did not need a drain cleaning! However, there was one part of the drain, right below the kitchen sink, that had a crack and was leaking. My plumbing contractor (Eastlake Plumbing)came in and did an AWESOME job fixing the drain. In fact, they re-routed some of the drain in order to fix a problem that the original builder left behind. However, I had to cut a hole in the stucco on the outside wall near the drain in order to give my plumbing heroes the correct access. That left a big hole in the side of my house. I wasn’t sure exactly how to fix it, but I had bought some cheap plywood and some goop with the hope that I could just seal it up and have it done properly when I hired a stucco crew to stucco the addition and “fix” some other problems.
I had deferred this project because I wanted to keep my momentum going with the brick wall and front yard. That turned out to be a good move because, lo and behold, my favorite YouTube stucco guy Kirk and Jason Girodanos posted a video on how to do a stucco repair after a plumbing job. He gave me some key pointers, but more importantly, showed the job from start to finish so that I had a really good example from which to proceed. I bought my materials, and then finally, this past weekend, had a chance to actually start on this project.
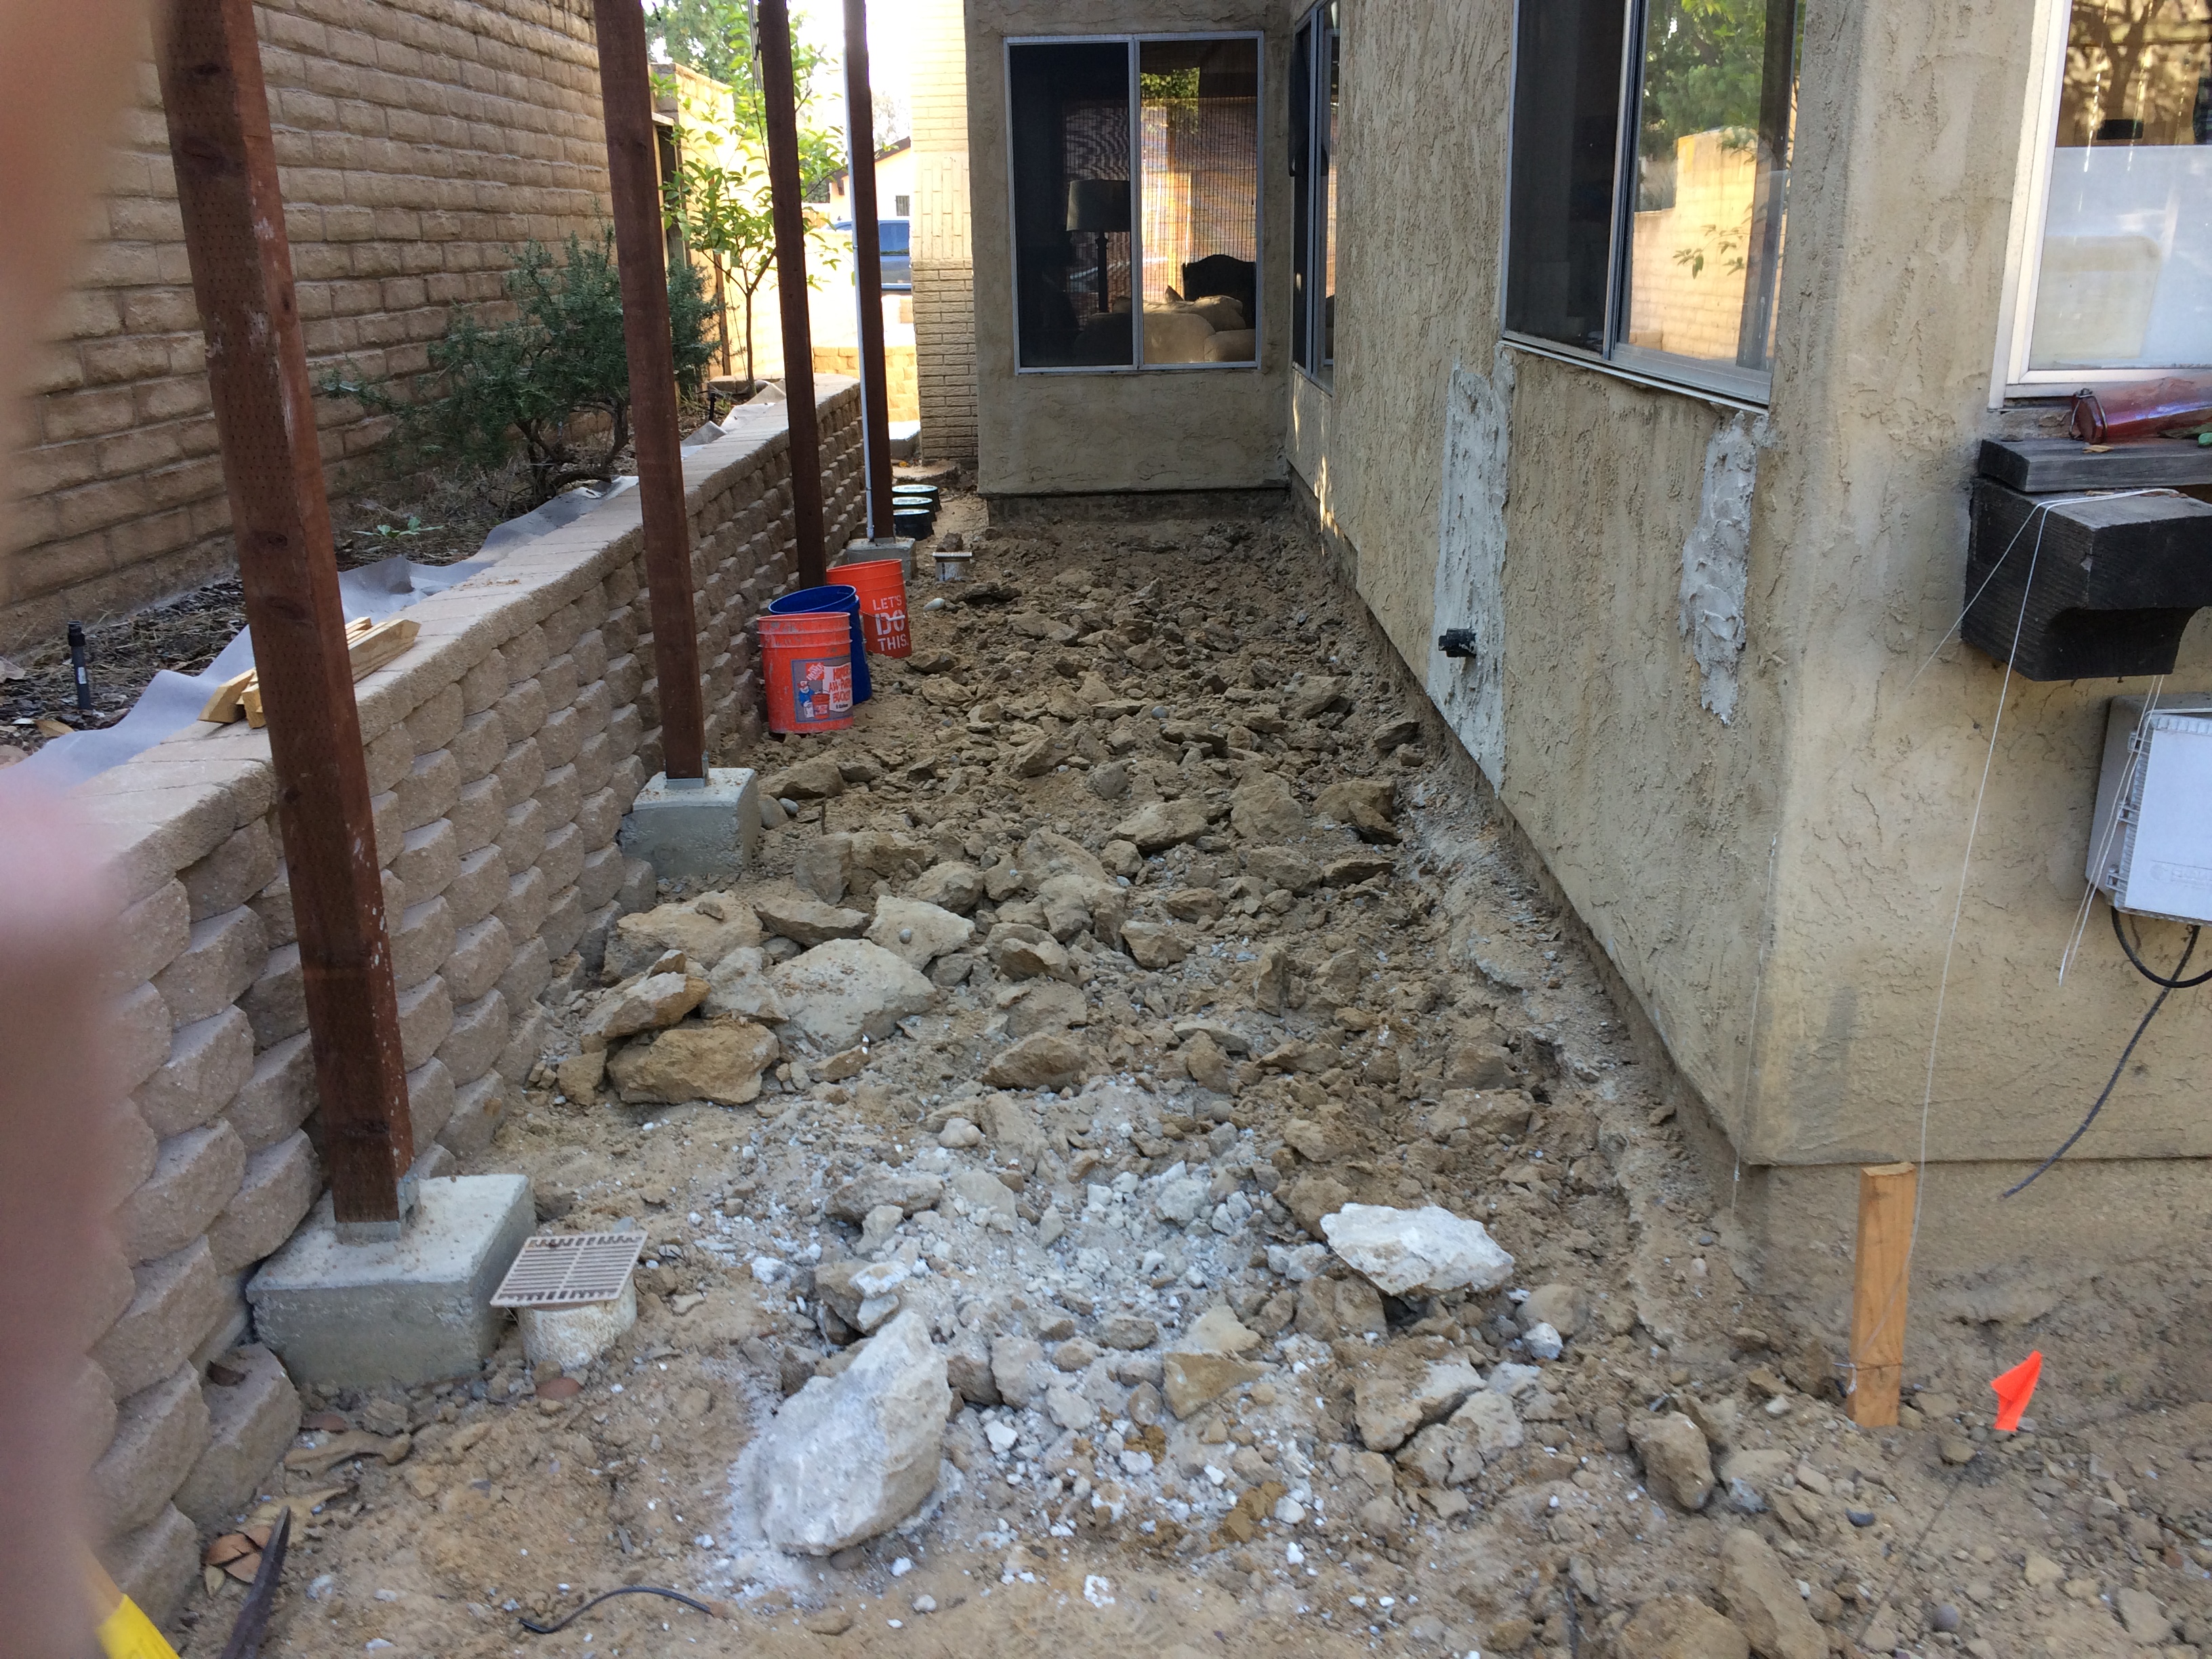
The first thing to do is to chip away the stucco from the perimeter of the cut so that you can slide some building paper underneath. Unfortunately, as I broke away stucco and exposed the underlying structure, I found that it had been adversely affected by the water which was constantly leaking out of the drain. Plus, for whatever reason, the original stucco only had one layer of building paper underneath, instead of the required two layers. So I had to remove a lot more stucco than I planned on in order to expose solid material from which to work with.
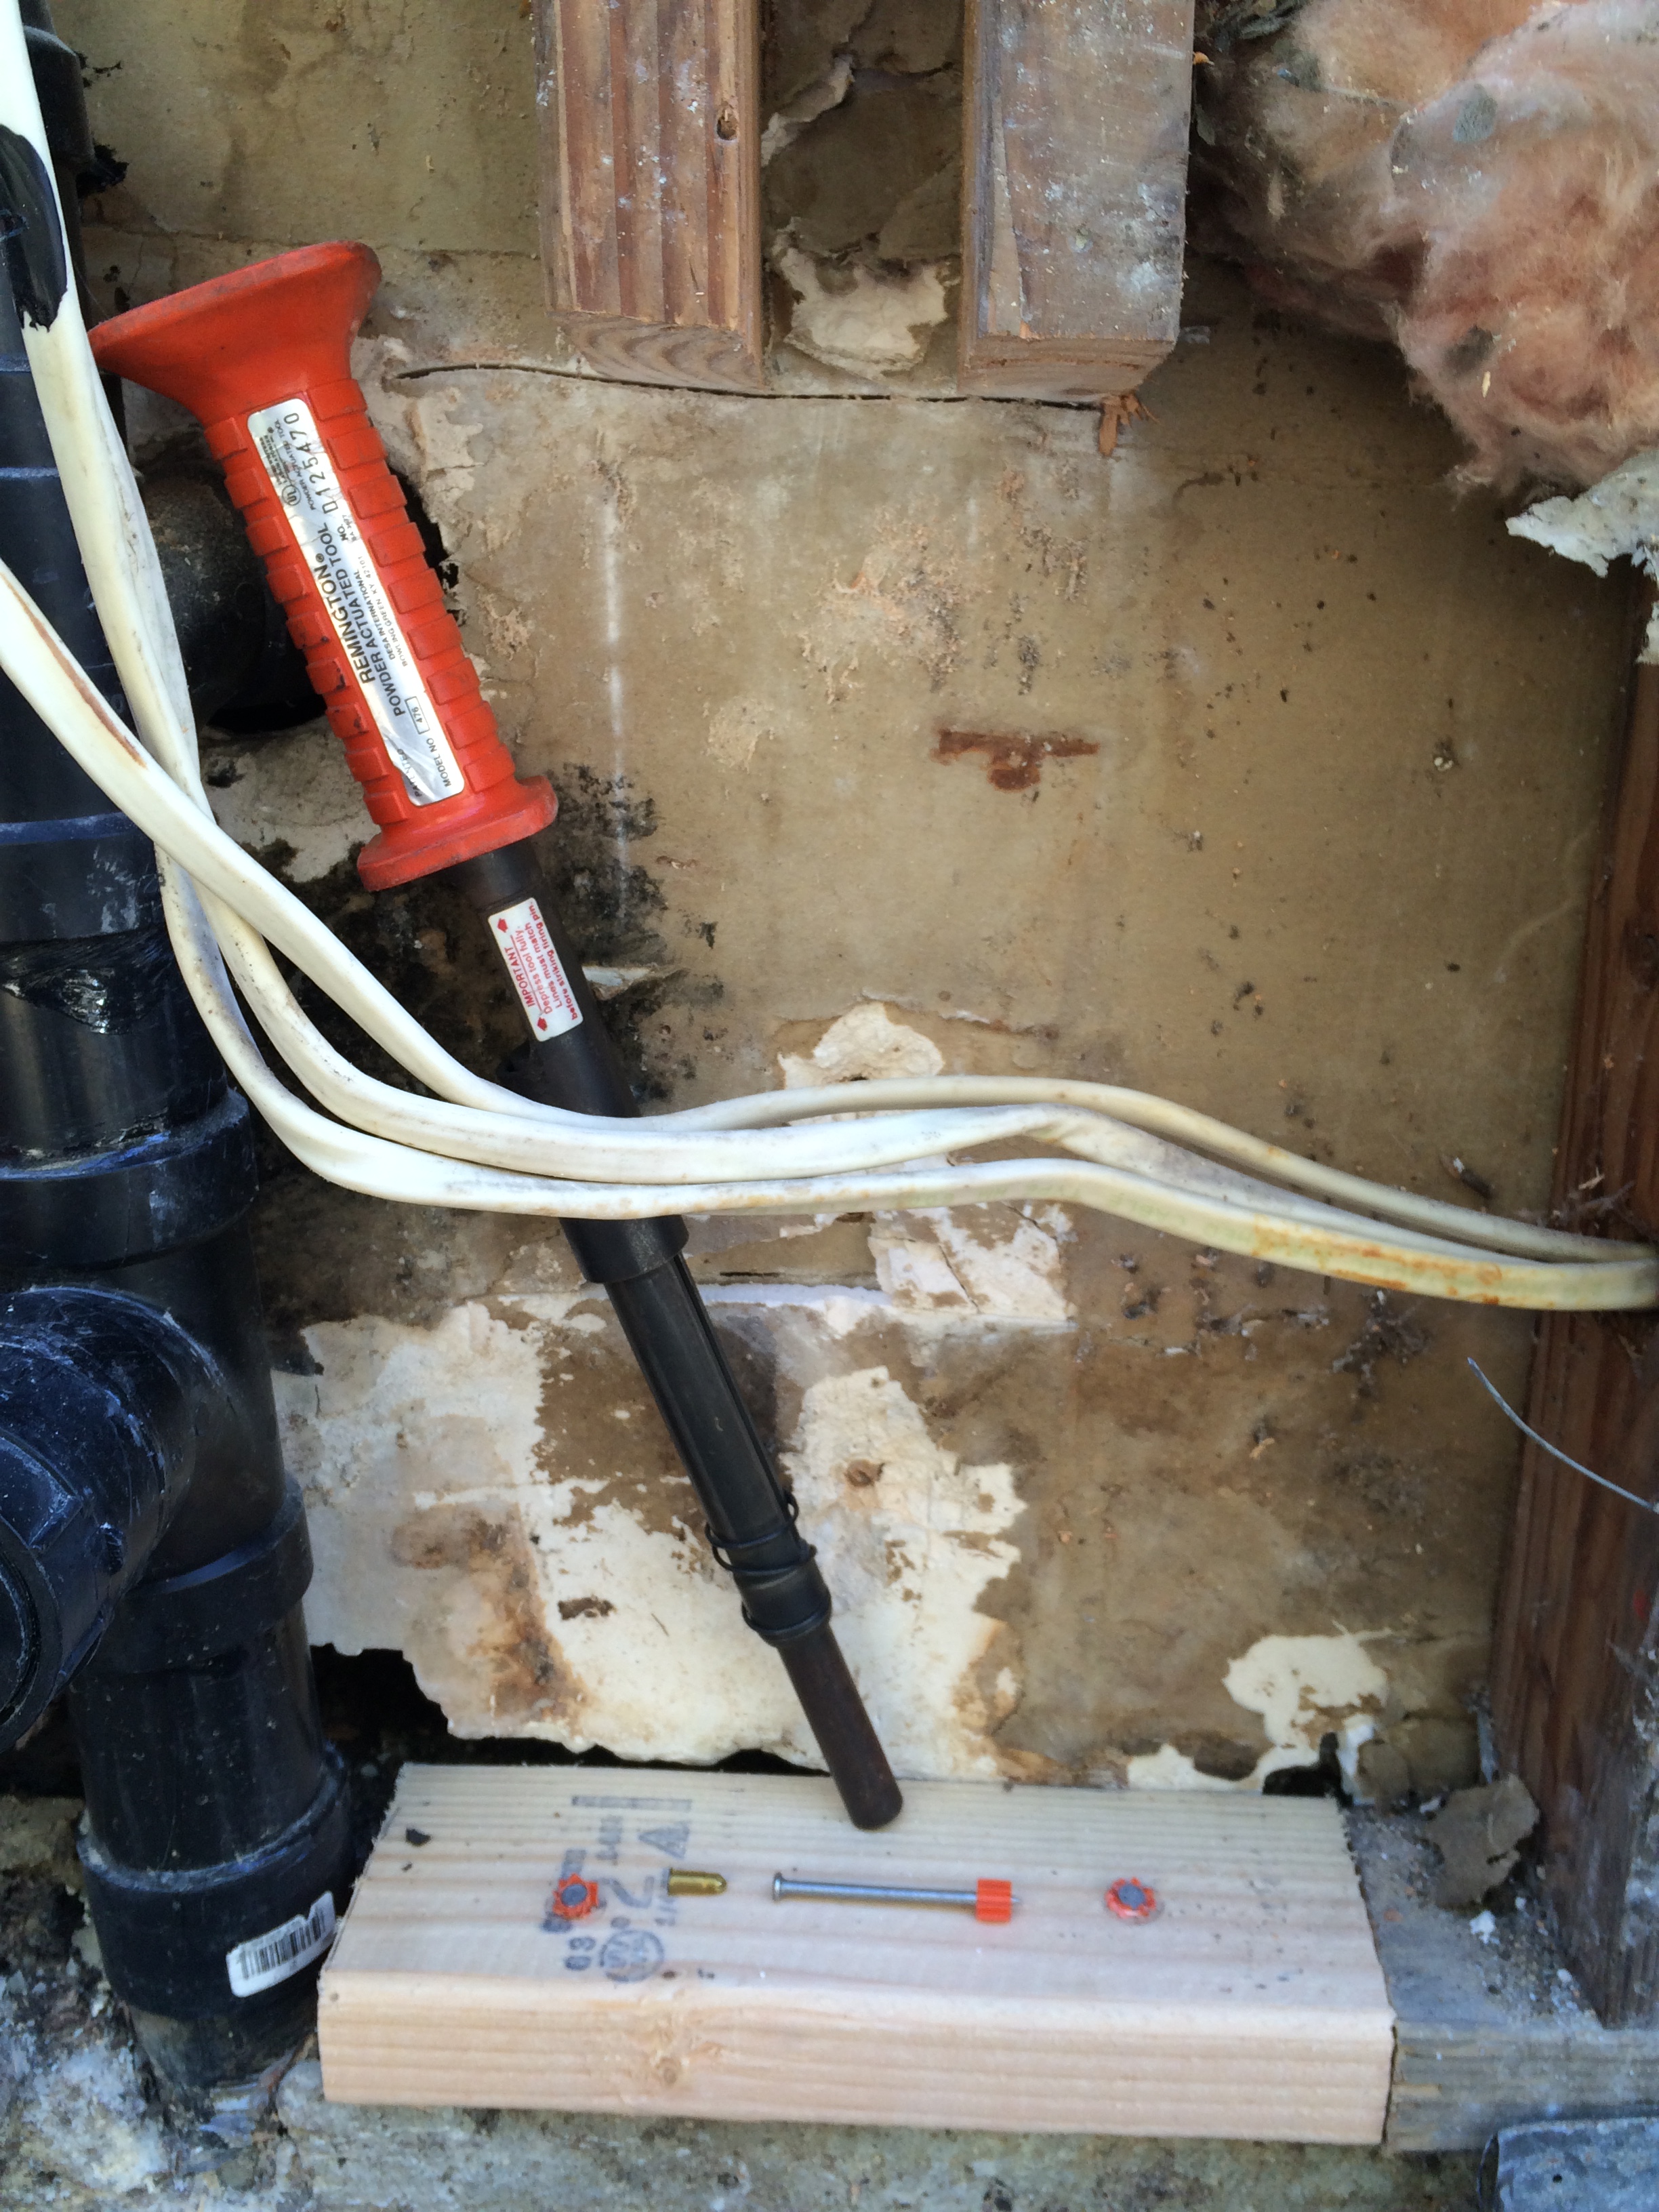
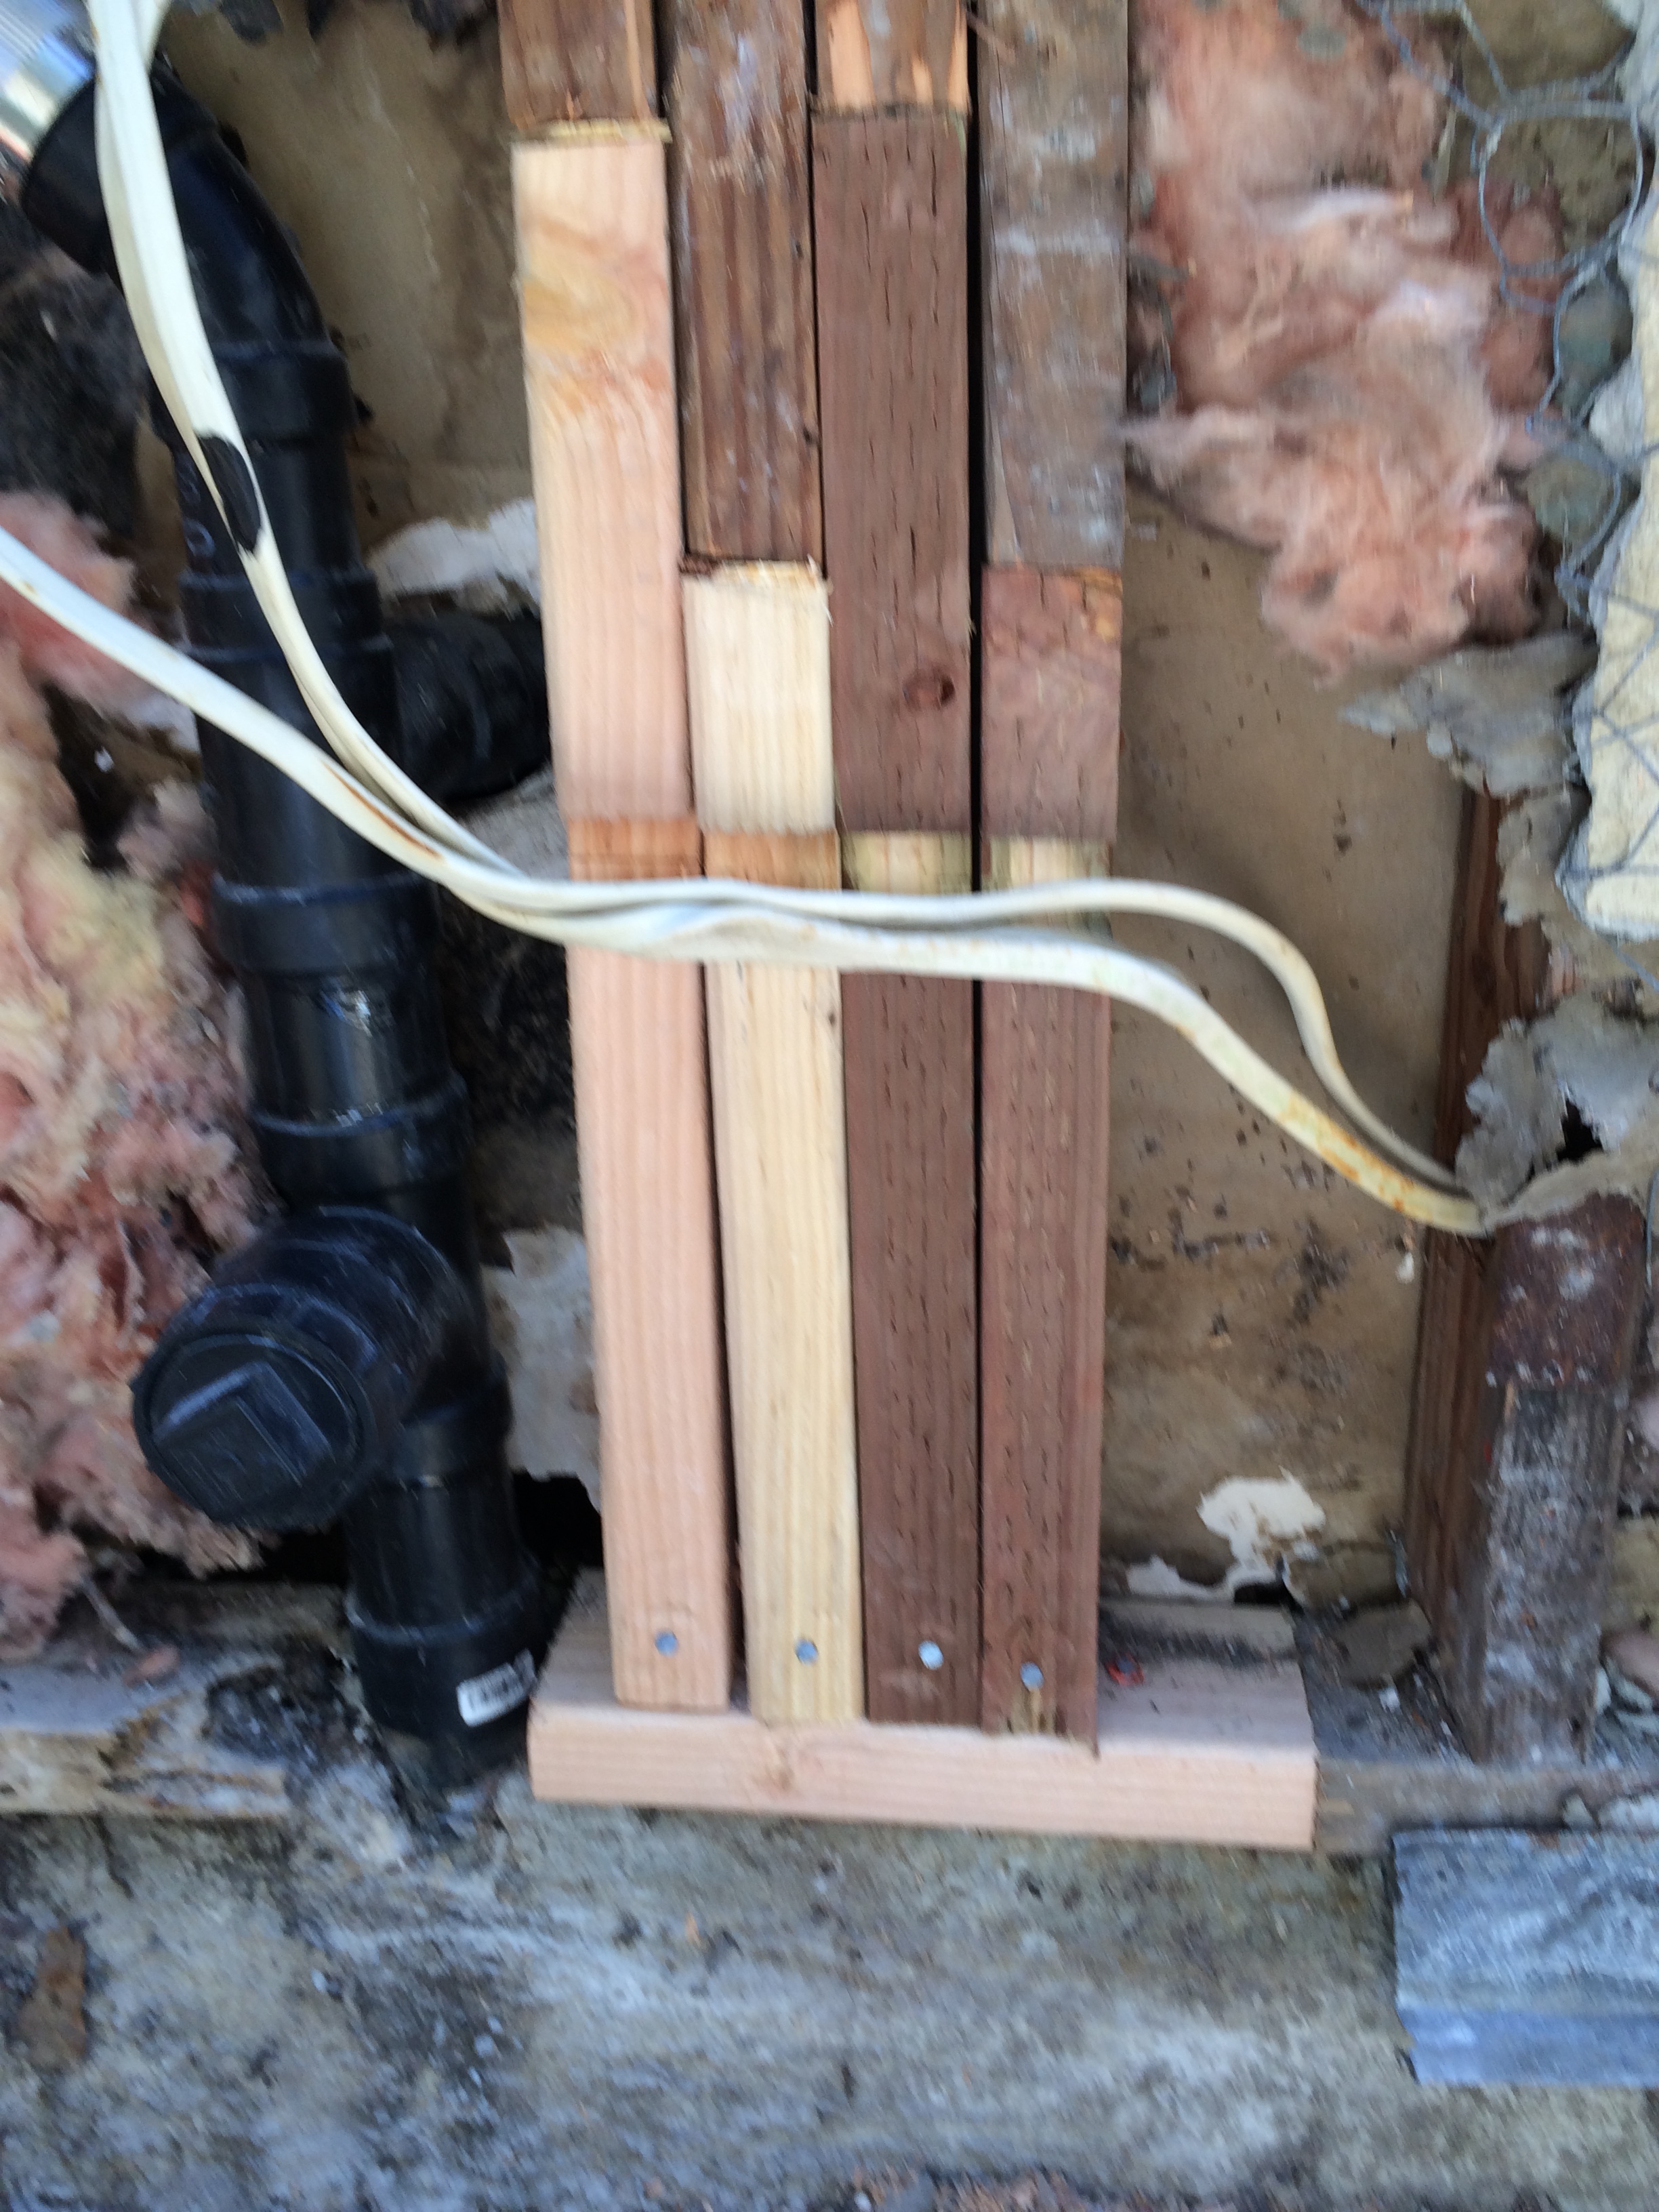
The other problem was that there were several studs, plus some of the sole plate and the weep screed, which were totally rotted out. Thus, I had to deal with the structural issues first, before I could move forward with the stucco repair. At least my carpentry skills are fairly well-developed, so I was able to cut away the offending materials, and rebuild the ends of the studs by wedging in “cripple” studs at different lengths to form what looks like a finger joint. This gave me some resistance to shear forces, in addition to the gravity forces which were taken by a new sill plate that I attached to the foundation using a “gunpowder” hammer. I also had to cut notches in the new studs to accommodate electrical wiring and then secure them with nail plates.
Demolition is complete Note how the rotten sole plate and studs are removed, and that I cut the studs to make interlocking “fingers” that will provide lateral strength.
Rotted out studs. Like swiss cheese!
New sole plate installed. This is a “powder activated” hammer, meaning that it uses a .22 caliber shell to power a hammer. The nail has an orange centering bushing that holds the nail in the “muzzle” of the hammer. You whap the end of the tool with your regular hammer, and that fires the shell and drives the nail right into the concrete. I bought this years ago for attaching furring to a concrete wall, and I’ve used it countless times since. A must-have if you want to attach something to concrete.
Replacement studs, interlocked, nailed, and notched for the electrical wires.
Nail plates over the wires. Required by code, but also did a good job of keeping the wires in place. Note that I’m fitting the building paper.
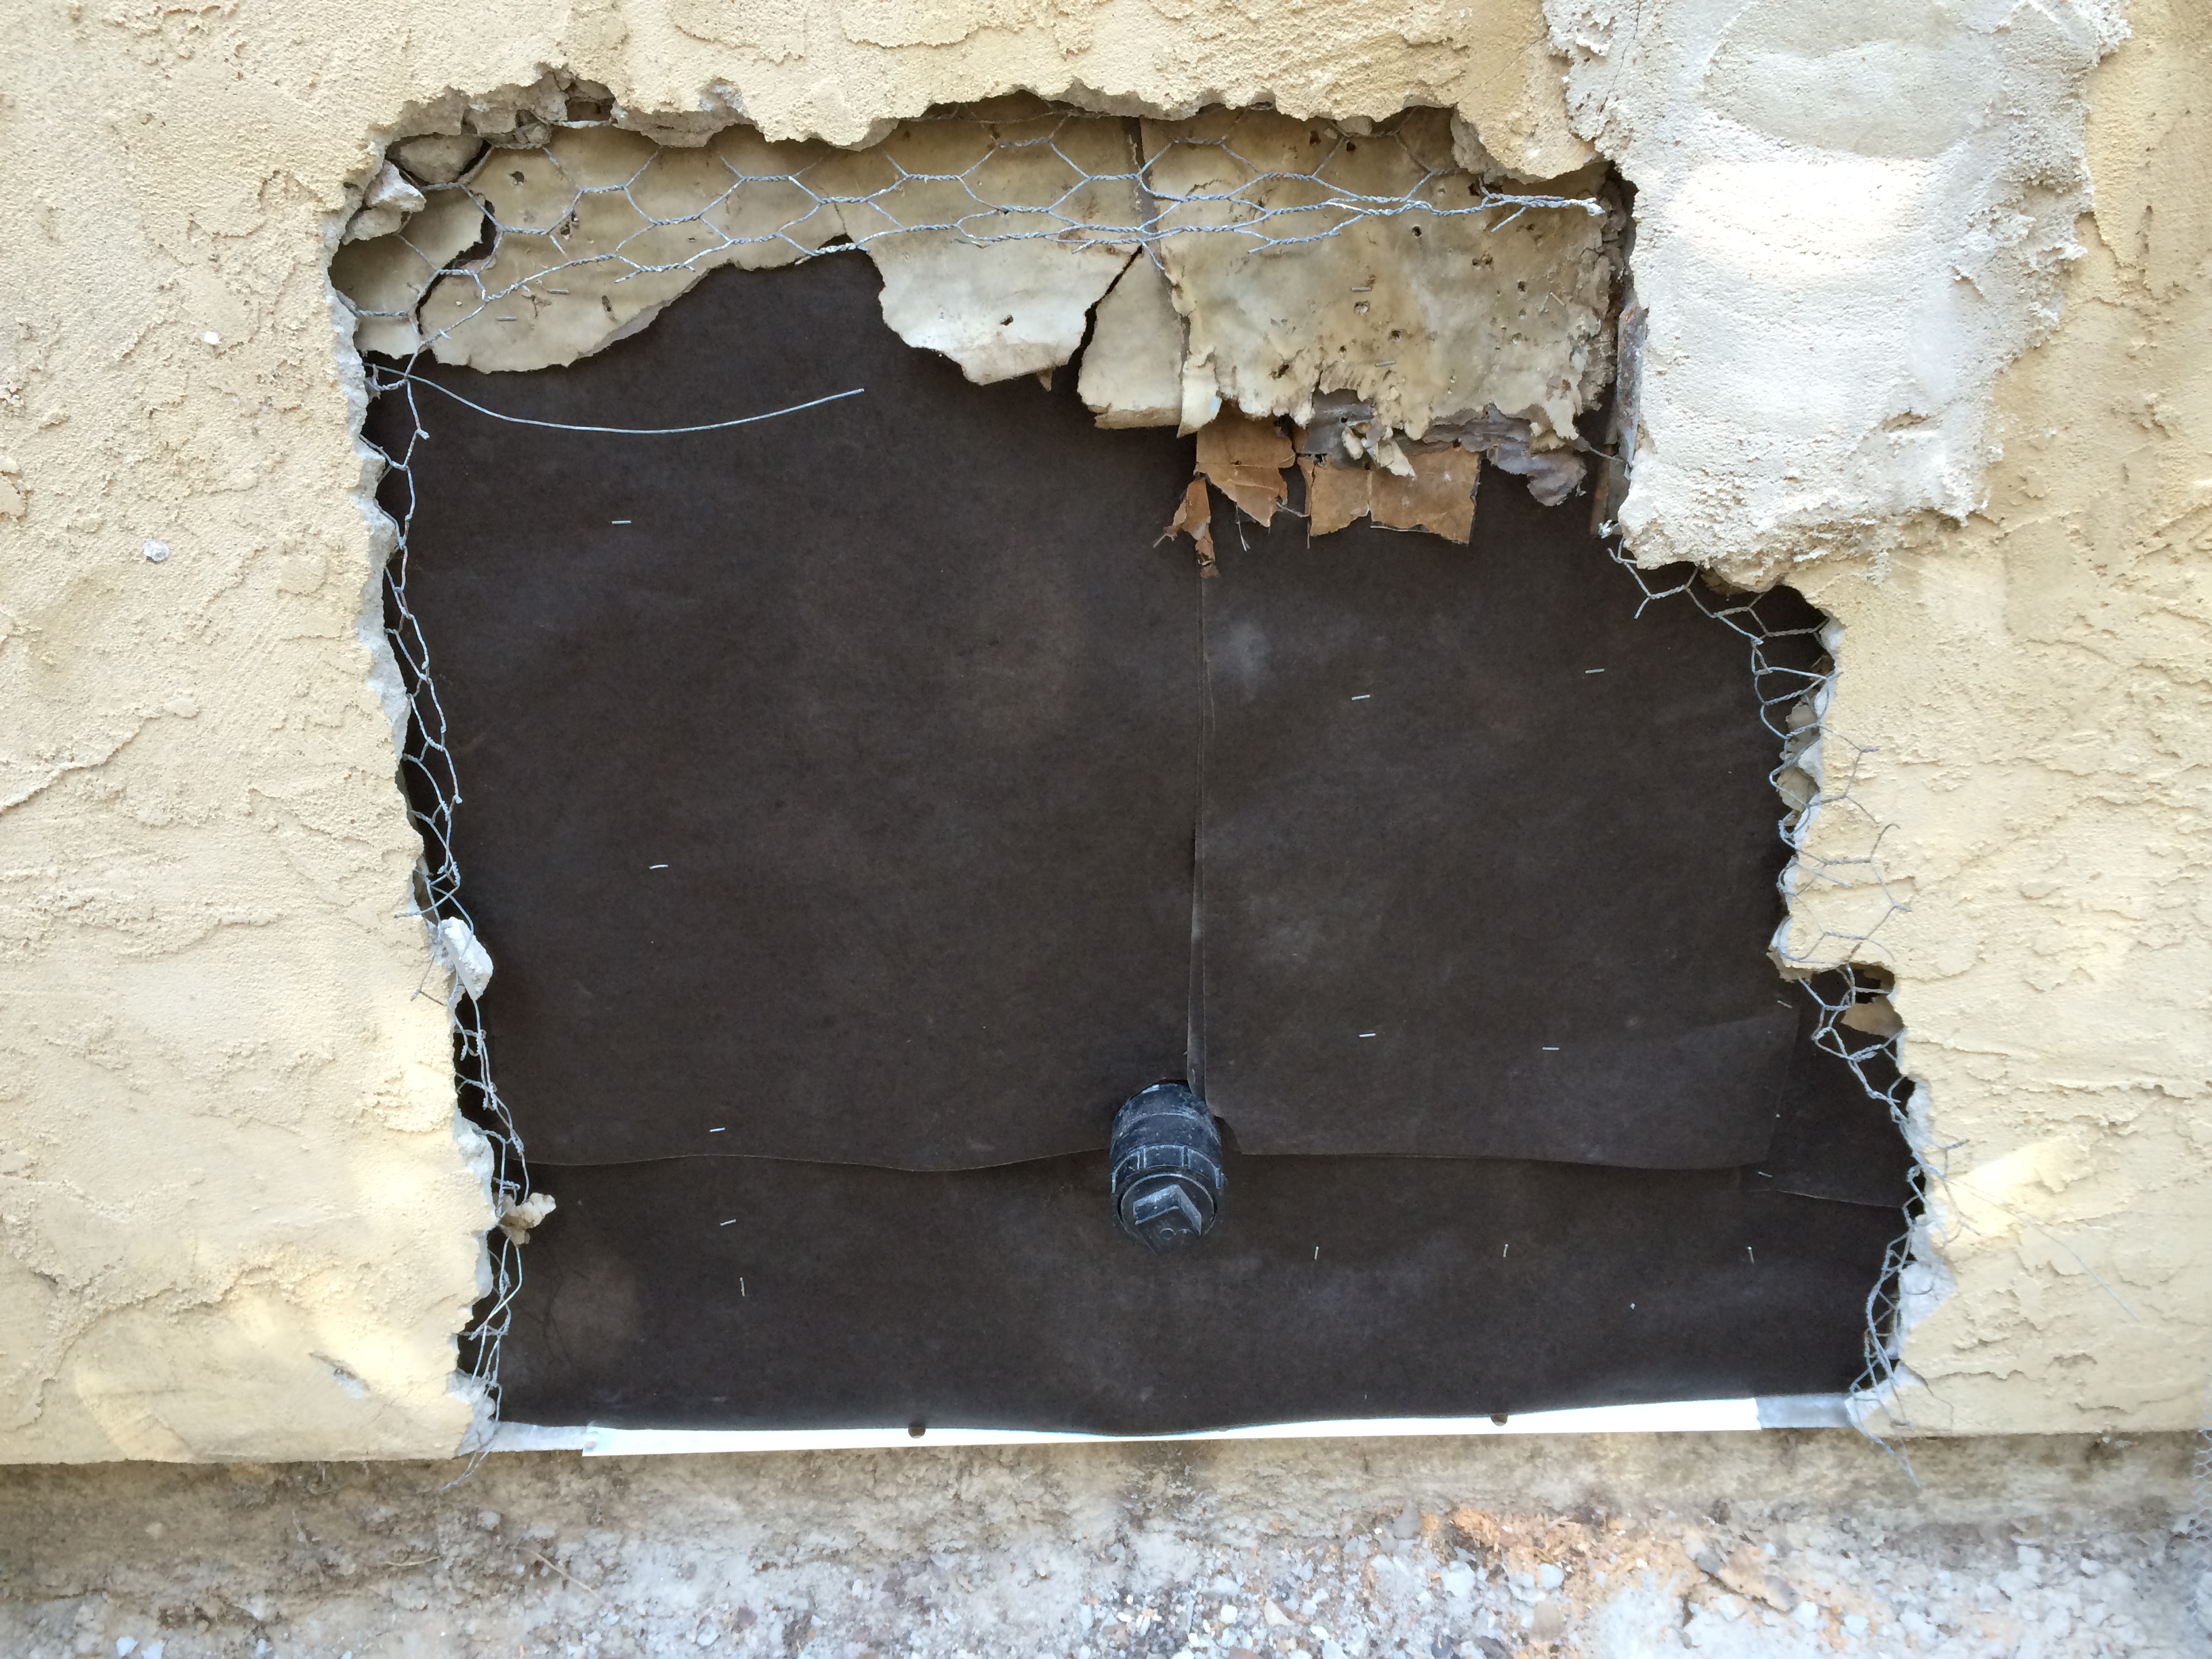
The next step was to shove 2 layers of building paper underneath the original building paper at the top edge of the cutout. I thought this would be a major problem, but it turned out to not be so bad. For me, the key was cutting everything the right size and breaking it down into a few separate sheets to make it easier to handle and position.
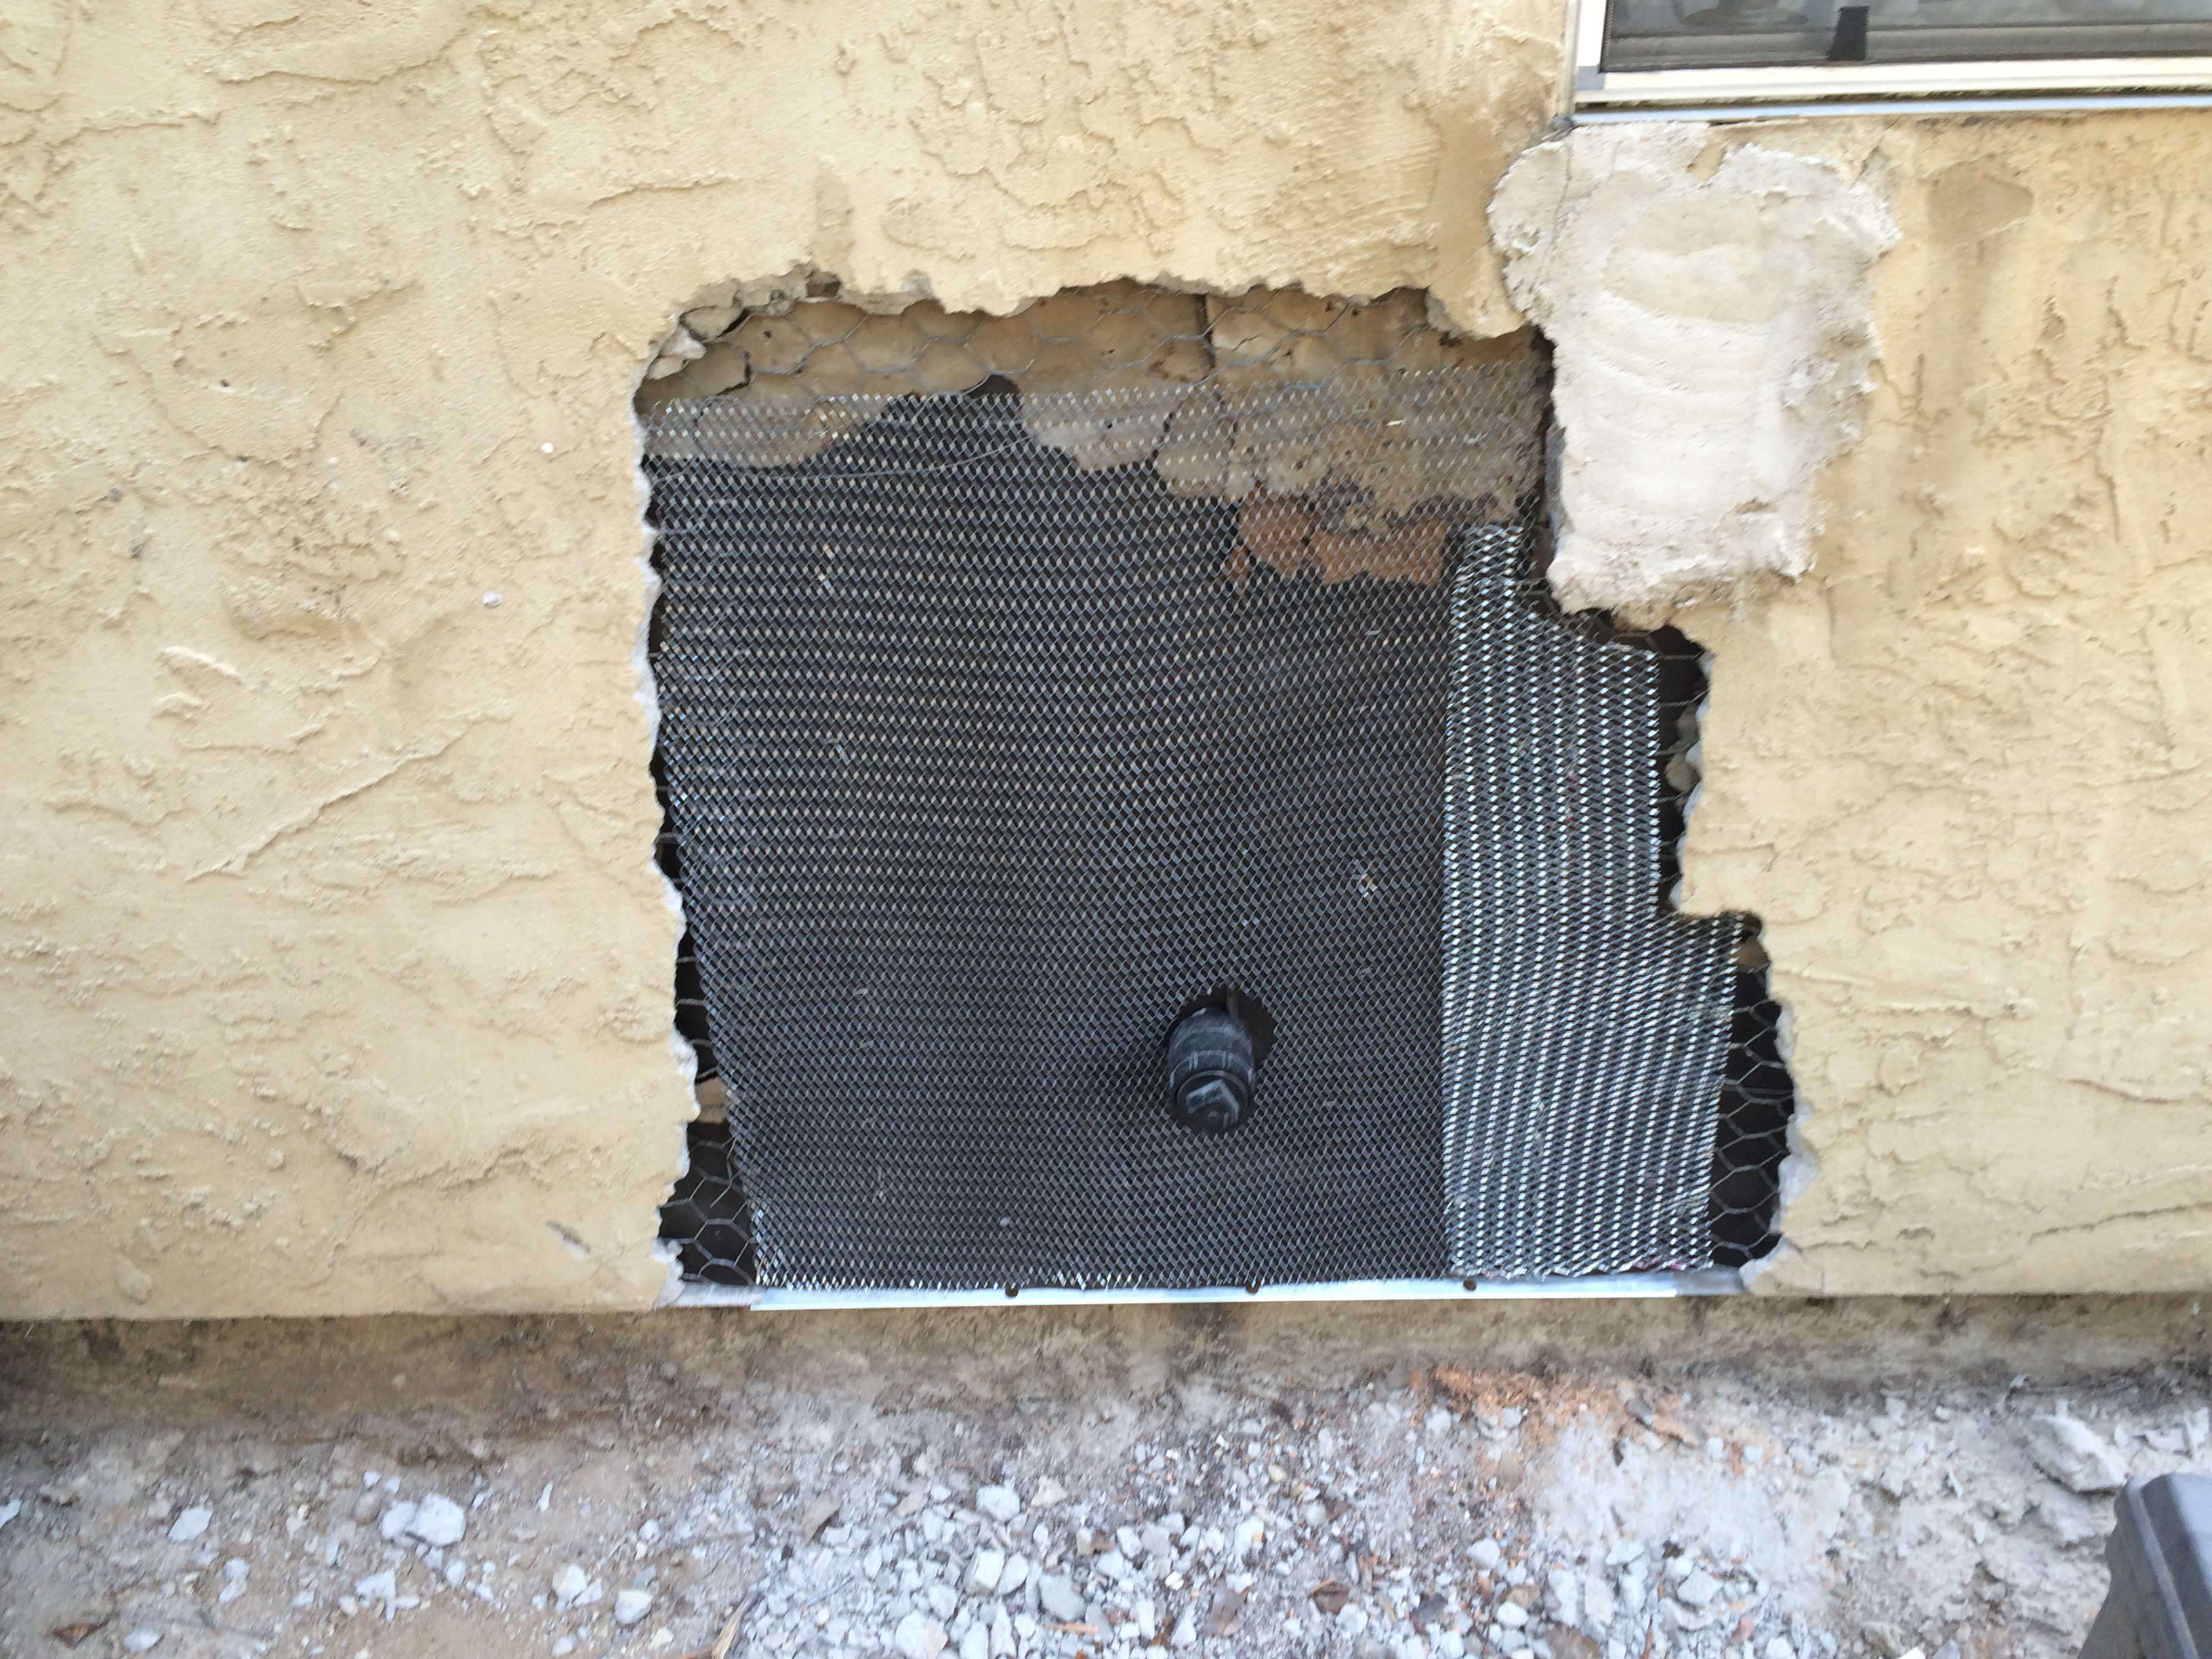
From there, I had to staple on some lath. I got this lath at a discount because it was folded over and wasn’t a continuous sheet, but for my purposes it was OK. Again, cutting and fitting took several iterations, and I used a number of individual pieces to make things easier to work with. And a lot of staples.
Building paper in position.
Lath installed. Ready for stucco!
Finally, time to put on the actual stucco. I bought a couple of boxes of “stucco patch” which has only a 20 minute working time, so ya gotta work fast! I used my “eggbeater” mixer and a 5 gallon plastic bucket to mix the stucco and then went to work. Kirk and Jason Girodanos use what is called a “pool trowel” and that worked like a champ! So, I got everything on, but I ran out of stucco mix, so I have a big concave area in the wall where the patch is. NBD because (a) the patch is fully functional (waterproof and no holes), and (b) I’m going to have a crew come in and stucco the addition, so I can have them go around the house and fix all of my other stucco problems. Honestly, I don’t know how to apply the finish, and I have other demands on my time. Again, this is an example of making smart decisions about what you do yourself, and what you contract the pros to do. When it comes to portland cement products, I will typically defer to a pro who has a crew that can get the job done before everything turns into an unworkable and ugly slag heap. I speak here from experience.
Stucco in place. Looks like crap, but it’s functional and it’s concave so the pros can cover it up and make it look nice. I’m calling this the “brown” coat for obvious reasons.
As I was in the later stages of planning, and after the home inspector I hired pointed out that I needed to install a proper drainage system in my yard, I came to the realization that I would have to move a LOT of dirt. In a previous blog entry, I mentioned the fact that I rented a “skid steer” (or Bobcat) to do the demolition of my concrete and retaining walls. Now, with another long weekend at hand, it was time to rent the beast again and do some real digging.
I remember from my childhood an interest in heavy machinery doing all kinds of excavation and grading on a miniature scale in my sandbox. With my Tonka Toy grader and bulldozer, I was digging awesome ditches and making the grade so smooth that you could calibrate your level on it. A nice memory, perhaps, but it takes a little time to get the hang of operating one of these beasts so it doesn’t hurt you (it can), and produces the desired result.
First, safety. It is important to get hold of an operator’s manual and read it. Although the machine is very intuitive to operate, there are some basic safety concepts which must be followed. Other than doing dumb-ass stuff that the machine isn’t designed for, like using the shovel as a working platform, you really have to remember one thing: BALANCE!!! ALWAYS keep the HEAVY end towards the uphill side. If you have a full bucket, then forward is good. If you have an empty bucket, then backward is the preferred arrangement. I made a couple of mistakes along the way and, because the machine is very compact, the center of gravity (CG) can shift quite a bit. It’s a tradeoff between stability and compact size. Fortunately, I did not tip over, but doing wheelies with a 2 ton machine can be scary. Interesting side note: The machine has a “roll cage” which the manufacturer insists that you do not modify in any way. I wonder if that’s because the occasional operator became over-enthusiastic and found themselves upside-down! The other factor affecting balance is the height of the load. The arms can raise the load above your head in order to dump it into a truck. But if you carry the load that way, you are in serious danger of flipping over. Of course, you also need to have personal safety equipment. A hard hat, because you can actually dump crap on yourself (I did), safety glasses (your eyes are vulnerable and too important not to take this simple safety precaution), earplugs because the engine is noisy and I didn’t want to listen to any criticism about my heavy equipment operating skills, and steel toed boots because your feet are important. If your feet get injured, then you can’t walk, and you then become an invalid. Take no chances!
Second, have patience and practice. I saw a lot of You Tube videos on how to operate these machines, and I learned a lot, but there is no substitute for experience and experiment. Start with a relatively benign environment where you have some room to move around, and some latitude to make mistakes. Try to do different operations such as cut, fill, load, and dump. Yes, you may spend an hour or two getting oriented, but the time spent is well worth it.
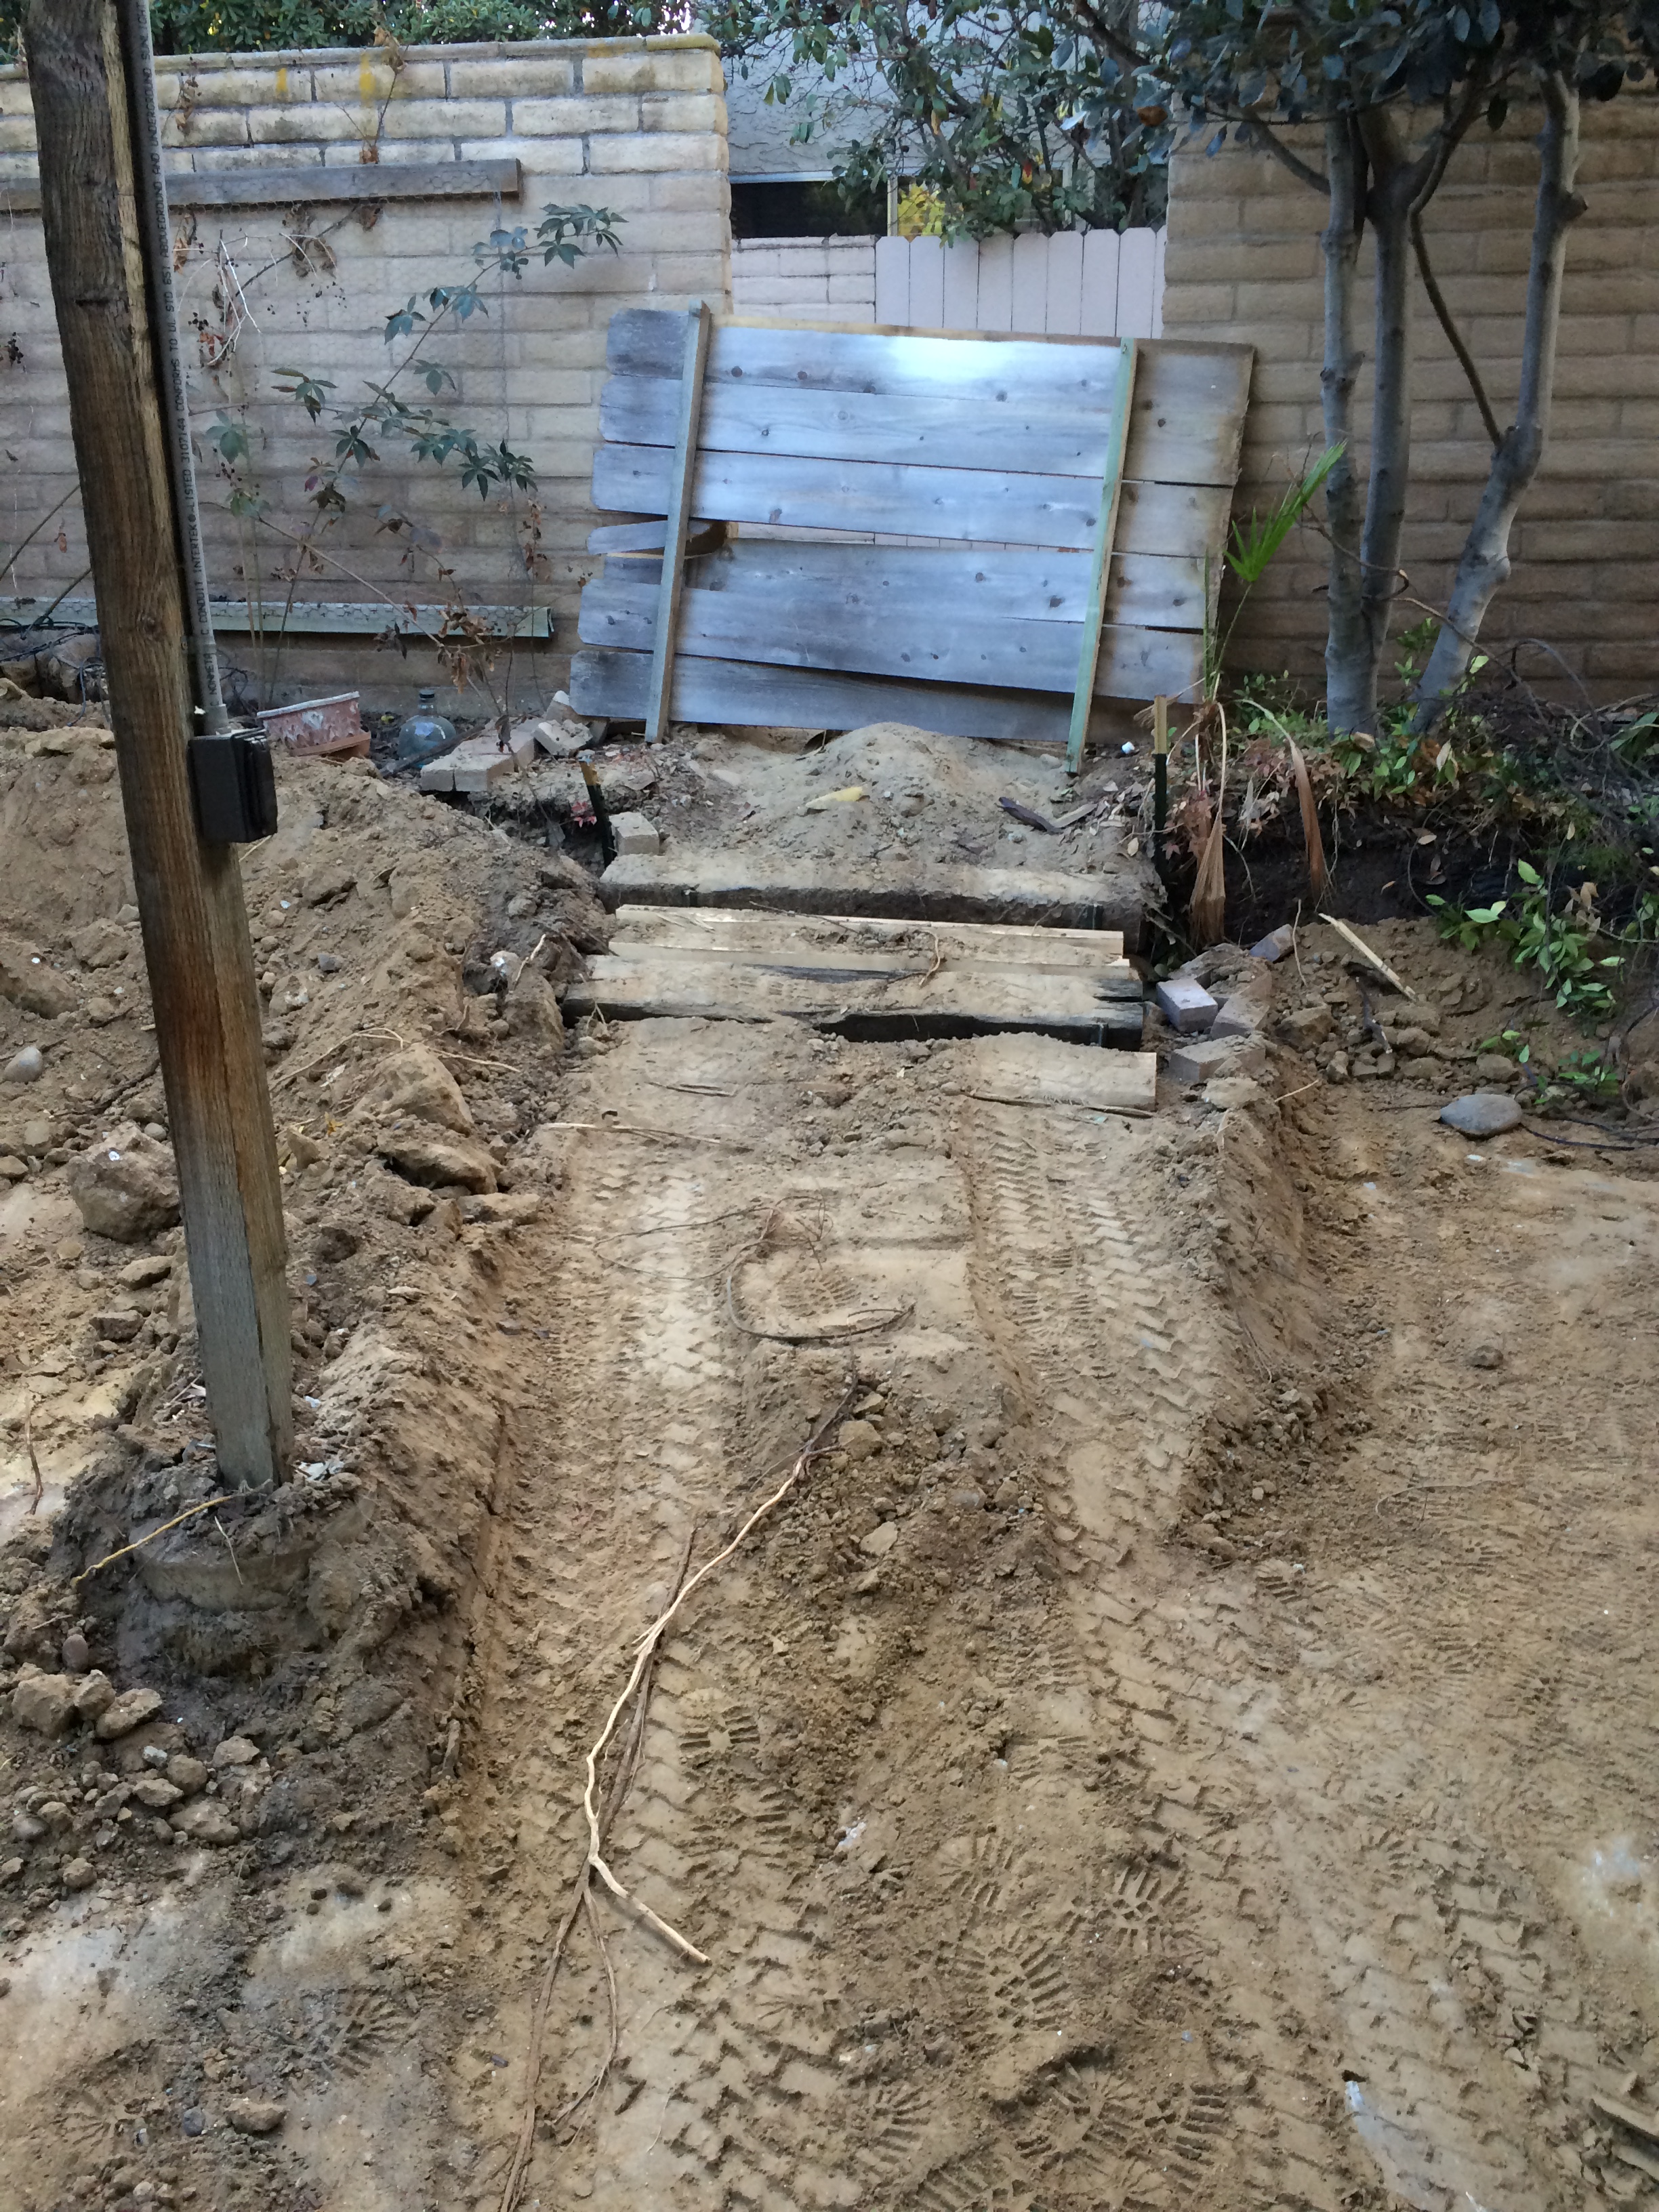
Third, have a plan. This means that you have to think through what you’re going to do given the topography and the desired end result. It’s more nuanced than just getting rid of a bunch of dirt, although you may have to do that at first. Where will you be able to dig? What are the constraints on my maneuverability? Most importantly (for me): how do I get this material out of the back yard an up a 30″ elevation? This last problem was not trivial. I had experienced two failures (detailed in a previous blog), so this time, I used railroad ties to build a “staircase”. I figured that if these ties could support a locomotive, they could support a measly skid steer. Turns out, that I was right. This solution stood up to numerous 2 ton trips. Here is a picture:
A Ramp That Works!
In the end, I learned how to get a full bucket (pile up your stuff, lower your bucket, and ram it while scooping the bucket (right foot) and lifting the arms (left foot). I learned how to cut (lower the bucket and aim down, push forward, but be careful about digging too deep). I learned how to fill (dump some dirt, and then lower your bucket and go backwards, then run over it a bunch to compact the dirt). Other variables include type of soil (this clay shit that I have to work with needs a jackhammer!), and proximity to existing objects (house, patio cover posts, trees….). Bottom line is that I did OK with establishing the grade (using frequent measurements), I got rid of the dirt that I think I needed to, and (most importantly) I didn’t kill myself or anybody else. I consider that a worthy accomplishment. Here some “after” pictures:
Side Yard… Lots of handwork BC the skid steer wouldn’t fit!
Nice grade for the driveway apron
Front yard. This was my practice place.
Backyard — no, I’m NOT installing a swimming pool!
End of a long day. Full dumpster, and the skid steer ready to return. Tomorrow, they will vanish from this scene.
For those of you who were interested in seeing me actually operate the little skid steer beast, Here is my video on steer skid operation:
Here are some more videos of cool skid steer operators:
This guy is my hero. I learned SO MUCH from him.
This is how I learned how to cut and fill. PATIENCE!!
Here is a trickster. See what I mean about balance:
Even the pros F/U:
The other thing I learned is that many of these videos show how the operators make nice even contours given an expansive area. When you’re confined, it doesn’t matter how small your skid steer is. There are places where it won’t reach, and you’ll have to do the work by hand. So it turns out that I have a lot of work to do by hand! But, overall, I probably saved 90% (or more) of the backbreaking manual labor which I am getting ready to undertake as “residual” earthmoving.
In the end, you have to ask the question, was it worth it ? In other words, would this have been an activity that was better to hire out? At first blush, I seemed to think so. Then, I looked up what the going price was for excavation services in my area. I spent about $5,000 between equipment rental, dumpster costs (5 x 15 yd = 75 yd of concrete/stone and soil detritus), and ancillary expenses (diesel fuel, measuring equipment, safety equipment). The cost for 75 yards of excavation was $10,000. So I saved $5,000. Well, I still have some scut work to do with manually finishing the job (that will take several weekends). I guess it hinges on what is most important to you. If you have a tight schedule to meet, then maybe spending $10,000 on hiring a service is OK. On the other hand, if you’re not so dependent on schedule, then maybe saving $5,000 is better. Of course, there was the angst of worrying about the skateboarder who would suddenly appear just as my skid steer was emerging from the back and running into him (her) and killing him (her) and thereby losing what little remains of my fortune. But that didn’t happen, so the bullet was dodged, and I am happily putting aside this phase of the remodeling project. And moving onto the next one! Trenching and inspections. But only after I finish up the manual work of cleaning up the excavation. Wish me luck!