
It’s been awhile since I’ve put in an entry, and there’s really no excuse other than the holidays, a vacation, and not making enough time for it. So, the next few entries will be to catch up a bit and get back into the flow of regular blogging.
Since the last entry, I’ve completed all of the contracting work, and if you look at my bank account, you can tell. Going into this project, I knew that the contract work would be the largest overall expense, especially when you’re talking about new windows, a new roof, re-stucco, exterior paint, and a brand new HVAC system. The HVAC system cost quite a bit, but believe it or not, less than the stucco. Be that as it may, these are simply jobs that a DIY’er cannot accomplish. Either they require a crew, as is the case of the HVAC system or most anything that has to do with stucco or concrete, or is just too tedious and inefficient to do by yourself, such as roofing and exterior painting. Plus, I had enough experience dealing with heights, so that was enough of that.
The HVAC installation was fairly smooth. Once I settled on a contractor and a date, they came in, took all of the old stuff out, installed the mechanicals in the attic, and then ran all of the ducting. There are plusses and minuses to putting the HVAC mechanicals in the attic, but for me, the plus of getting the mechanicals out of the garage and simplifying the ductwork outweighed the noise factor (the system is super quiet to begin with) and the minor loss of efficiency by having the mechanicals in a hot attic. I think the fact that I have a cool roof and excellent attic ventilation will significantly reduce that concern.
Here are some pictures:
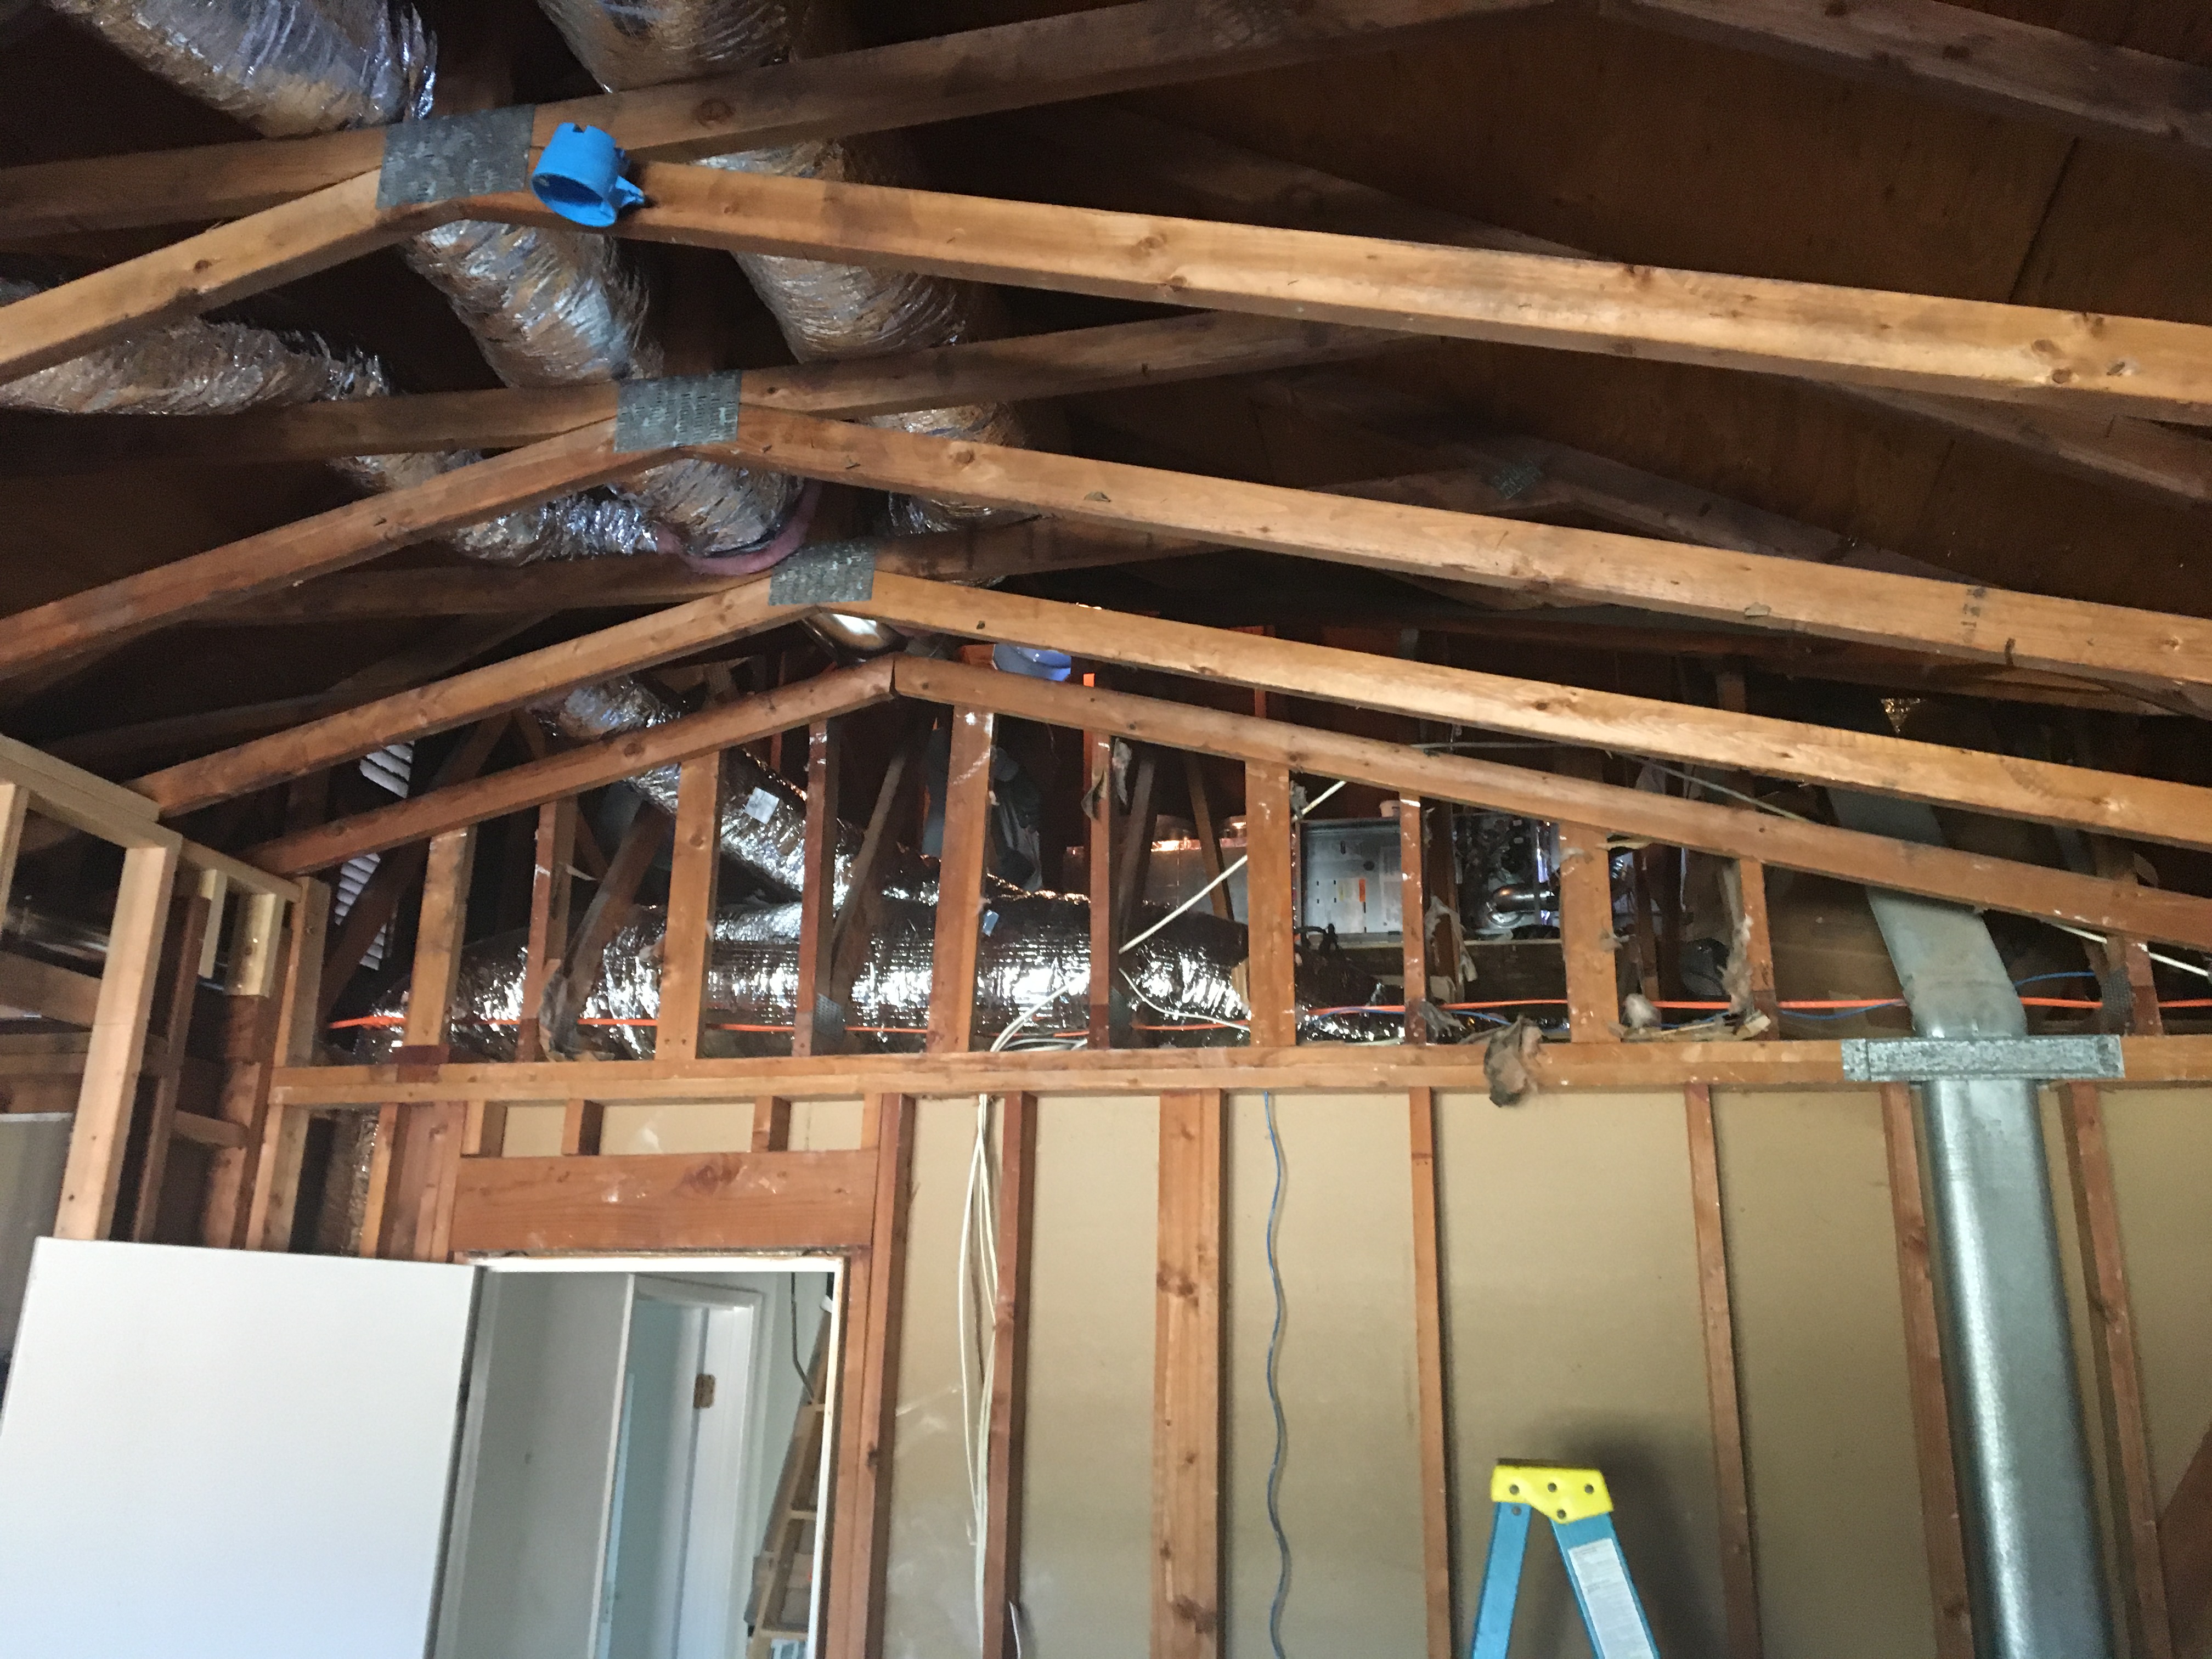
The new HVAC system involved a lot of ductwork. I ended up with a 3 zone system. Upstairs, downstairs, and MBR. Yes, my MBR is going to be the ultimate retreat and I wanted everything to be the best.

More demolition to make way for the HVAC system. The fun never stops!

HVAC folks working in the attic to put the system in place. The attic is a tough place to work in, so I’m glad they’re doing this instead of me.

The lead installer getting the mechanicals in order. They had to build a support framework in order to place the furnace, air handler, and cooler. Fortunately, the manufacturer (Carrier) makes these units so they can be installed horizontally, which works great in an attic configuration.

One of the HVAC installers, proudly standing by my new condenser. Having A/C put in was a major objective of my remodeling project.

The leftovers of the chimney of the old furnace. Ideally, I would have installed the HVAC system before I had the roof finished, and this would have precluded this extra “stack” but that’s not the way things worked out. Maybe I'[ll get this removed when I do solar (in some future lifetime).

One thing that I had to take care of by myself was to hook in the condensate drain into the house drainage system. Not too big of a deal, but the installer talked me into it, and I didn’t say no. Perhaps it was better because I know I did it right.

SOME of the HVAC system was DIY. In particular, I needed to construct ventilation ducts for my MBATH fan. Since I will have to do that for the other bathrooms, the laundry room, and the kitchen, I decided to invest some time in educating myself in the proper techniques and investing in a few tools to make the job turn our pro.

This shows a special crimper that is used to make a cut-off in ducting into a fitting that can be properly inserted into the next ductwork section.

Here is the MBATH vent going out.
Lastly, the painters came along and finished all of the trim work and exposed woodwork. This really made the place look nice and everything started to look finished from the outside. I got (and still am getting) a lot of positive comments from my neighbors.
Here are some pictures:
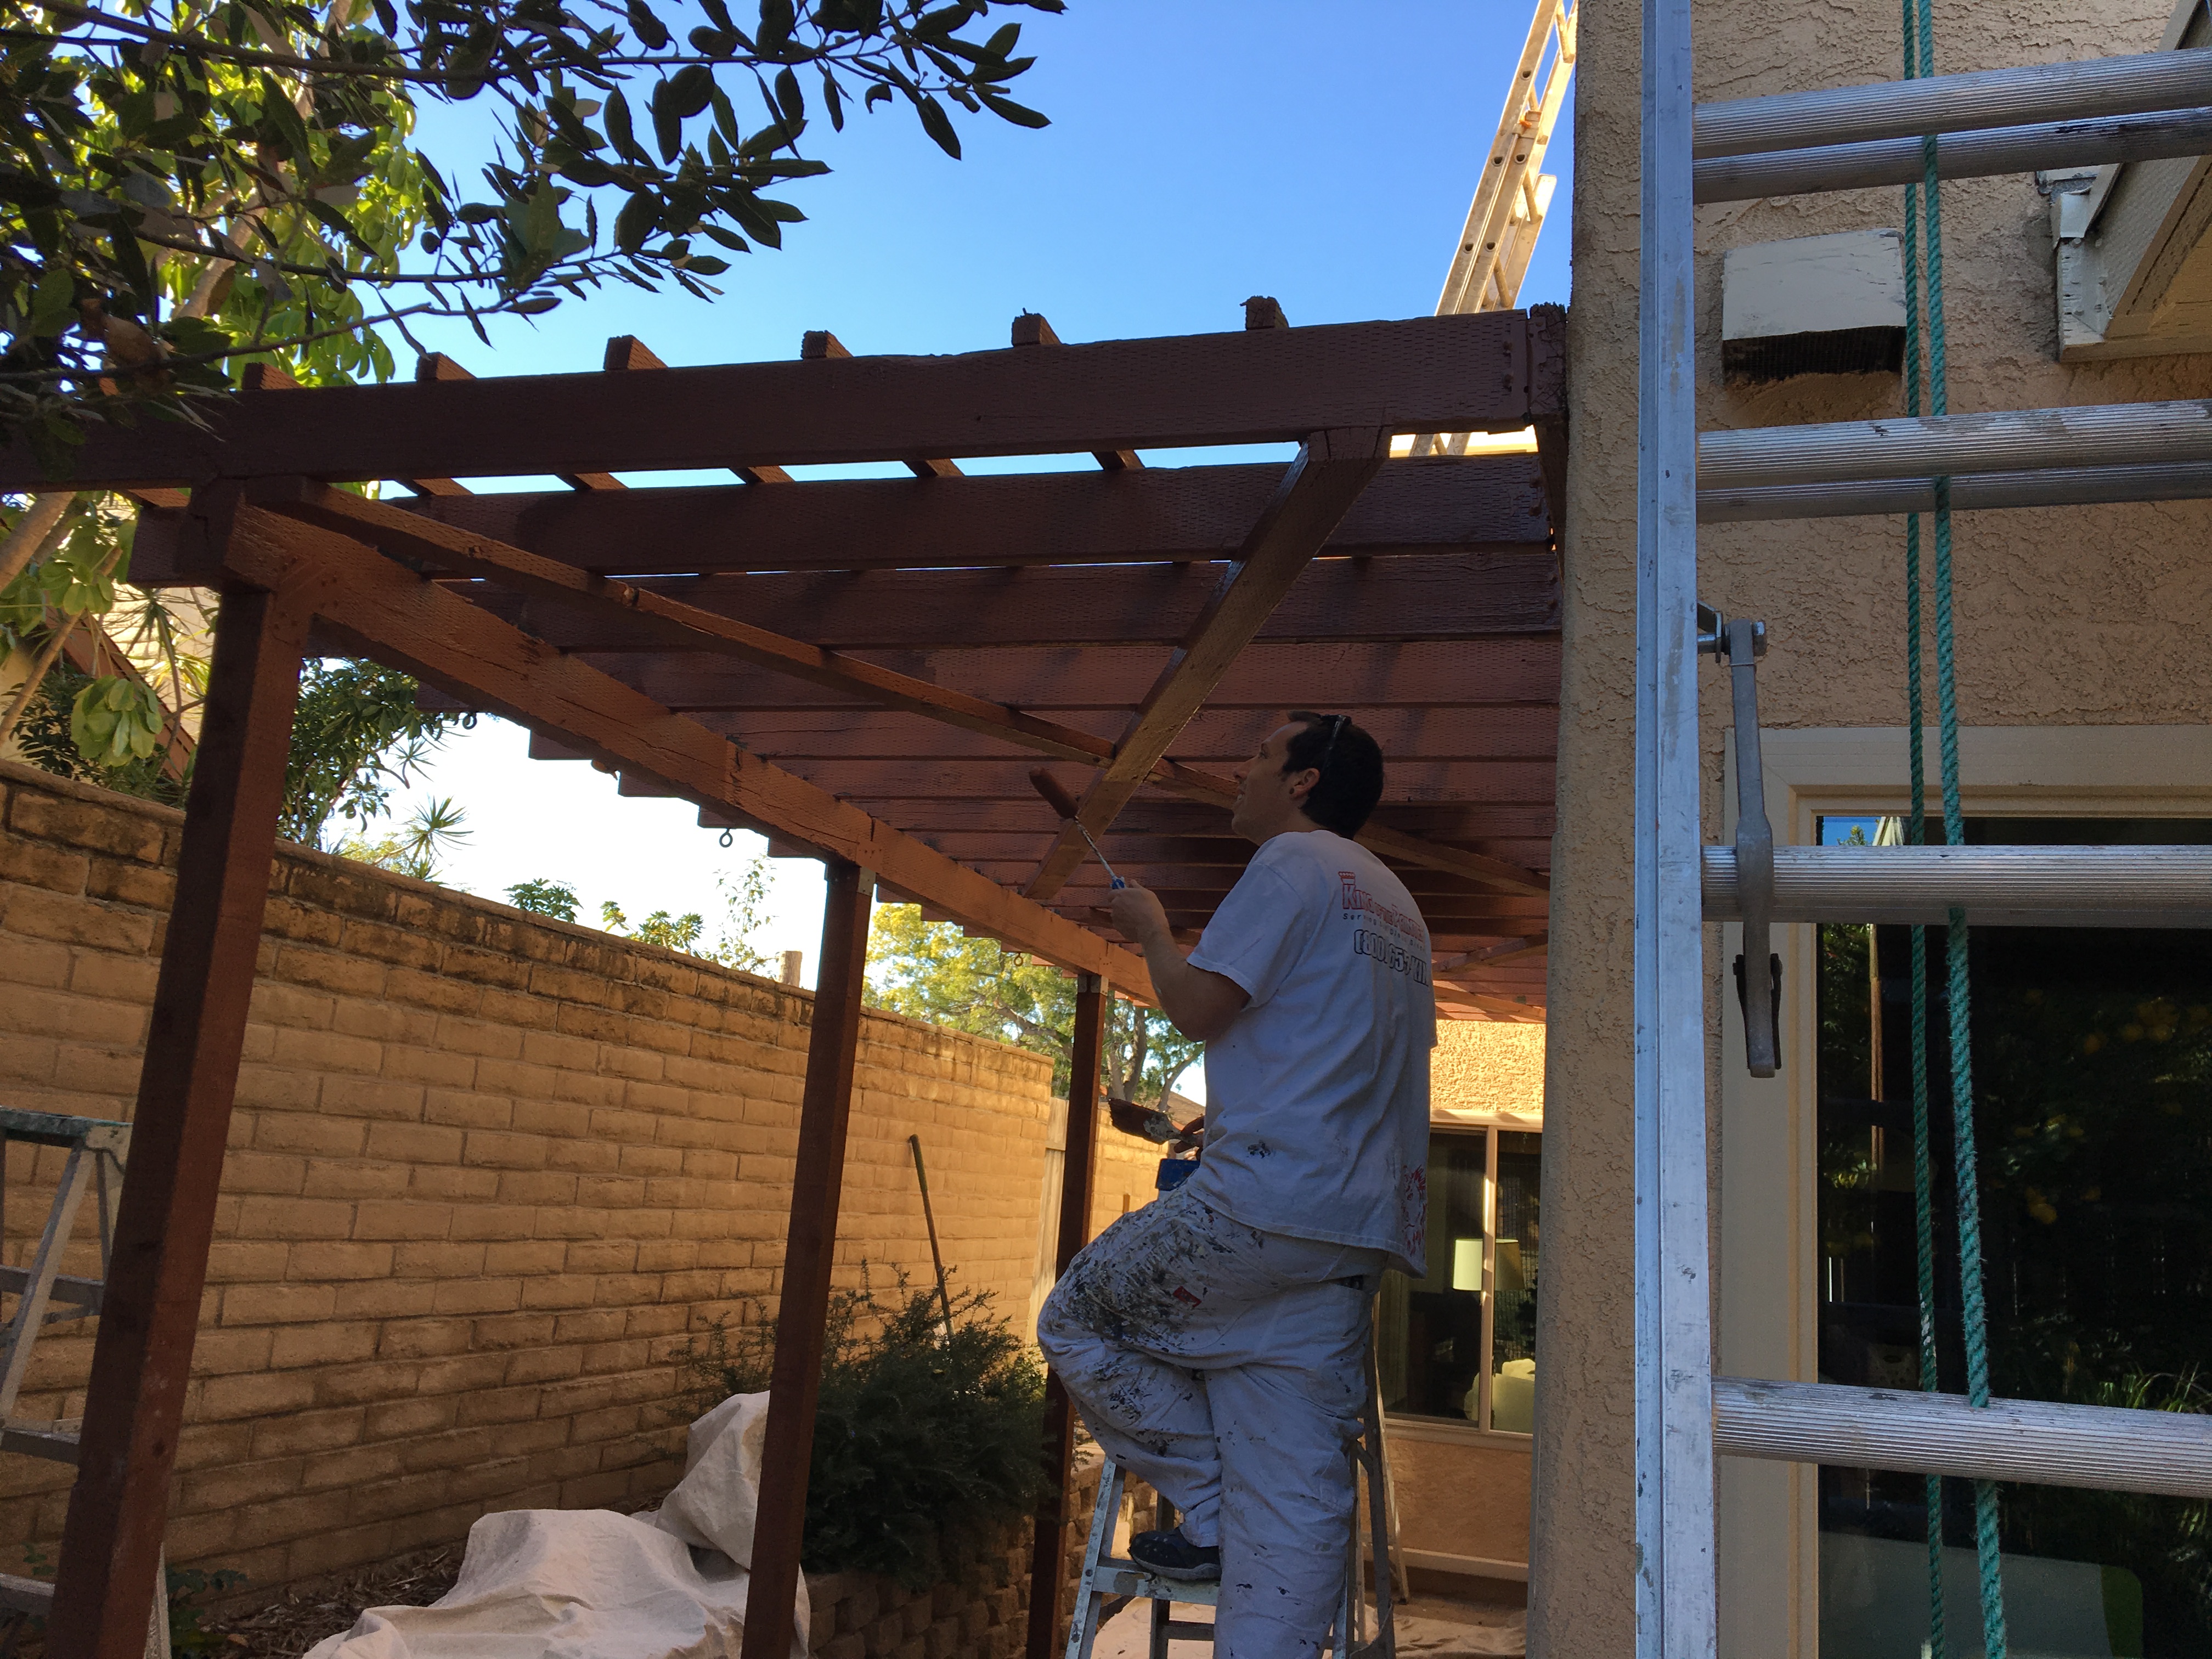
Painter working detail on my trellis. This was very difficult work and he took two days doing it. The results were magnificent!

One of the painters working the detail of the gable vent. Notice how he is up high on a ladder. Better him than me!

I decided to paint a light color underneath the patio cover. This is reminiscent of how porch covers are painted in the South. Bringing in these Southern elements no only pleases Stella, but also lightens up an otherwise dark space. Those Southerners certainly know their onions!

My side yard painted nicely. I had left this unfinished and it really was beginning to look shabby. I knew I needed to paint it, and I’m glad I finally had it done.

The paint match with the stucco is perfect! See how the otherwise gray electric panel now simply melts into the rest of the structure? Same with the gas line. Professional painters are masters at color matching, which is another reason that hiring a professional painter is well worth the expense.
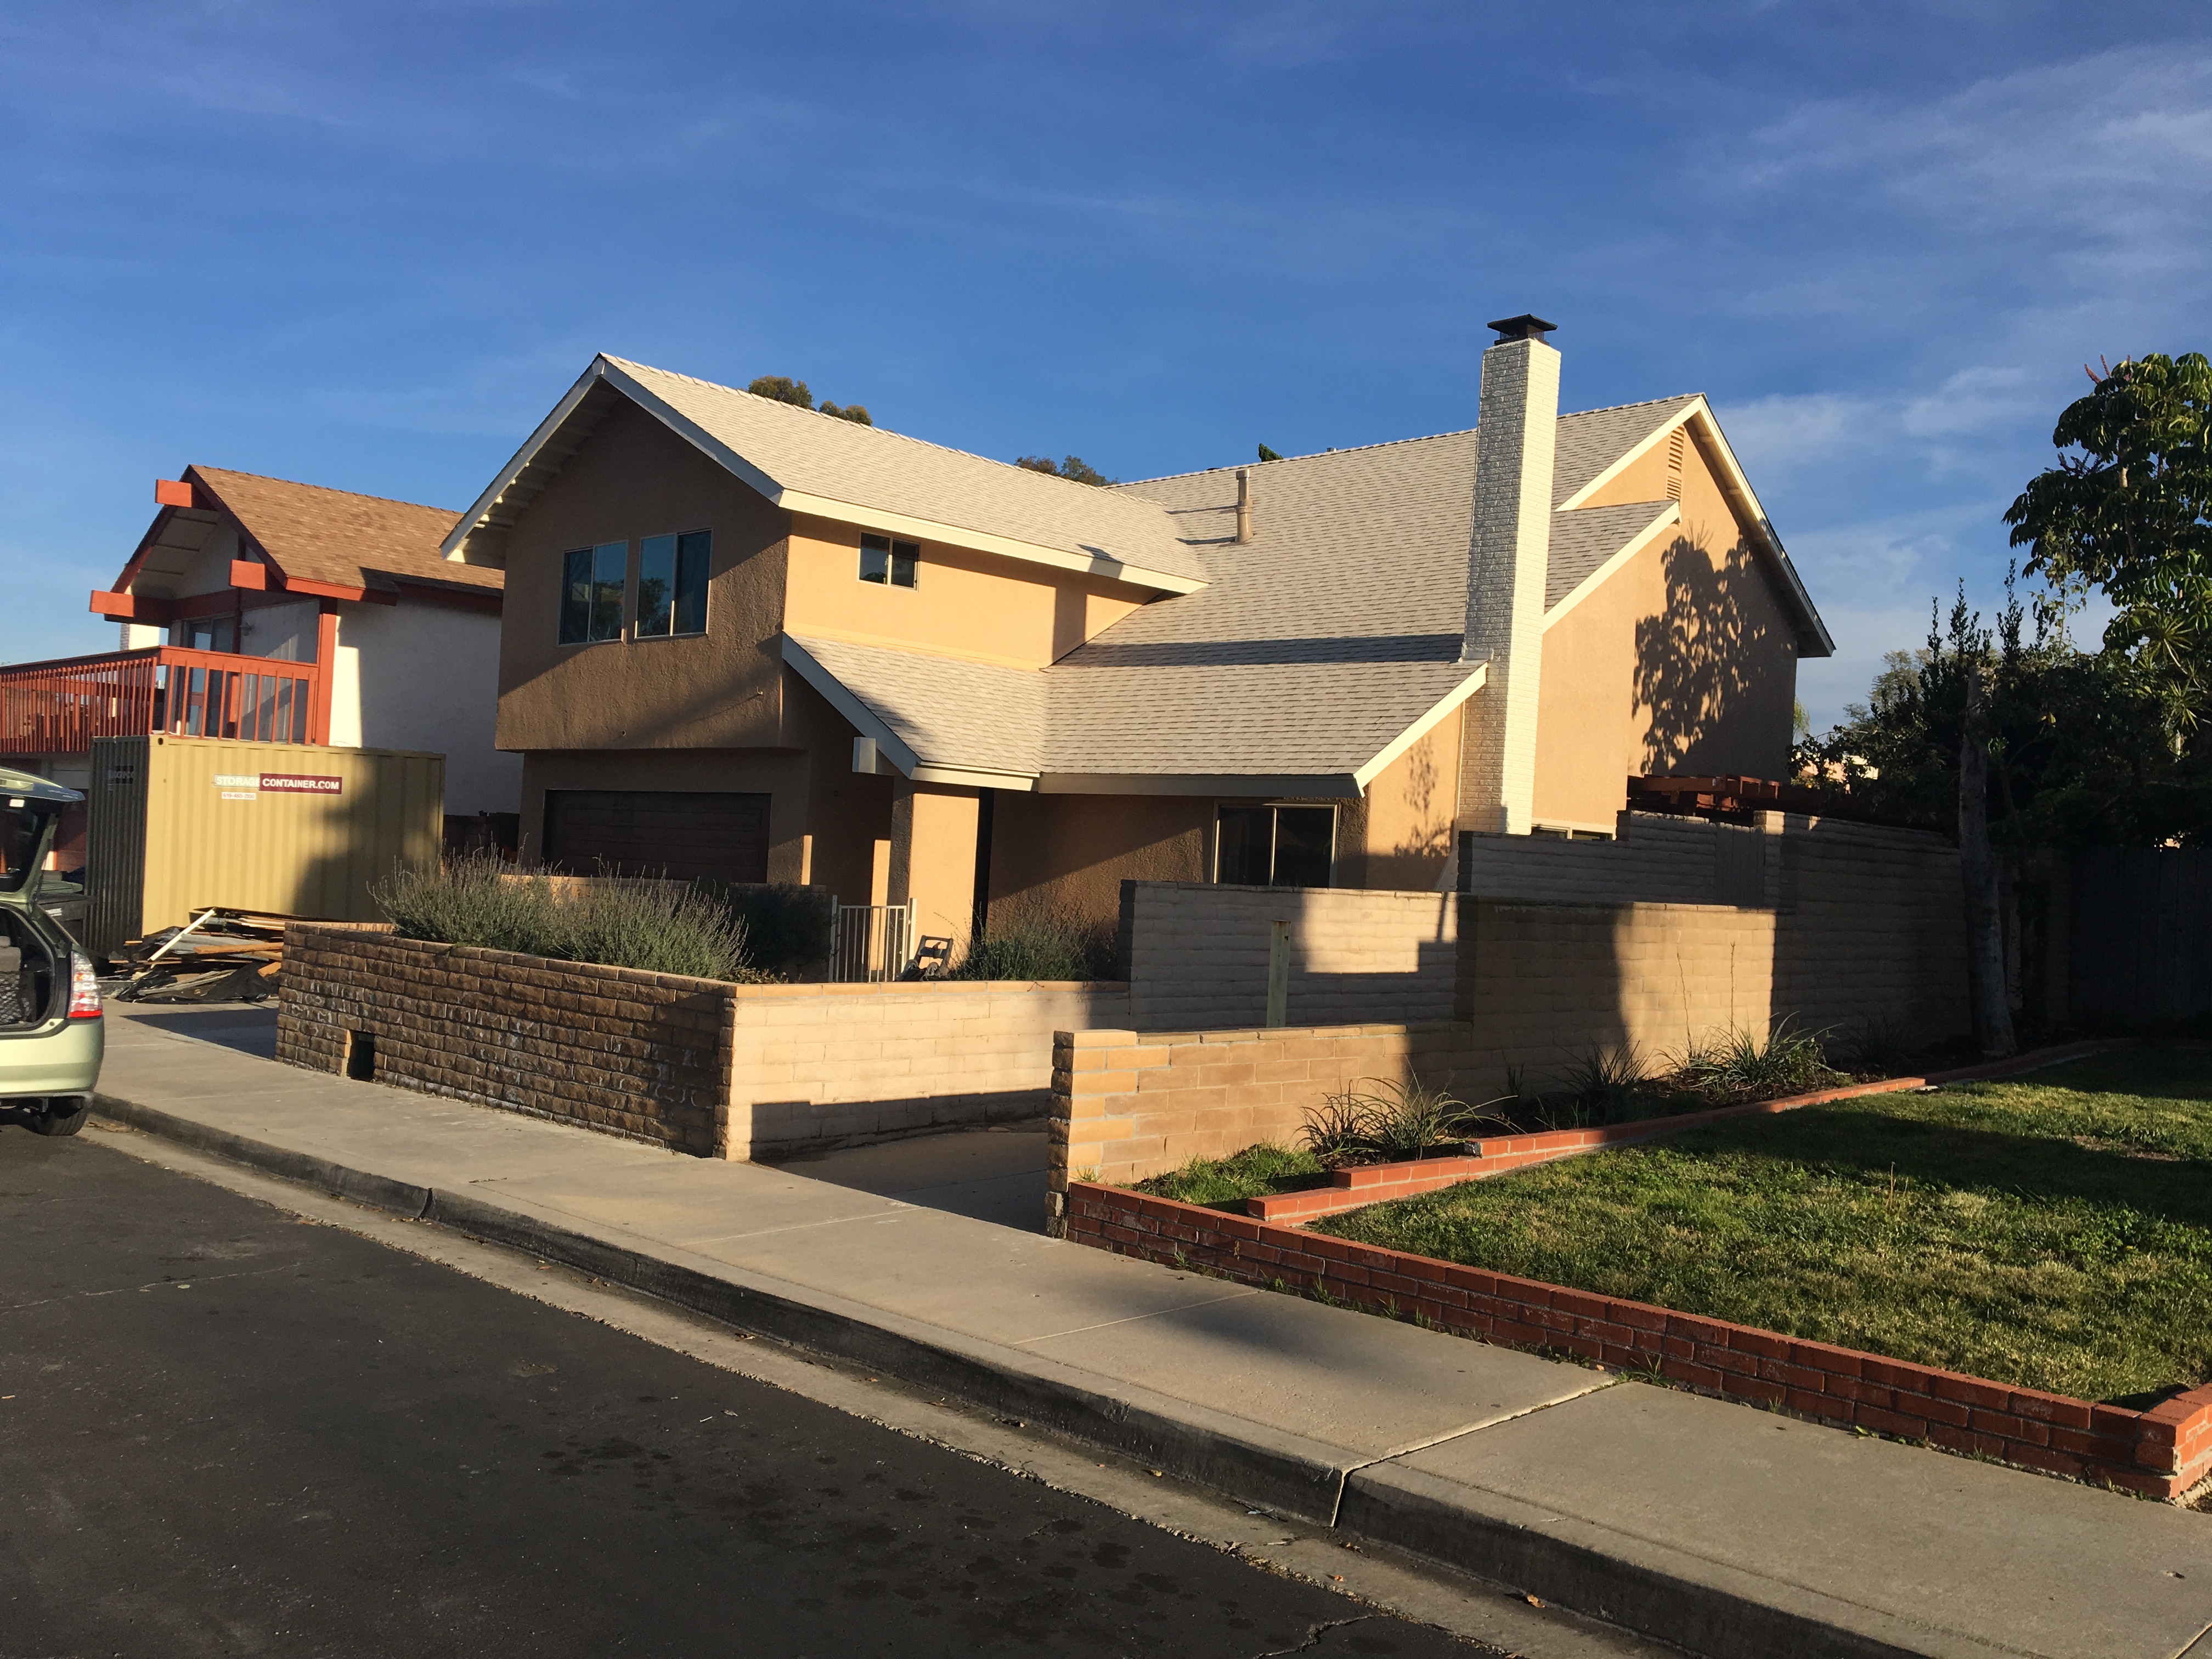
Wonderful picture of the project after painting. This is really looking nice!
In fact, I got a letter from the my homeowners association asking when my storage container was going to be moved. Unfortunately, I had to explain that while the outside of the house looked great, the inside was a total disaster and I had at least another year of work before I was finished.
Since the time the contractor work was complete, I finished off some plumbing and electrical work for the Master Bedroom and got an inspection. I was going to write up some of the details of the electrical and plumbing, but decided to wait until I did another round of it as I have several other rooms to renovate.
More to follow soon!!
