Some Thoughts About Having A Truck

This past weekend I needed a 4×8 sheet of plywood, and because I have a Prius instead of a truck, I had to do the good old Home Depot truck rental. Not really a bad deal, but I paid $12.00 for the material and $20.00 to rent the truck. On the surface, that may seem like a waste of money to pay more for “shipping” than for the actual product, but in the long term, owning a truck costs a lot more. My wife and I discussed this early on because I figure with a remodeling project, it sure could be handy having a truck whenever you need it. Plus it seemed like it would be a nice toy. But the numbers prove otherwise. Here is the run-down:

$10,000 for a used truck in reasonable condition (i.e., I’m not going to buy a $6,000 truck and have to put $4,000 worth of repairs into it).

$1,000 for insurance and registration ($500 per year for the two years of the remodeling project).

$2,500 for gas (5000 miles per year / 15 miles per gallon x $4.00 per gallon times two years).

$500 for maintenance

Total: $14,000

-$8,000 when I sell the truck after two years

$6,000 total ownership cost.

For $6,000 I can rent the Home Depot truck 300 times! That’s like every other day. I figure the max I’ll ever use that rental truck will be once a month, so $20.00 x 24 months = $480. That means I save $5,500 if I just rent the darned truck. That’s my new A/C system right there! (Or at least a good down payment on it.)

That being said, there are always a few complications such as somebody else has the truck when you need it. However, this is easily overcome by some planning and shopping strategy. Most DIYs get their stuff on Saturdays and Sundays, so try to avoid those times, and if you do need the truck, get there when the place opens and reserve it right away. Then do your shopping and get in and out.

Hey, trucks are cool.  Nothing wrong with having a truck if that’s what you like to drive. But unless you’re going to a jobsite every day and really using it, it just isn’t economical for a DIYer, so don’t kid yourself that you’re saving any money. It’s much less expensive, and more convenient, to have the suppliers deliver to the jobsite and on those rare occasions when you need to, just rent a truck for the specific need. Even if it is only $12.00 worth of materials. (OK, just this one time.) Besides, my Prius can hold a lot when it comes down to it. Just not 4×8 sheets of plywood!

The Dumpster Do-Si-Do

One of the (many) common denominators in a remodeling project is demolition. With demolition comes the necessity to get rid of the debris. There are two basic approaches for a DIY’er to address this requirement: (1) Pay somebody to come and do the clean-up and haul all the detritus away; (2) rent  a dumpster. A third option, which is not DIY, is to task your subcontractor to dispose of any waste generated by the job. This makes sense, especially if you’re dealing with things like brush removal, tree trimming, or hazardous waste, like asbestos, which is typically encountered with HVAC upgrades. But usually the folks who you will subcontract know how to deal with this, and again, it ain’t DIY.

Option one, paying somebody to come in and haul away your stuff, can be very useful, especially if you have a relatively small job. These folks are quick, efficient, tidy, and you don’t have to concern yourself with any of the codes, regulations, or liabilities of disposing your waste. The downside is that these folks are pretty expensive, and you lose some flexibility with respect to generating your waste on your own time schedule.

Option two, renting a dumpster, is fairly typical of what a remodeling contractor will do. The dumpster will be placed in front of the home, and you can add as your needs require. How simple can that be? Well…. NOTHING in remodeling can be so simple!

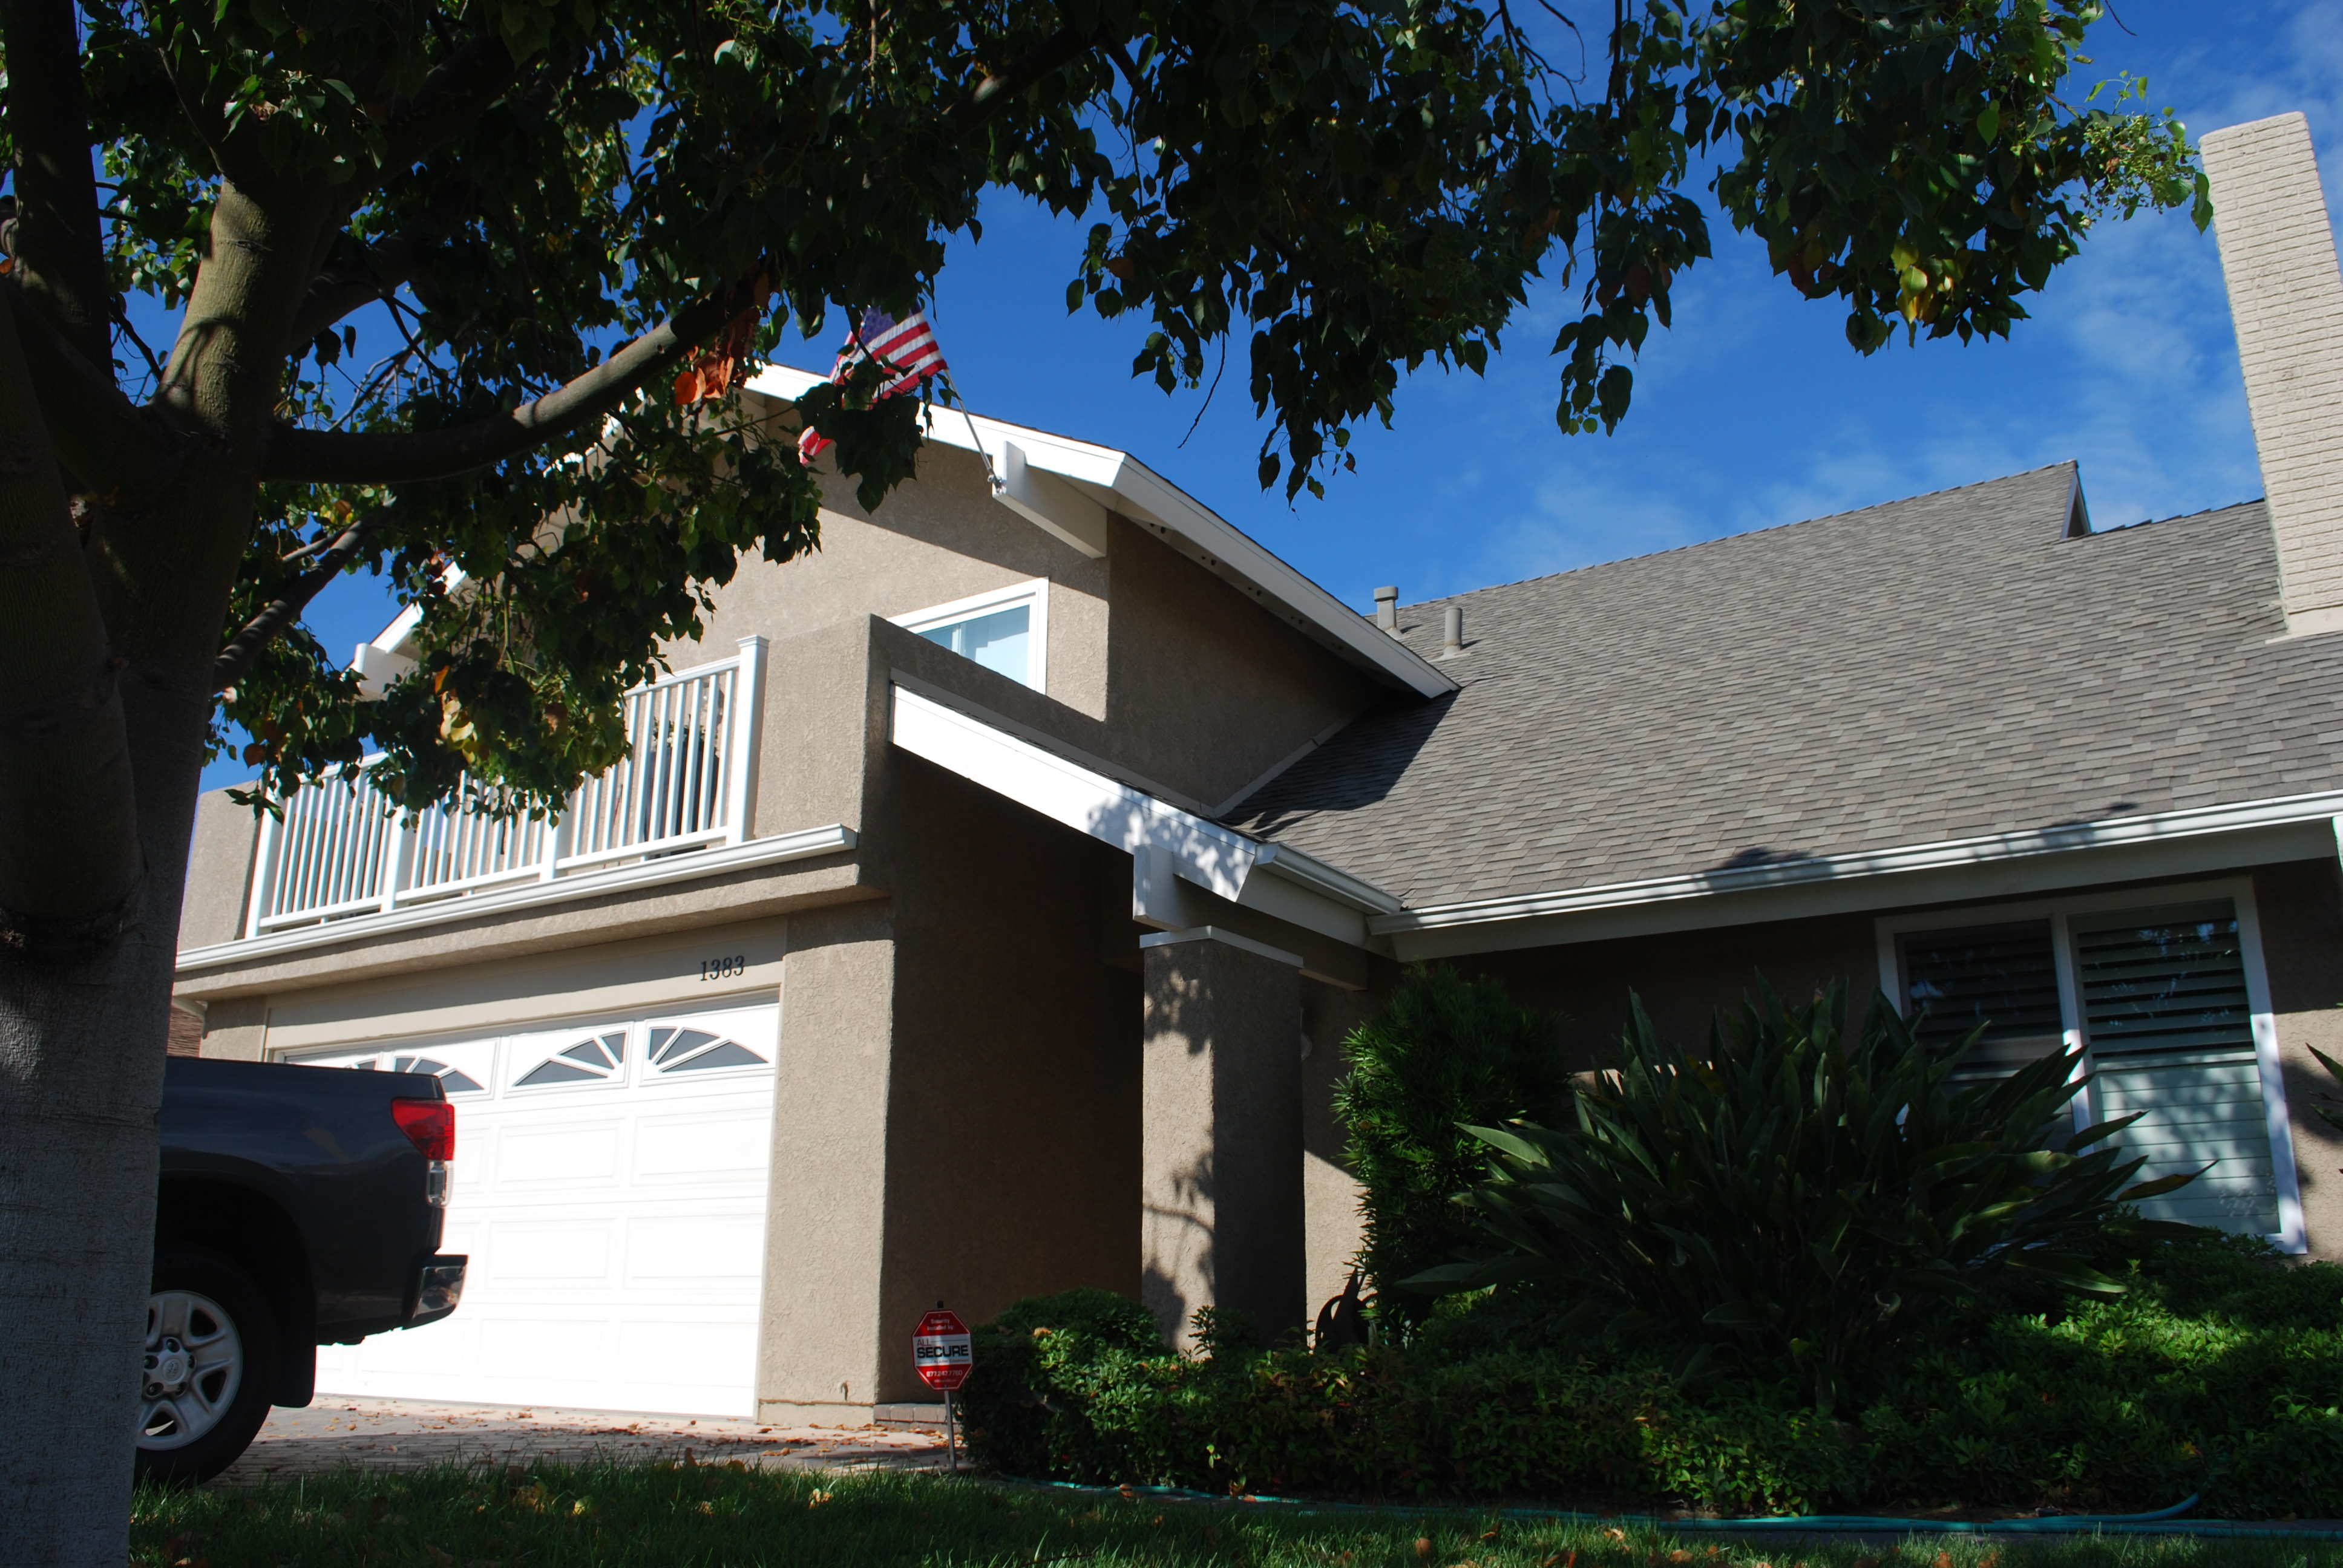
You just can’t plop a dumpster anywhere you want. If you have some space on your property, then consider yourself lucky as the requirements are typically less demanding. In my case, I have no room on my postage stamp sized property, so the only option was to place it on the street in front of my house. Now the fun starts.

Because the street is owned by the homeowners association, I had to get permission of the HOA board. They granted permission provided that I informed  my neighbors about the dumpster. Turned out that I had the opportunity to meet some of my neighbors (for the first time), so maybe that is a blessing in disguise. However, I also had to deal with the city ordinances, and the company who would supply the dumpster is contracted by the city, so there was no way out. When I first requested a dumpster from the waste services company, all of a sudden, I had to deal with additional complexities. (1) What type of waste? (general residential demolition). (2) Do you have any heavy waste? (Yes, I have concrete, stones, brick, and dirt. (3) Concrete, bricks, and stones go in a 15 yd dumpster. If you put dirt in it, we have to charge extra. (Well , at least they told me.) (3) Do you have a permit from the city? (No, but not required because, this is a private street). Here is where the plot thickens.

I tried, valiantly, to get an answer from the city as to whether I needed a permit or not. I left a message with somebody at public works, but I wanted to find out the answer, so I kept calling the city and eventually found a city employee who said “If it’s a private street, you don’t need a permit, but you have to place traffic barriers with flashing lights around the dumpster.” I inquired about the necessity for that requirement and was told that there had been a number of accidents whereby the drivers of certain vehicles have crashed into dumpsters parked on the street because they did not have the same kind of reflective markings that a parked car does. I am certain that alcohol was NOT a factor in any of these incidents. (The person on the phone chuckled appropriately.) In any case, I agreed to procure (purchase) traffic barricades and lights. Heck. They may be useful in other circumstances in the future.

So, I called back the dumpster company, and I reassured them that I did not need a permit, and that all I needed was a HOA letter telling them that it was OK to put a dumpster on the street. Then, 2 days before delivery, I get a call from the city saying that thee person whom I called was out and that they looked up my address and determined that I would need a permit. So much for inter-organizational communications! So I went to the place where they issue permits, got the permit, and e-mailed it to the waste disposal company to make sure that everything was square. I’m not sure what the $65 fee was used for other than supporting the city’s bureaucracy, but being a retired military officer, I should not be one to judge. I followed up with the dumpster company and was assured of prompt delivery on the date agreed upon. The dumpster came and I was ready to accept in all respects.

This is what I learned:

(1) A bureaucracy has a mind of its own, and you need to be flexible, and  be accommodating, to get what you want. Honey is better than vinegar.

(2) Your project has a mind of its own. After I took a lot of effort to setting up the dumpster, and equipment rental, I originally wanted to get all of the demoe’d hardscape into the dumpster the first day, but the backyard retaining wall was far more difficult to demo. I ran into serious trouble. My schedule was trashed, and  I had to quickly re-arrange my plan. The bottom line is that I did not have the right tool for the job. So I came up with plan “b”. Rent a hydraulic breaker with the steer-skid, and stop the manual demolition nonsense. Heavy equipment (on a DIY scale), will make short order of this problem.

More to follow….

Site Planning Complete — Digging Has Commenced!

Although I had to submit a “site plan” to the city for inclusion in the building permit plan set, I really didn’t have a plan that was detailed enough for me to work with. Additionally, when it came time to start digging, my wife and I took a second look at the front yard and decided to completely change it since it had to be gutted anyway. As mentioned in my previous post, I had to add an irrigation system, and I determined that all existing retaining walls had to be re-done because when I lowered the backyard grade to the correct level, it would undermine the existing retaining wall. Talk about project expansion! So, I went about revising the site plan, and I’ve uploaded it here: 1370 BFD LANDSCAPE PLAN R 0.0 for your reading pleasure.

The first action that I had to do was remove all of the bricks and sand from my existing patio. Rather than toss the bricks and buy new ones, which would be tremendously expensive and wasteful, I decided to pressure wash them and stack them up. For the sand, I needed a way to screen out all of the mess, and after some research, I came upon a website that had plans for a hand “trommel”. This is a device that was used by gold prospectors, and it turns out that there is an active hobby community that goes out and does this sort of thing. Hence, there are resources available. You could buy a motorized one, all assembled, for a lot of money, but a guy developed a plan for a real DIY trommel that is made of Home Depot (or Lowe’s) buckets, some PVC pipe and fittings, and some screen. Here is a link to his page, and here is a picture of my finished model.

Site Work 043

I also needed to get rid of all of the plants in front of the house. This would be no easy task as it was overgrown with agave and rosemary. They were pretty plants, and it was a nice ecosystem with zero maintenance (no watering), and buzzing with bees who were hard at work gathering rosemary nectar. (That would make awesome honey!) Alas, with heavy heart, we called in a landscaper to do the dirty work. Good thing because he got attacked by the bees and had to go to the drug store to get some benadryl. Plus, digging out that agave is a royal pain. It as well worth the $850 I paid him and his helper. Here are before and after pictures:

Front Yard After

Front Yard After

So, work is now well underway. There’s still a lot of site work to go, but I’ll have more updates along the way. Next up: Dumpsters and Steer Skids!

Front Yard Before

Front Yard Before


Irrigation — And How A Project Expands

This past week, I’ve been working on gutting my landscape. The reason for this is because the first order of business is to install a site drainage system. The reason this is first on the list is because I have to excavate in order to install my upgraded electrical power line from the power head on the street. I then have to cover it up and pour concrete because that is where I am going to place the temporary storage box for all the household crap I have to move in order to vacate my master bedroom to build out the addition. A real Chinese puzzle.  But I digress. So, if I’m going to excavate and break up concrete and hardscape, I better do this once. That means that I have to plan for ALL underground utilities, being it 12V lighting, drainage, or irrigation.

When I started looking into irrigation, I wanted to make sure that I was making a very conservative plan as water, especially for irrigation, is a scarce resource here in Southern California. My studies revealed that the two approaches which made most sense were drip irrigation with a xeriscape, and use of grey water from the laundry. First the xeriscape.

The idea of a xeriscape is not new. There are several high quality example gardens in our area, and we have visited them on more than one occasion. The idea is that you provide some drip irrigation to start the plants out, and as they mature, they require less and less water. Plus, drip irrigation is very efficient as it waters the roots directly, as opposed to spraying water all over the place and having the excess run down the storm drain. Let’s face it: if you live in Southern California, or any other place which is subject to drought, then you should be ashamed of yourself if you have spray irrigation. Especially if you have a lawn. If you like the expanse of green, then get artificial turf. The modern and smart way to landscape is with drip irrigation and water conservative plants.

The best reference I was able to come up with was a website called irrigationtutorials.com.  The person who writes this is a professional landscape architect, and his information is very detailed and practical. Regardless of what irrigation system you choose, you would do well to visit this site and to peruse, if not read thoroughly, what he has to say. I learned a TON about what to do, but more importantly, what NOT to do. Pay particular attention to the section on backflow prevention. This is serious stuff, especially if you don’t want your drinking water contaminated with whatever happens to be on or near your drippers. After all, animals, both domestic and wild, have to do their business somewhere!

The other thing I discovered, and I am STOKED about this, is the use of grey water for irrigation. Grey water is waste water from your house that is not sewage, e.g., not from your toilets. So, anything from your sinks, showers, dishwasher, or laundry, is considered grey water. Now, if you’re ultra conservative, you could set up a system that uses ALL of your grey water for irrigation purposes. But some of this requires permits and professional design. However, there is a low-cost DIY approach: using the effluent of your washing machine. Your washing machine uses a lot of water per load. If you have a top loader, then it’s 40 gallons per load (20 gal wash and 20 gal rinse). Even the high-efficiency front-loaders are 20 gallons per load. So, why not put all of that water to use in irrigating your property? The answer is that it’s pretty simple and definitely within the realm of a DIY project. First, there’s typically no permit required. Second, it’s relatively cheap. All you need is a 3-way valve, a vacuum breaker, some PVC pipe and fittings, some materials to make a bunch of mini-dry wells (perforated pipe, gravel, and circular pavers), and some inexpensive valves to regulate the flow such that you have an even distribution of water. There are some regulations that you have to be aware of, such as property line setbacks and having sufficient surface area to distribute water so that it doesn’t pool or overflow, but these requirements are spelled out very succinctly in a number of on-line articles. The best one is a manual that was produced by the city of San Francisco, CA (San Francisco Grey Water Design Manual) that is a very comprehensive guide. It includes detailed instructions for installation of a DIY laundry effluent grey water system. In my jurisdiction, Chula Vista, CA, the city took (plagiarized) elements of this manual for local guidance. So, if you care about water conservation and are in an area where drought is a concern, this something very simple and do-able for the average DIY.

The San Diego County Water Authority published a good guidebook on how to design a “water-smart” landscape (here). Additionally, the City of Chula Vista posted some professionally designed xeriscapes. Here is the link, but for some reason, it’s not working at the moment I’m writing this, so I’ve posted one of the plans here: wildlifefriendly-irrigationplanwildlifefriendly-planwildlifefriendly-plantimageswildlifefriendly-concept,

So, this was an expansion to the original project, but for several reasons, I think this is the way to go. I’ll have more details about my site plan in future posts.

Today Was A Banner Day!

Today, I picked up my building permit! I had to sign a bunch of stuff acknowledging the responsibilities and liabilities of an owner-builder, but I had done some research, so I have a pretty good idea of what I was signing up for.

California law allows for an exemption for homeowners who want to build on their own property. Basically, they are exempt from the requirements of the California Business and Professions Code, meaning that you DON’T have to have a license to build on your own property. That being said, there are a number of restrictions, most of which have to do with who has liability. All good stuff to know because understanding these details will help you avoid unpleasant legal actions should something go wrong. While there is a lot of legal gobbledygook involved, it boils down to some simple stuff.

(1) If you do you your own work, then you are responsible for the quality of that work, and if you sell the property, the buyers could conceivably come back after you if your work was shoddy. Unlikely in my case because I will be working under approved plans which will be inspected by the building department. Plus, I don’t do shoddy work as I will have to live with it. AND I don’t plan on selling the house. It will likely be inherited by my children (and THEY will have to deal with it).

(2) If I hire work to be done, then the work must be done by a licensed contractor OR I assume the responsibility of acting as a business and therefore have to pay for all of the liability insurance and taxes. Simple solution: Only hire licensed contractors. (And check them out ahead of time.) Yes, it may cost a little more up front, but it’s pennies on the dollar compared with an undocumented immigrant falling off your roof and permanently injuring his back. The immigrant may not do anything, but you can bet that the health care system will track you down and make you pay! This happened to an acquaintance of mine, and I felt very bad for him. But that was a big lapse in judgment on his part.

(3) There are some restrictions on selling the property or working on many properties at once. This is to discourage flippers. You have to own the property for a period of time and you can’t do it to many properties at once. Again, pretty much N/A in my case as this is really my home and not some quick-turn investment get-rich-quick scheme.

The other thing that happened to me today was that my car turned over  100K on the odometer. So I got the extra digit on the screen. It happened moments after I drove out of the civic center parking lot after getting my building permit. Coincidence? Yes,but a happy one. At least it put me in a good mood!

Architectural Design — The Addition, and Fixing The Roof Leak

One of the major reasons I started this project was the fact that I had an annoying leak from the roof that was making a big stain on the ceiling in my living room. The leak really comes from a second floor balcony which is adjacent to the master bedroom. The design is poor because water accumulates from the roof and concentrates in the balcony, and there is no easy way for the water to run off. So it stays in the balcony and ultimately leaks onto the porch, the garage, and the living room. I tried three different ways to fix the floor of the balcony (tile, flat roofing, and rubber membrane), and none of them worked. In looking around the rest of the neighborhood with houses of similar design, I noted that they also had the same problem.


BALCONY DESIGN_2

ORIGINAL BALCONY DESIGN

So another approach was necessary. Fortunately, a few of the houses had a modification that put a valley roof directly above the porch. I asked the owners if that helped and they all said that it completely solved the leakage problem.

ROOF OVER FRONT PORCH-1

ROOF OVER FRONT PORCH 2

That being said, the balcony itself was just wasted space. It was hot in the afternoon because it faces South West, and it has an expansive view of the garages of my neighbors across the street. Not exactly a place where I’d hang out and relax. So, to make more out of the space, I decided to see what it took to completely eliminate the balcony and expand the master bedroom.  There were some homes in the neighborhood that had done that, but I didn’t like the outcome because they didn’t fix the leakage problem. Plus, I wanted to reconfigure the windows to provide better air flow and noise mitigation, and I wanted to rearrange the master bathroom and closet to provide a more open floor plan.

EXPANDED MASTER BEDROOM

EXPANDED MASTER BEDROOM


So, I looked at my original floor plan, and went back to the type of functionality we wanted. We decided to utilize the new space in an open manner, swap the location of the toilet and lavatory, make a small “room” for the toilet area with folding doors, and enable a natural flow from the bathroom to the dressing area. The dressing area would be open, yet private, and have some nice light coming in from the new windows. We also have some room for a sitting area and our desks. Simple and straightforward, but it looks pretty nice. At least from the plans!  I think it meets our requirements for making the most out of wasted space and provides a permanent fix for the roof leak.

Here are the plans:


ARCHITECTURAL

ELEVATIONS


ARCHITECTURAL DESIGN

EXISTING 2ND FLOOR

ARCHITECTURAL DESIGN

NEW 2ND FLOOR

Electrical Design

As with any other design, electrical design begins with your requirements. Lighting requirements, which I discussed in a previous post, will dictate the locations and types of switches and circuits. But one also must consider the other electrical needs of the house. This includes electrical outlets,  appliances, HVAC (Heating, Ventilation, and Air Conditioning), and specialty circuits such as an electric car charger or a stair elevator. When considering the electrical requirements of my remodel, I also wanted some room for future expansion to take care of needs that aren’t yet specified. In an older home, this typically means that you’ll have to upgrade the service going into the house. More on that in a bit. Here is the list of requirements that I came up with for my remodel.

  1. Significantly expanded permanent lighting to be controlled with switches from convenient places.
  2. Additional outlets for the den (entertainment center) and kitchen.
  3. Dual electric car chargers.
  4. Air conditioning system.
  5. Additional outlets in garage to support a smart home wiring closet

Now at this point of the design, we start to get on thin ice when it comes to a DIY job. You will have to start making design decisions and tradeoffs which are going to be influenced by code requirements, and unless you have some background and experience with electrical design and code requirements, it might be a good idea to enlist the help of a professional. In my case, I have an engineering degree, so I have a good handle on basic electrical design and circuits. In addition, I have several years of experience from the Navy as an electrical officer and engineer officer, so I have a lot of practical experience with electrical systems including power generation, distribution, control, and most importantly: SAFETY!! This is why I caution anybody who does NOT have experience with electrical systems to get professional help sooner rather than later. Electricity can kill you and can burn your house down, so you’d better be sure you know what you’re doing. With this in mind, I started with a focused study of the California Electrical Code, which is basically a reprint of the National Electrical Code (NEC). There are also a lot of “how-to’s” on the Internet, and there are a lot of forums where you can pick up some good tips that help demystify the arcane language of the NEC. One site, which is particularly geared to the DIY enthusiast, is Wire Your Own House. The guy who writes this is a professional electrician, and his website is chock full of good information. Turns out that there are a lot of professional tradespersons who freely share their techniques and knowledge. If you really want an education on how to do things like a professional, YouTube is a great resource. Consider it your apprenticeship program! Now, armed with knowledge, I was ready for the next step. As in every other remodeling project, the first place to start is figuring out what you’ve got. So I went to my service panel and methodically turned off one circuit after another and with multimeter in hand, recorded every switch, receptacle, and appliance, and matched all of those to my the individual breakers in the service panel. Needless to say, I found some problems.

  1. The service panel was woefully inadequate for what I had planned. It was a 100A service and it was maxed out. I knew I needed more than that. Wasn’t sure how much yet because I hadn’t completed the design, but I knew there was no room for expansion.
  2. Some circuits were not per code. I had a massive amount of lights and receptacles on one circuit, and it looked like it was messed with by the previous owner of the house. My adding some “extensions” to the circuit didn’t help much.
  3. I didn’t know what I was doing. What did I say before? If you’re not in the business then be VERY CAREFUL. Turns out that I made several code mistakes, like powering kitchen lights with dedicated small appliance circuits (a no-no) and extending lighting circuits with junction boxes buried under drywall (safety hazard — and not per code). However now that I know the code better, I’m going to right these wrongs. Plus, my design has to get approved by the building department, so they will provide an independent check. PLUS — I’m going to hire a consultant to check any work I end up doing myself. I may be smart, but I don’t know everything, and an independent look is well worth it.

Sidebar: a couple of months after I accomplished the “as installed” conditions, I had an electrical fire. No kidding! The dryer breaker fried. So I pulled apart the dryer to make sure that the heating element was OK, and it was fine. I then went back into the distribution panel, and lo and behold, the 240V wiring from the dryer in the panel had shorted out. You know, the one with the red insulation on it? Upon further inspection, I found out that there were knife cuts in the insulation, probably from stripping the outer plastic sheathing on the Romex during the original assembly. So, I put some heat shrink on the offending conductors, and clipped the blasted out wire so that I had a good solid wire to work with, and put in a new dryer breaker, the original one being a slag heap. Moral of the story: Even the professionals get it wrong on occasion! If I needed another reason to get a new distribution panel, this was a good one.

Now that I had the “as installed” configuration, I could start to work on the remodel. I went back to my design requirements and placed all of the lights, receptacles, and switches where I wanted them on the plan, and then mapped those to the existing circuits, making new circuits where necessary. Also, to be code compliant, I had to consider not only the numbers and types of circuits, but also which ones were Ground Fault Circuit Interruption (GFCI), but also Arc Fault Circuit Interruption (AFCI). AFCI is used to help prevent fires by detecting the spark (arc fault) that occurs between two conductors that short out (such as with a faulty lamp cord). Those are required in living areas such as living rooms, dens, and bedrooms. Basically, if you want to be up to code, you’re either going to have a GFCI or an AFCI breaker in your distribution panel. Not so many “standard” breakers anymore! Lastly, now that the circuit design was done, I had to calculate the loads to figure out what service I needed. The code can be pretty arcane when it comes to figuring out what you really need. Fortunately, there are some great resources on the Internet, the best one was from a website (“Electrical Knowhow“) where you can find a handy-dandy spreadsheet(ResidentialLoadCalculations) where you put in your numbers and it figures out what you need based on the code. BUT…you REALLY need to understand what goes into that spreadsheet and why it produces the numbers that it does! I referred back to the code at every step to make sure that I was putting in the correct numbers and that the results were code compliant. To sum up my diatribe on electrical design, allow me to leave you with these thoughts:

  1. Approach the design with the same top-down method that all designers use. Start with your requirements and work down, making sure that the design meets those requirements as you get increasingly detailed.
  2. Use the DIY approach to detail the design within the limits of your knowledge and experience. It’s OK to stretch a bit as long as you’re willing to invest the time and effort to self-educate. Even if you never get to the point where you finish the design, or do any of the work, the time you spend in learning the details will pay off when you hire a professional.
  3. Have humility. Don’t pretend to know-it-all and, if you’re doing this as DIY all the way, at least have the common sense to hire a consultant to check your work. The stakes are too high.
Electrical Plan_1

ELECTRICAL DESIGN FIRST FLOOR

Electrical Plan_2

ELECTRICAL DESIGN SECOND FLOOR

Here is my final electrical design.

Lighting Design

Although lighting and electrical design can be, or should be,  intimidating (because if you screw up you can electrocute yourself or burn your house down), there are some important design and planning aspects which a DIY’er can accomplish. These revolve around things like placement and functionality, as opposed to detailed design such as number of circuits, wiring requirements, distribution panels, and component specifications. The detailed design is best left to professionals. Even if you’re SURE you know what you’re doing, you still should get some professional advice. More on that later. First: Lighting Design!

Lighting design is important for an age in place home because as you get older, your eyesight diminishes. Besides the inconvenience of  fumbling around in the dark for the light switch, older people are endangered by unseen trip hazards. Remember, if you fall when you’re older, you may lose your mobility, and that is a death sentence. Lighting can also be a very aesthetic addition to the home.

There are three types of lighting: (1) Ambient (or General) which is used to provide light to a relatively large area, (think garage overhead lighting); (2) Task lighting, which is directed over specific areas where people do work, such as over the stove or kitchen counter: (3) Accent lighting which is used to draw attention to specific areas such as wall wash lighting for a picture display or outdoor foot lights on the sidewalk. Lighting design can get pretty involved, but a good place to start is the American Lighting Association website that has a lot of good resources to investigate. Another good resource is the California Title 24 Residential_Lighting_Design_Guide. This has some nice plan views to help visually show some of the options. A great resource, if you have to deal with California Title 24 lighting requirements, is the UC Davis California Lighting Technology Center (CLTC). Hey, even if you don’t give a rip about Title 24, this is cutting edge stuff.

So, I went through the house and imagined where I would want light for going from place to place (general), seeing what I was doing when I was cooking and washing my face (task), and highlighting our family picture wall (accent). I then drew up some plans and did some rendering to see what it might look like (here). A short word on rendering. It takes a bit more effort to understand computer rendering. But if you have a good 3D  model, you’re over half-way there. It’s actually pretty cool to see your virtual creation look like a photograph, and it’s possible for not too much $$ if you’re willing to take the effort. Kerkytha render is a free program, but you have to jump back and forth from SketchUp, which for me, is a PITA. A better program is Twilight Render, which at $99 is a real bargain. It is integral to SketchUp, and you can produce fantastic photorealistic renders. In any case, I did a few renders and walk-throughs, and came up with a lighting design.

Kitchen 4

Kitchen Lighting

Another aspect of lighting design is how you’re going to hook up the lights and control them. You want to be able to control certain lights from specific, convenient locations. Many times, you’ll find that it will make sense to control a group of lights from different locations, such as hall lights with a switch and the beginning and end of the hall so you can turn them on and off as you move through the space. That’s where the electrical hook-up comes into play, and we now are getting down into the nitty-gritty of the electrical design.

Kitchen Design

Now that I had the house drawn up. It was time to start thinking about the re-design. A good place to start was the kitchen because it’s my favorite room in the house. I happen to be an avid amateur chef, and before I started this remodeling project, I was the food King. Meaning that I did all of the menu planning, all of the food shopping, and all of the cooking. And I’ll probably want to pick it back up afterwards because I’m going to have a great kitchen to work in! These culinary experiences and interests give me a particular viewpoint on how a kitchen should be designed. I had some concepts and constraints in mind when I approached the kitchen design. In addition to having a good physical and experience-based idea of what I wanted as a cook, I also wanted to have things easy to clean, easy to access, durable, attractive, and inexpensive. There were many features of my current kitchen which I really liked, and in the end, I kept the same basic design. Yes, I tweaked some things, and yes, I came to the conclusion that I would have to re-do the cabinets and the island, which gave me the opportunity to put my woodworking skills and tools to good use, and incorporate some additional features. Let’s face it. Every dedicated DIY fanatic ALWAYS is in search of the next “project”, so here was yet another opportunity. And in continuing my research, I found that the original design was actually a better design than I thought. One of the things that I noticed about most of the model homes we visited during our “Love It Or List It” period was the fact that most kitchen designs suck. I mean really. Most of them look great if you just want to hang out and eat, but cook? Refrigerators across the room from the ovens. Islands too far from the other countertops. Backsplashes made of expensive material that looks nice but will be a bitch to keep clean. Storage that’s clumsily arranged and hard to get to. No concept of workflow (storage to preparation to cooking to cleaning). And my pet peeve:  a microwave over the stove.  So I started with that, and then went down the list of things that I didn’t like, but keep the stuff I did.

  1. Get rid of the microwave over the stove. These things have almost zero fan power and don’t extend far enough over the stove top to trap the oils and particulate that are a part of your cooking.  So all of that junk gets embedded in the wood of your cabinets and the ceiling above. Impossible to clean. Plus, the heat from the stovetop kills the plastic and fries the electronics. And the house gets all stunk up when you’re creating yet another culinary masterpiece that you will decide is too hard to ever do again. (Why do I keep doing that?) Replace it with a good vent hood that is designed for the purpose.
  2. Resize the island to make it closer to the sink so I could easily step back and forth, and farther from the refrigerator so people could go in and out of the kitchen with the refrigerator door open. Relocate the microwave to the island. Having the microwave in the island is a universal design concept that allows easy access to somebody who can’t reach high, but is convenient for everyone.
  3. Make pullouts for all of the shelves in the base cabinets, island and pantry. Another universal design feature. As you age, it’s more difficult to get on your hands and knees and look in the way-back for this pot or that bag of flour. Come to think of it, it’s a Pain-In-The-Ass (PITA) at any age. (If I didn’t spell it out, you would have thought I was talking about some kind of bread.)
  4. Redesign the island countertop for 2 levels. One at 36” for standing work, and one at 30” for seated work. Another universal design feature.
  5. Make the inner carcass of the cabinets around the dishwasher and sink out of pressure treated plywood. The current particleboard is coming apart.
  6. Integrate beverage storage/liquor cabinet into the island design.
  7. Lower the “spice rack”. My current island has an area between the work surfaces and the “bar” where I keep all of my baking and cooking essentials (spices, flour, sugar, oils, seasonings, baking power etc.) When you’re in the midst of cooking, this arrangement is extremely helpful in streamlining your workflow because you’re not constantly going in and out of the pantry to get the next ingredient. The only downers are (a) the tops of the containers tend to accumulate detritus — hopefully solved with the vent hood, and (b) it was placed too high to conveniently see the football games being played in the den. The new design corrects this problem.
  8. Provide a place for all of my cookbooks so I would have to ferret around for them (too much, anyway).
  9. Have a pull out cart for the mixer (a king size kitchen aid) that also serves as a supplemental work surface. More universal design.
  10. Provide increased task lighting and general lighting (universal design).
  11. Make the backsplash out of white porcelain tile with a decorative glass inset. Looks nice, easy to keep clean, and inexpensive.
  12. Have a white quartz countertop on the upper top of the island. The purpose is to be have a place to roll out pastries and cookies without having to lug out a slab of marble (which isn’t big enough anyway).
  13. All other countertops will be white Formica with a decorative oak rub rail. I did this on the first remodel of this kitchen about 12 years ago, and it still looks pretty good. Yes, it needs a refresh, but these tops aren’t that hard to make and they aren’t very expensive either so occasional replacement is no big deal. I guess I’m not a big fan of these stone/granite/marble/glass composite/concrete countertops. I mostly don’t like the look because it’s distracting when you’re trying to cook because it’s not a clean background, they’re hard surfaces so stuff breaks on them when you drop something, and they’re so dang expensive. They seem to be pretty popular, but I wonder if any of the designers/builders/owners of these are actually serious cooks. One question: Have you ever seen granite countertops in a restaurant kitchen? I think I prove my point. AND, I have the best restaurant in town. If you’re lucky, I’ll have you over for one of my dinner parties!
  14. Laminate wood flooring. I know what you’re saying – this stuff has a funny sound and is not as warm and inviting as real wood (or engineered wood). Here’s the deal: It’s inexpensive, has good traction (universal design), durable, and EASY TO KEEP CLEAN. Did I mention that it was easy to keep clean? Hey a bucket of water, a greenie, and a squeegee and you’re good to go. No fancy waxes, dirt in the grout lines, peeling varnish or gouges (like linoleum). I installed it in my last kitchen remodel 12 years ago and the only defect is when my King size kitchen aid mixer fell off the counter while kneading an extra large bread dough recipe and made a divot. It has filled up with dirt over the years so I’m GTG.

Here is a rendering of what the kitchen will look like.

KITCHEN REMODEL

KITCHEN REMODEL


Here is a SketchUp model of the island. If you know about Dynamic Components, check out the microwave, the drawers and doors, and the cart pull-out.

You’ll have to download a free copy of SketchUp to see it. Why resist?

This program is extremely powerful. And fun I might add. It has probably 90% of what you get in the pro version, and if your aim is to model, or do some small scale projects, this might be the ticket. BUT… if you want to DIY like a pro, well, you need to consider the pro version. More on that later.

Know What You’ve Got — Modeling The Existing House

The first step in designing a remodel is getting an accurate drawing, or model in this case, of what you have. This will allow you to do some design tradeoffs and, if you have a nice modeling program, give you a glimpse of what it will look like. The other benefit from doing this up-front work is that you end up learning a lot about how the structure is built and this helps give you a good idea about how to go about doing the actual work. Since I am using the SketchUp Pro modeling tool, some of what I’m going to write about will be particular to that tool. However I’ll try my best to put things in more general terms so that the narrative will be useful to as many readers as possible.

There are a number of different ways that can help you translate your structure and land into a modeling program, but the approach you decide on depends on what your goals are. For instance, it is possible to take digital pictures of your house and read them into the modeling program, do some rudimentary modeling shapes, and you now have a house. However, you don’t necessarily have the insides. Plus, if you’re going after a nicely dimensioned layout, then you’ll have to take some time to be accurate. All of the books that I’ve listed in my reference pages under design and modeling have various methods, and I encourage you to give them a look. For my purposes, I figured that just doing actual measurements would work, and it did. I had to do a lot of them, and it took several weeks of my spare time to put the model together. It looked pretty nice when it was done, but, as I kept reading about how to use the program, I found a couple of authors who did things in a much more streamlined way. So read the books first if you want to save some time. The other thing I discovered is that the building department will sometimes have the original plans for your home. Hey, somebody had to get a building permit at one point! So it is WELL worth your time, and the administrative fees, to obtain a set of your plans. Had I known this, or even had thought about it, I would have saved a lot of time.  In addition, you will likely have to show a detailed foundation plan if you’re changing any structure, and the easiest way to do it is to copy the original plans (sure beats excavating and measuring). That being said, nothing substitutes for poking around your house and figuring out what’s what. 2D drawings really don’t give you the sense of how the thing is built that a thorough walk-around and poke-about does. You’ll also discover a few other things that need “fixin’!

Here are a few things I learned about computer modeling when I did this project:

  1. There is a “goldilocks” level of detail. Too little, and you don’t get a sense of what the project is about. Too much, and the model becomes bloated and difficult to work with. Start simple and add detail as you go. If you need extra detail, like showing framing and such, then consider having a separate model for just those details.
  2. Be accurate. Learn how the modeling program “snaps” to various points and edges. I learned that the hard way and I can’t tell you the amount of time I wasted correcting sloppy modeling.
  3. Learn how to organize your model. Michael Brightman’s book (see “Design and Modeling” under References) has an excellent method, and had I used that the first time, I would have saved at least a week of my time.
  4. Customize your modeling program for workflow, meaning setting up toolbars and keyboard shortcuts. Again, Michael Brightman has some excellent ideas that will help you model faster.
  5. Be patient. Regardless of how intuitive a given program is to learn, it will take you some time to develop the necessary skills. You will make some mistakes, and in some cases, it will be easier to start over. Don’t be discouraged. Take the time to study and go on line to go through the numerous tutorials and You Tube video “how to’s”.
  6. If it’s time for you to get a technical refresh on your computer, consider getting a system optimized for graphics. The SketchUp online community organized a special deal with a custom computer maker (JNCS) that provided an optimum system. Yes, it cost some money ($4K when you include a really nice graphics monitor, wireless keyboard, and mouse for computer graphics), but it sure speeded up the modeling and I didn’t have to put up with the crashes caused by an inadequate system choking on the model.
  7. Have fun! The time spent 3D modeling can be reward in itself. It is especially cool if you can see a finished product and move it around, look inside, and see how it mimics reality.

Here is a render of my finished “as built” model:Rev 1.0 Render #1