Excavation–Oh The Joys Of Dirt!

As I was in the later stages of planning, and after the home inspector I hired pointed out that I needed to install a proper drainage system in my yard, I came to the realization that I would have to move a LOT of dirt. In a previous blog entry, I mentioned the fact that I rented a “skid steer” (or Bobcat) to do the demolition of my concrete and retaining walls. Now, with another long weekend at hand, it was time to rent the beast again and do some real digging.

I remember from my childhood an interest in heavy machinery doing all kinds of excavation and grading on a miniature scale in my sandbox. With my Tonka Toy grader and bulldozer, I was digging awesome ditches and making the grade so smooth that you could calibrate your level on it. A nice memory, perhaps, but it takes a little time to get the hang of operating one of these beasts so it doesn’t hurt you (it can), and produces the desired result.

First, safety. It is important to get hold of an operator’s manual and read it. Although the machine is very intuitive to operate, there are some basic safety concepts which must be followed. Other than doing dumb-ass stuff that the machine isn’t designed for, like using the shovel as a working platform, you really have to remember one thing:  BALANCE!!!  ALWAYS keep the HEAVY end towards the uphill side. If you have a full bucket, then forward is good. If you have an empty bucket, then backward is the preferred arrangement. I made a couple of mistakes along the way and, because the machine is very compact, the center of gravity (CG) can shift quite a bit. It’s a tradeoff between stability and compact size. Fortunately, I did not tip over, but doing wheelies with a 2 ton machine can be scary. Interesting side note: The machine has a “roll cage” which the manufacturer insists that you do not modify in any way. I wonder if that’s because the occasional operator became over-enthusiastic and found themselves upside-down! The other factor affecting balance is the height of the load. The arms can raise the load above your head in order to dump it into a truck. But if you carry the load that way, you are in serious danger of flipping over. Of course, you also need to have personal safety equipment. A hard hat, because you can actually dump crap on yourself (I did), safety glasses (your eyes are vulnerable and too important not to take this simple safety precaution), earplugs because the engine is noisy and I didn’t want to listen to any criticism about my heavy equipment operating skills, and steel toed boots because your feet are important. If your feet get injured, then you can’t walk, and you then become an invalid. Take no chances!

Second, have patience and practice. I saw a lot of You Tube videos on how to operate these machines, and I learned a lot, but there is no substitute for experience and experiment. Start with a relatively benign environment where you have some room to move around, and some latitude to make mistakes. Try to do different operations such as cut, fill, load, and dump. Yes, you may spend an hour or two getting oriented, but the time spent is well worth it.

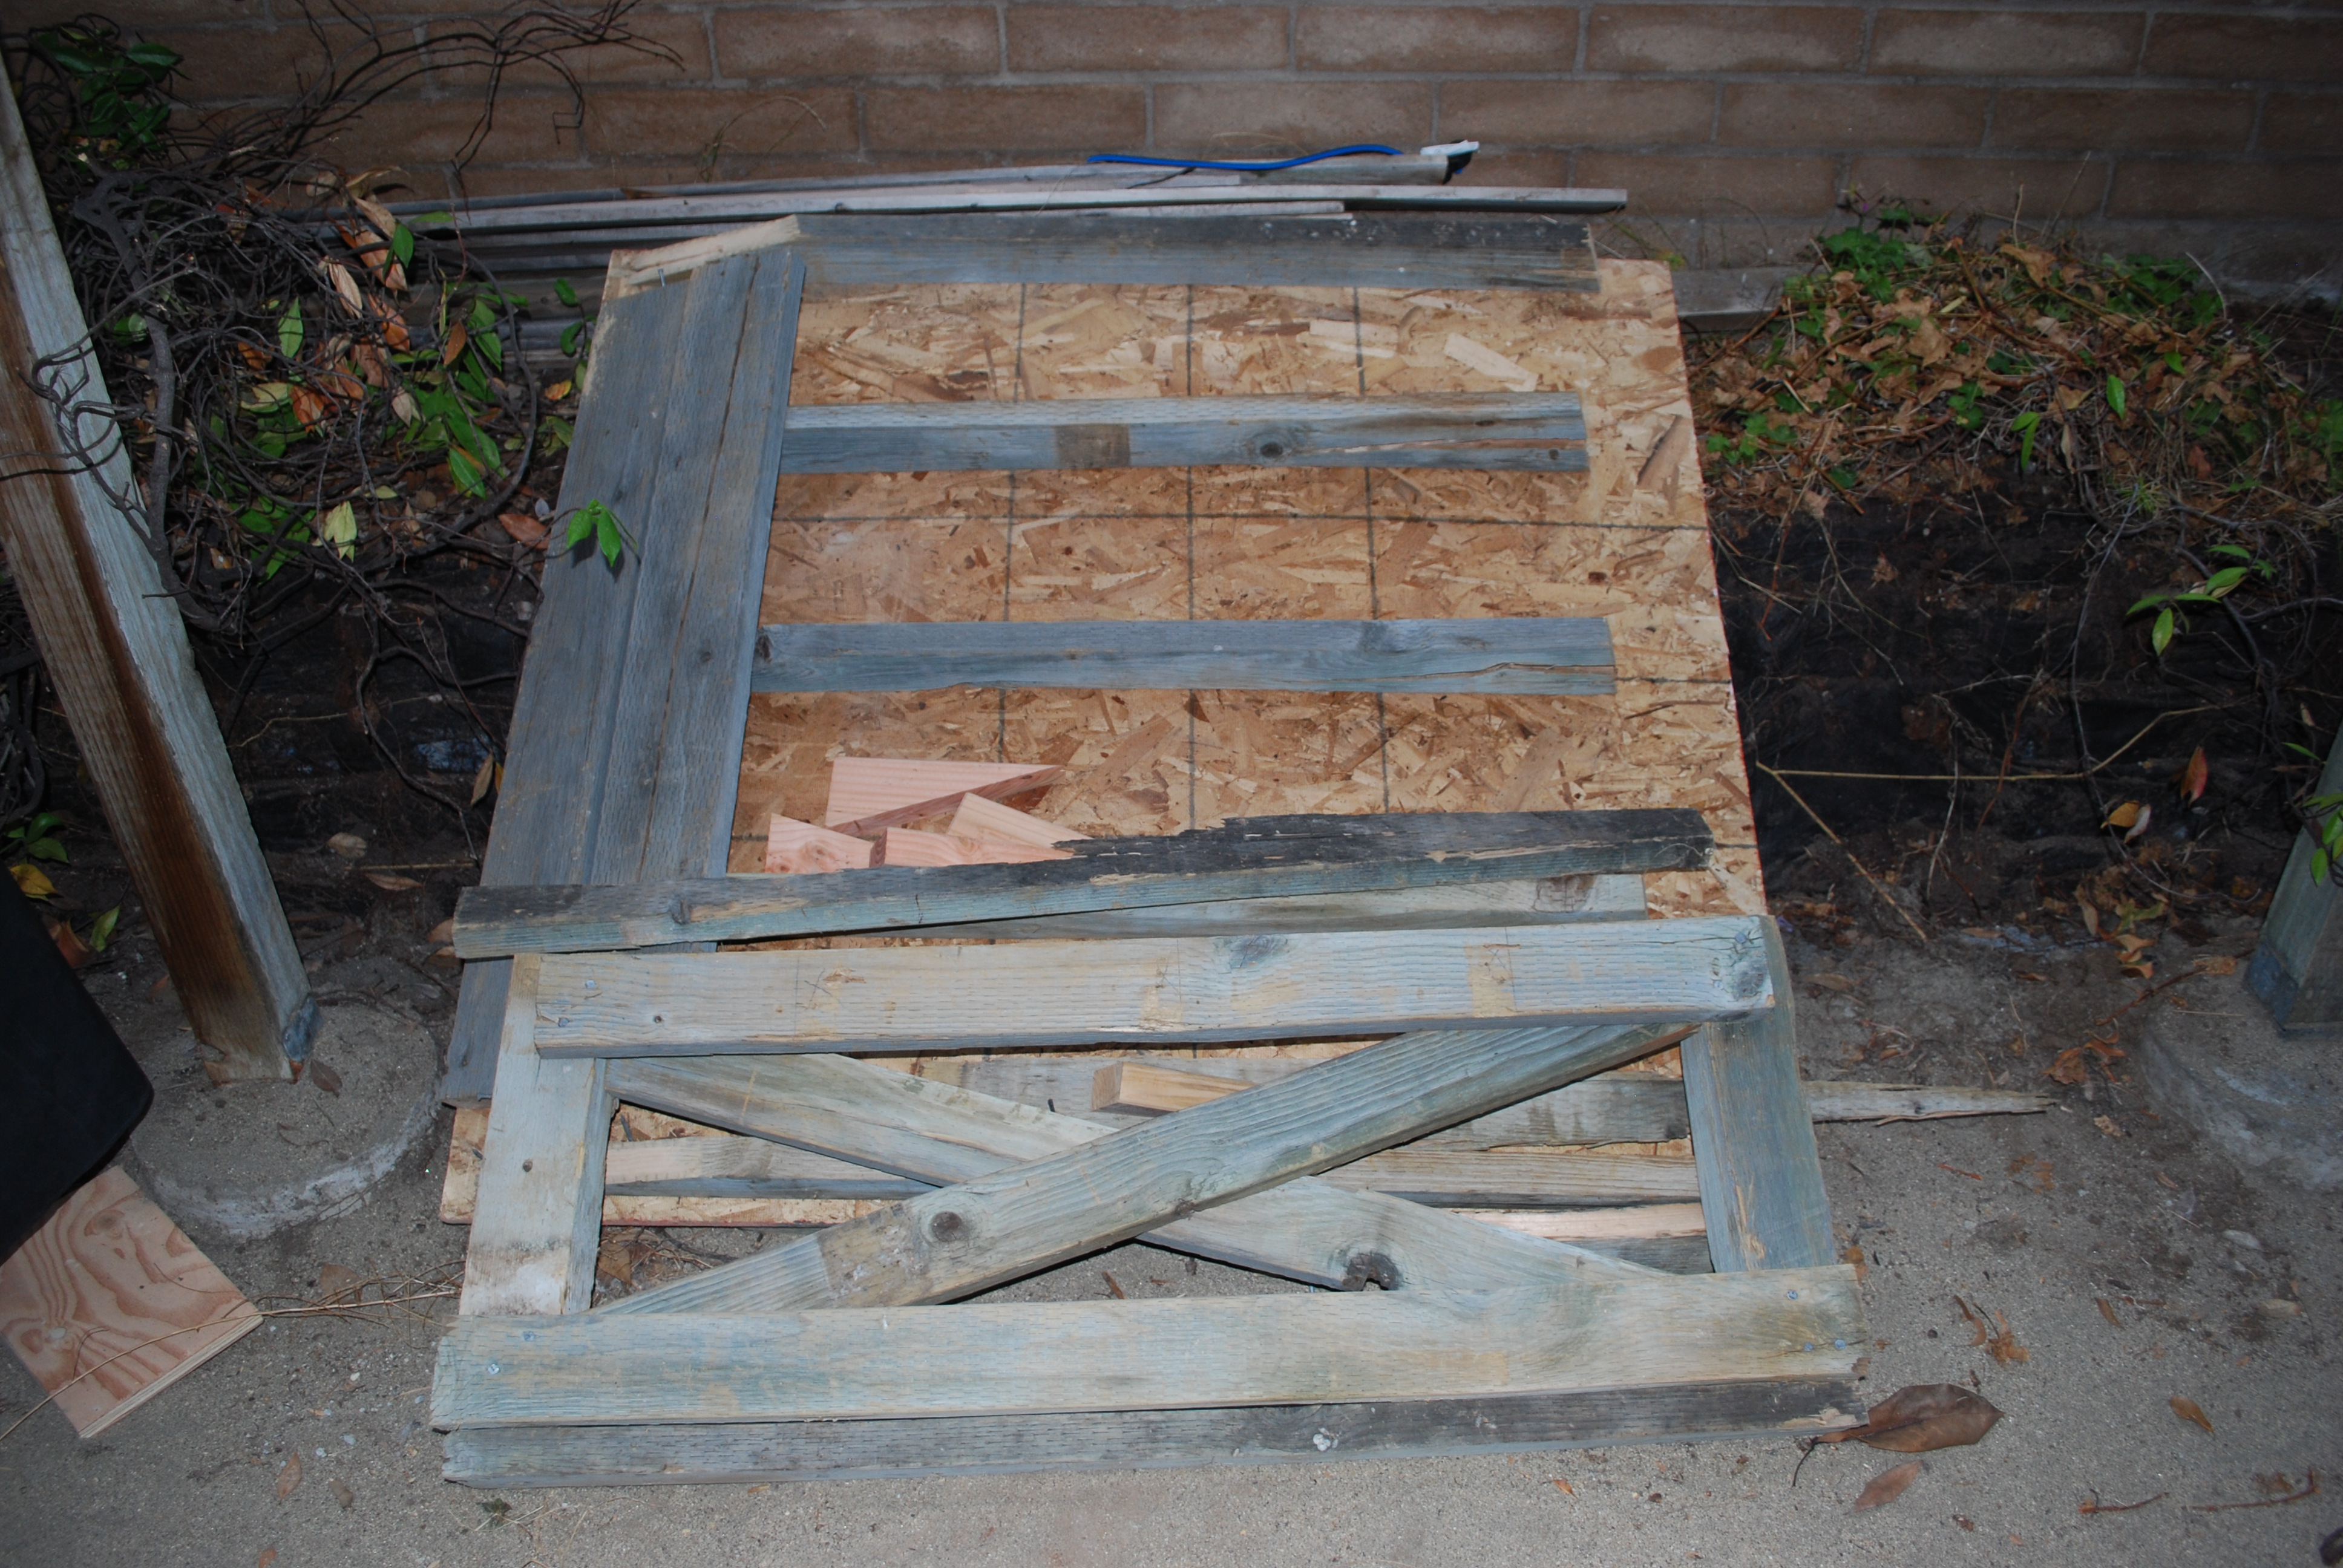
Third, have a plan. This means that you have to think through what you’re going to do given the topography and the desired end result. It’s more nuanced than just getting rid of a bunch of dirt, although you may have to do that at first. Where will you be able to dig? What are the constraints on my maneuverability? Most importantly (for me): how do I get this material out of the back yard an up a 30″ elevation? This last problem was not trivial. I had experienced two failures (detailed in a previous blog), so this time, I used railroad ties to build a “staircase”. I figured that if these ties could support a locomotive, they could support a measly skid steer. Turns out, that I was right. This solution stood up to numerous 2 ton trips. Here is a picture:
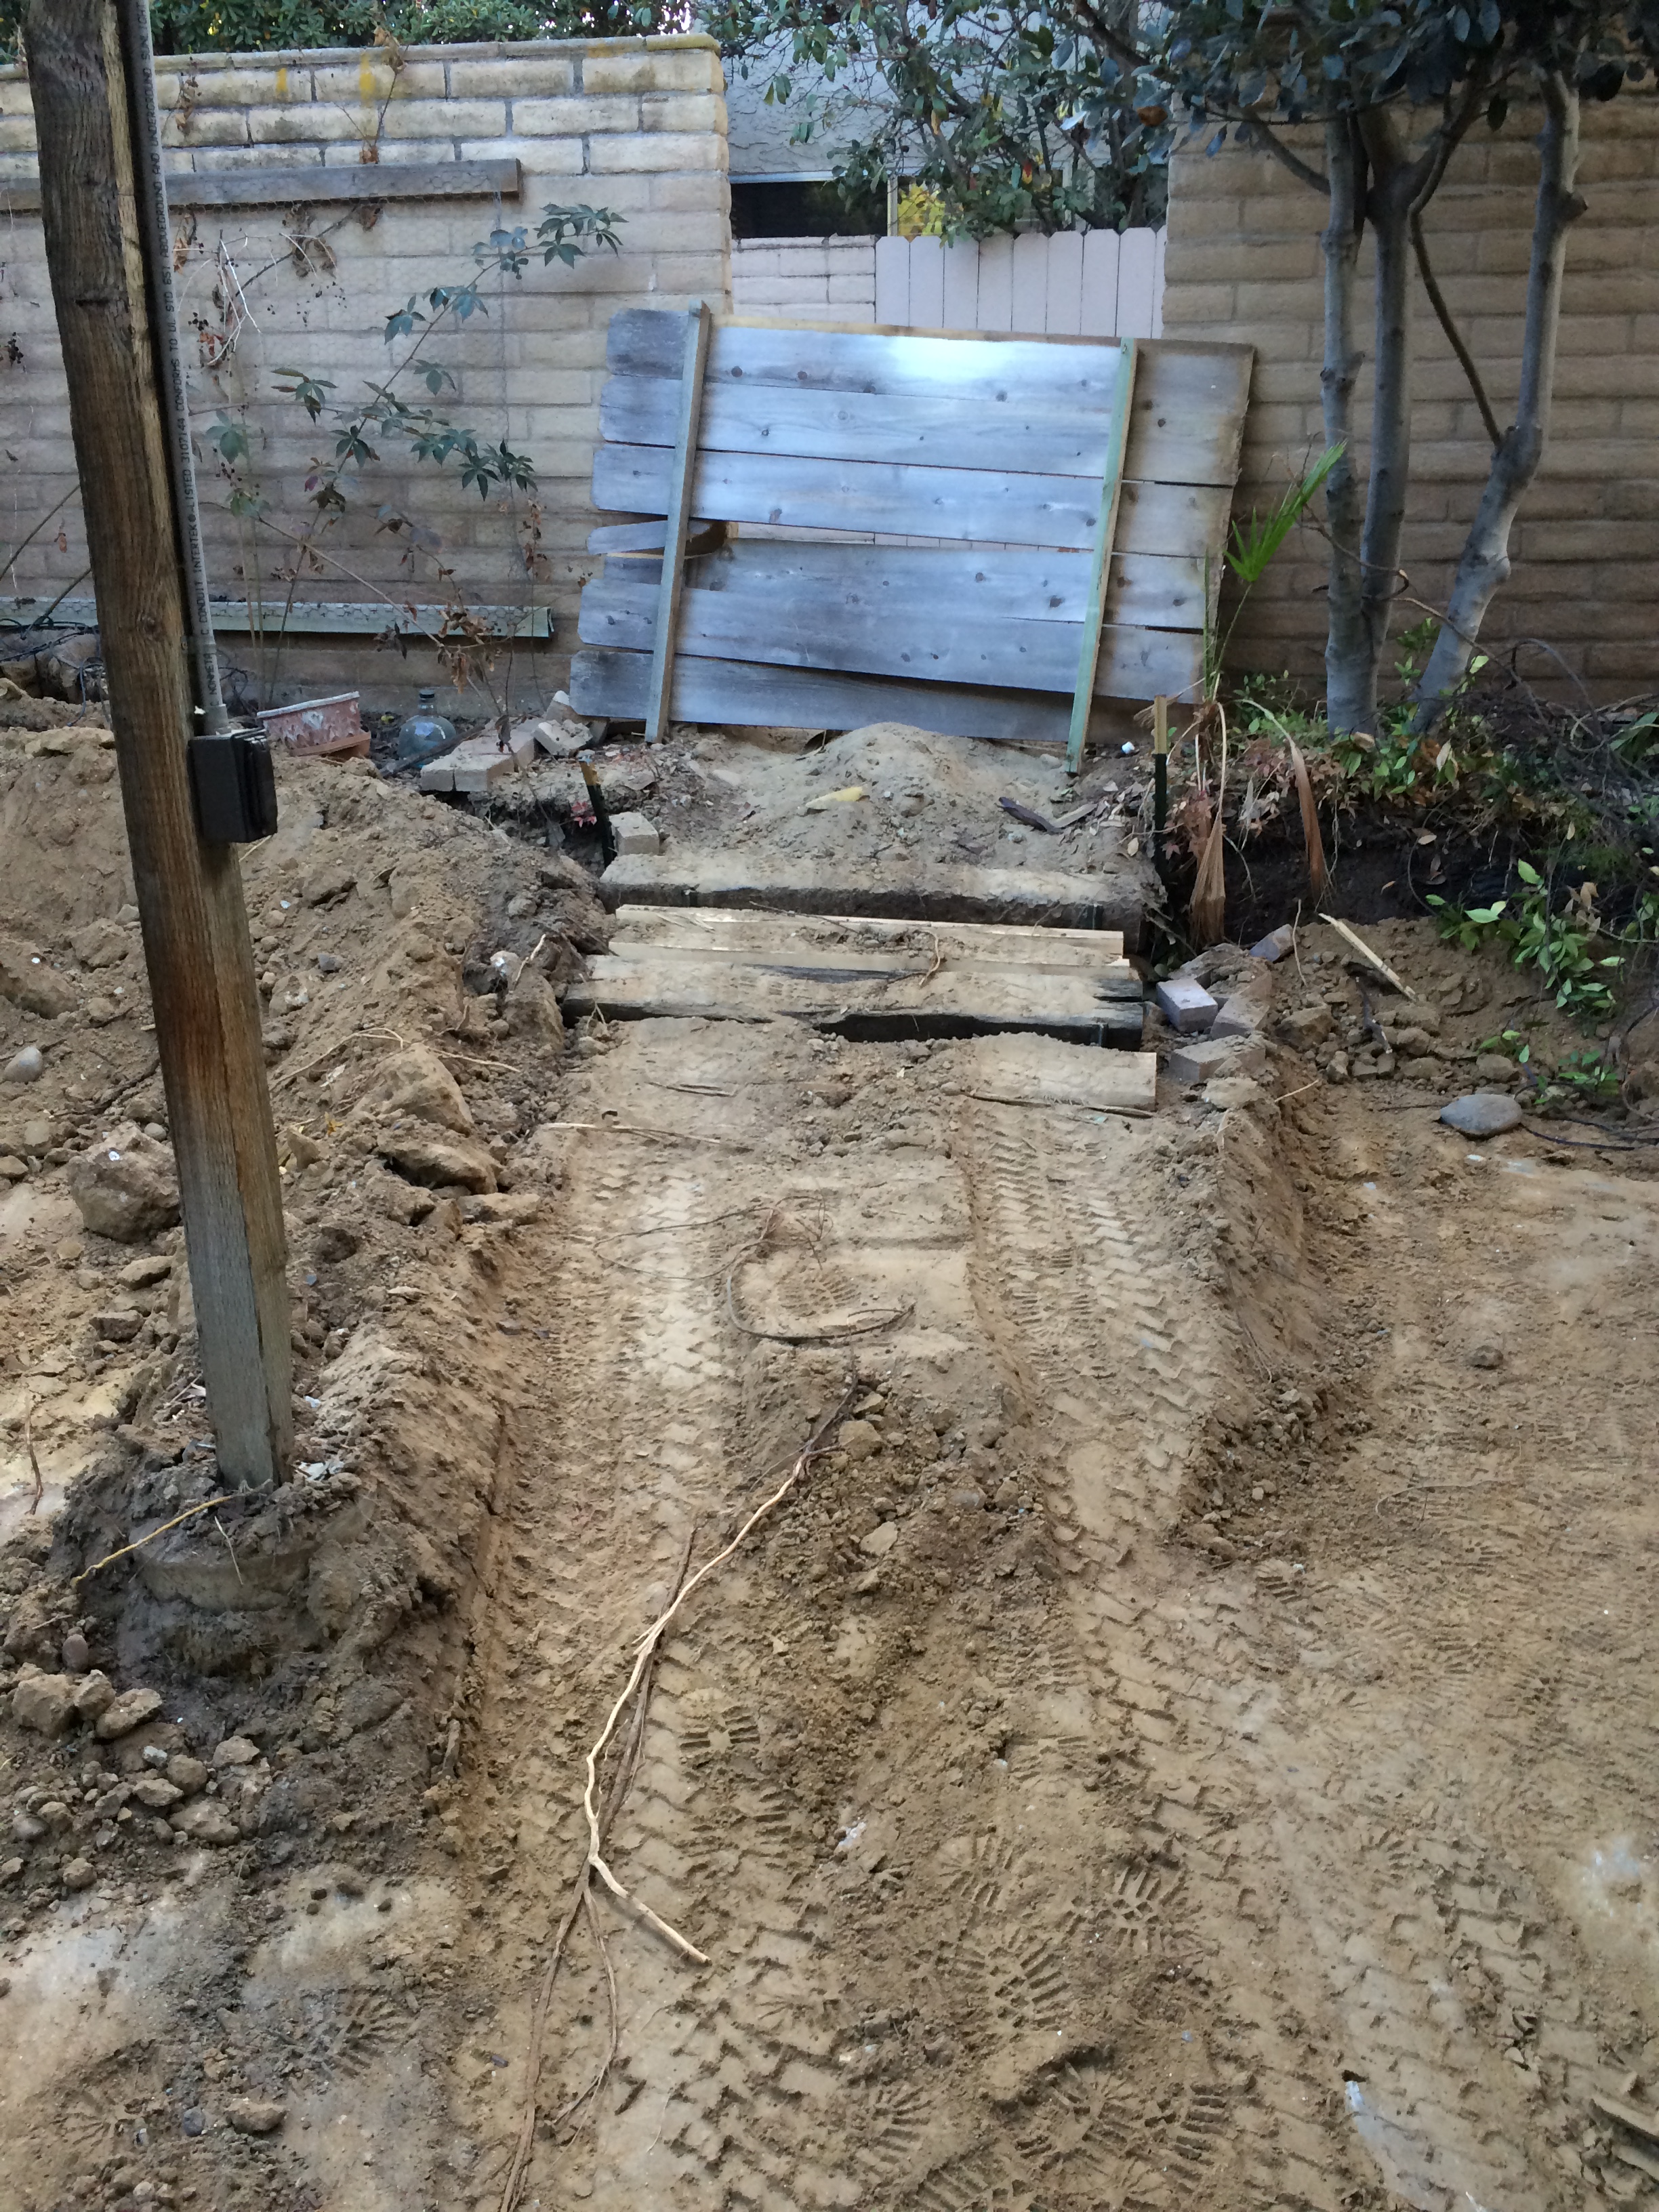
IMG_0046

A Ramp That Works!


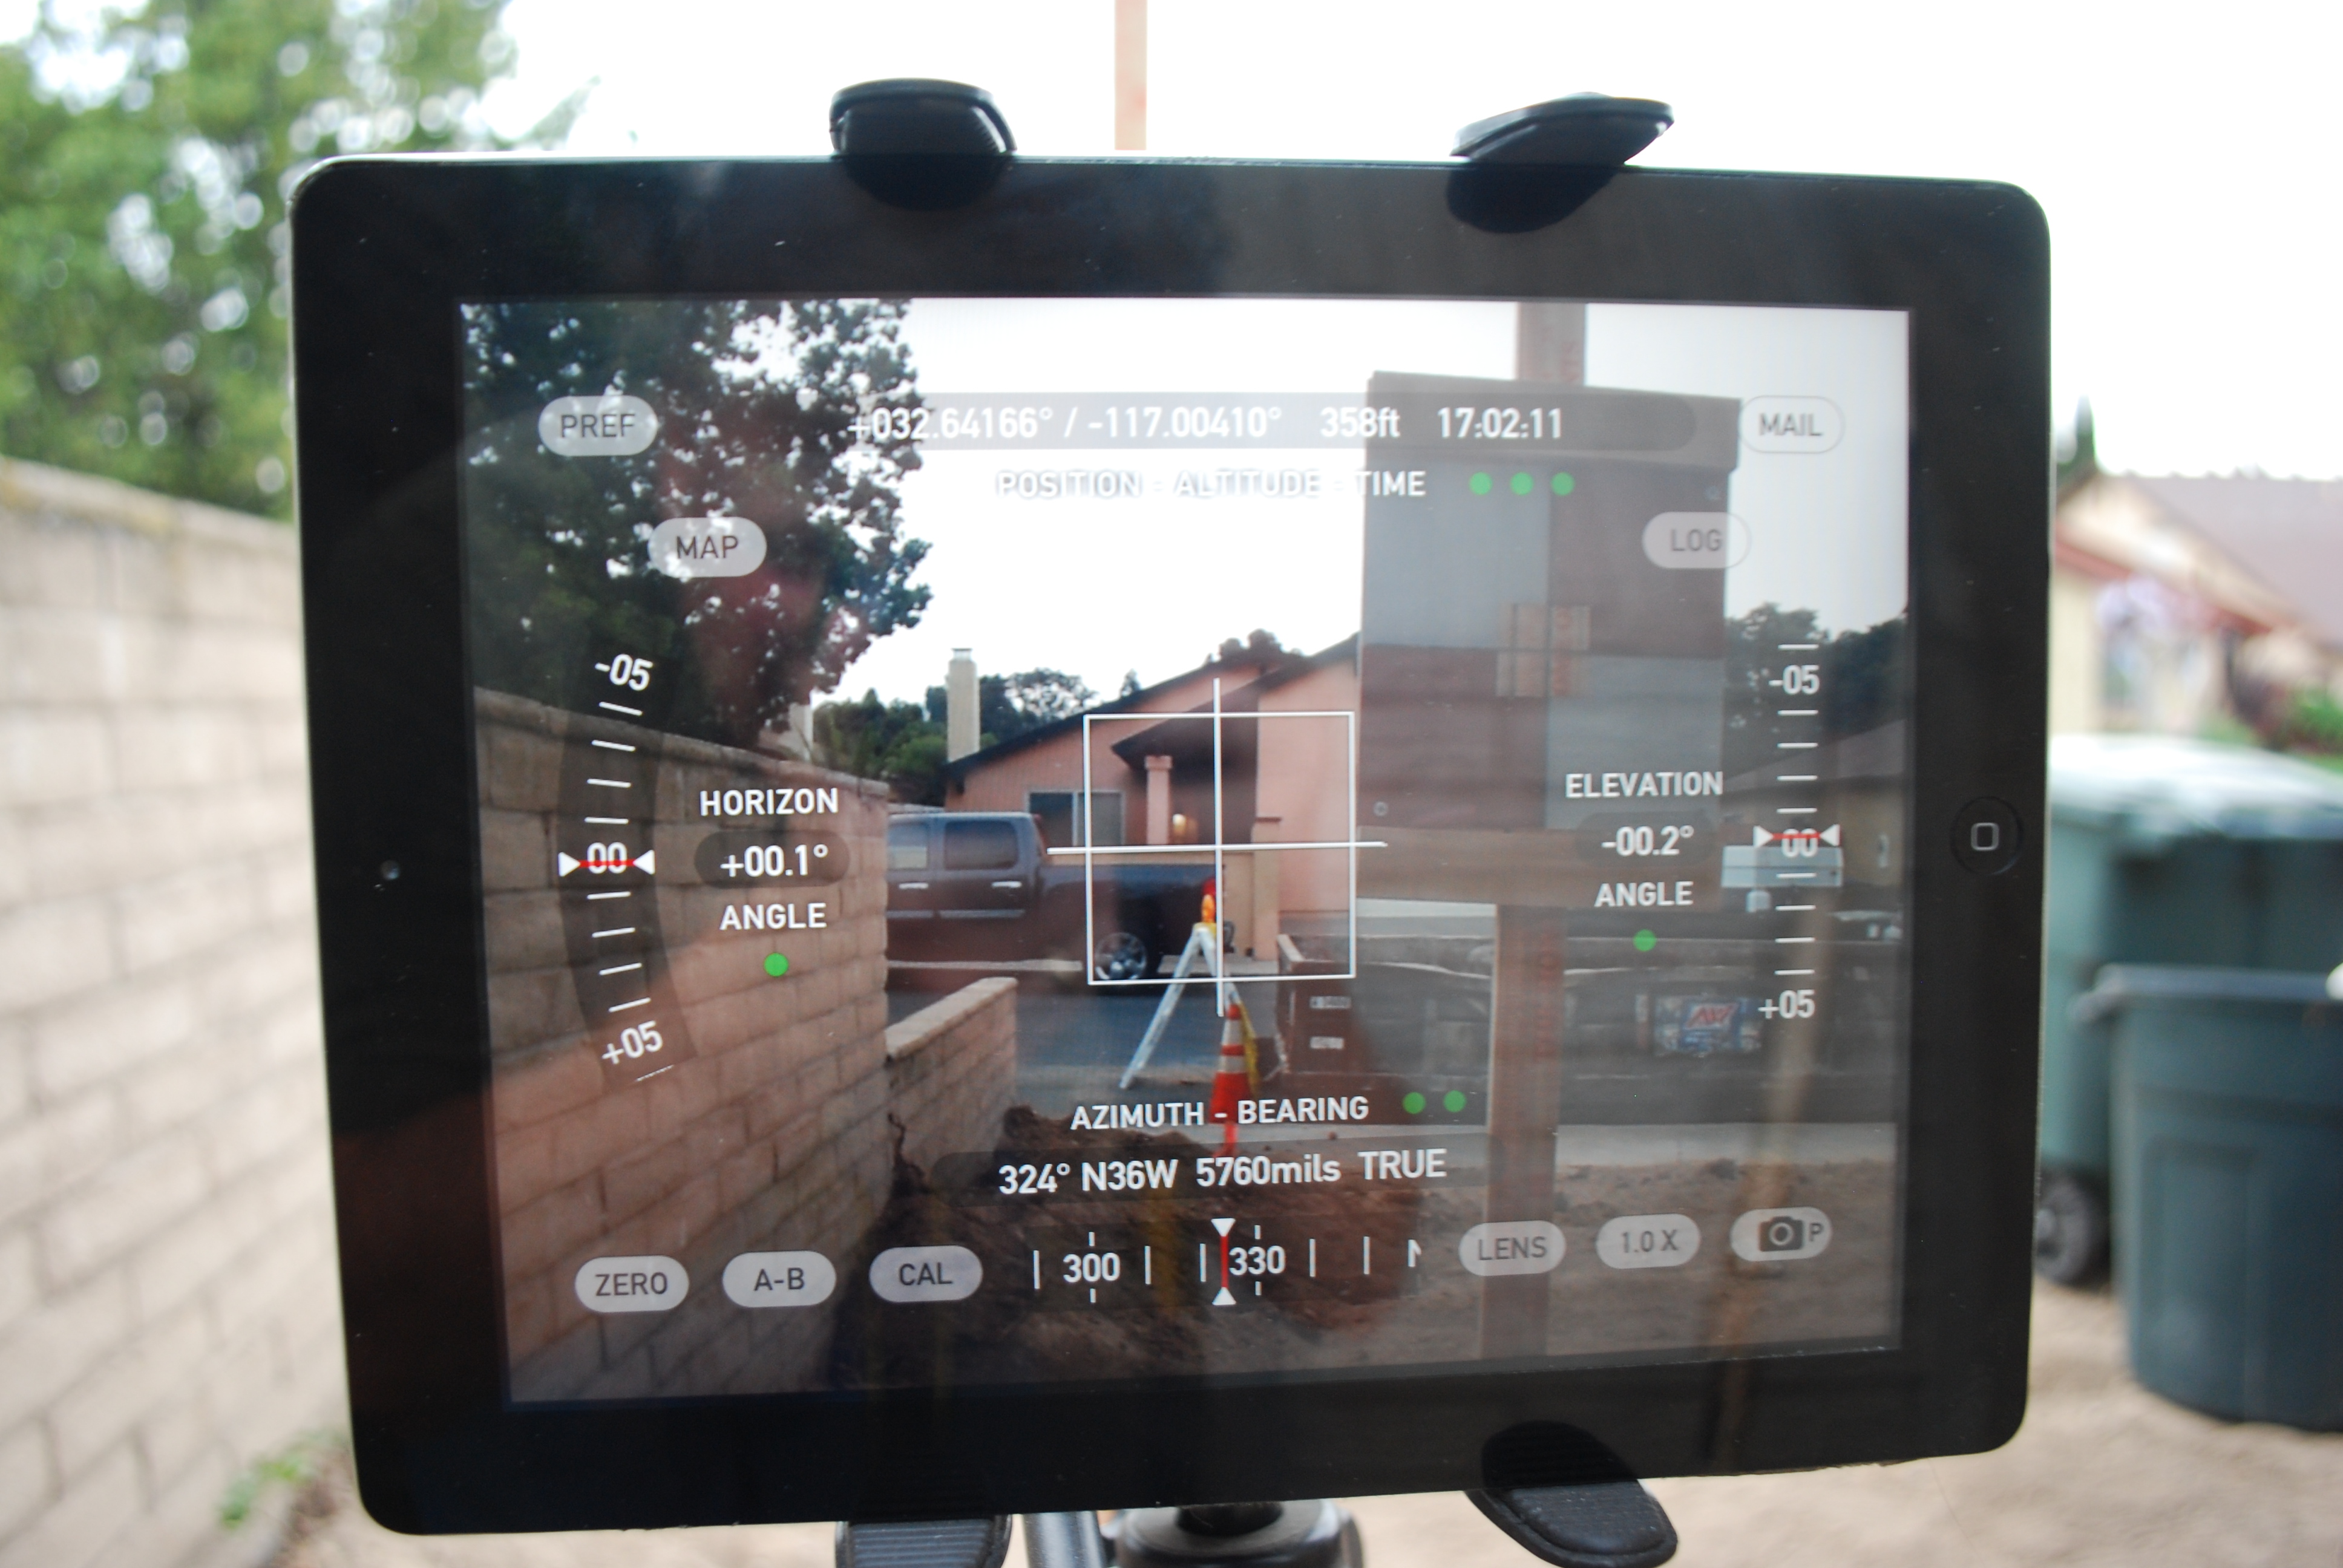
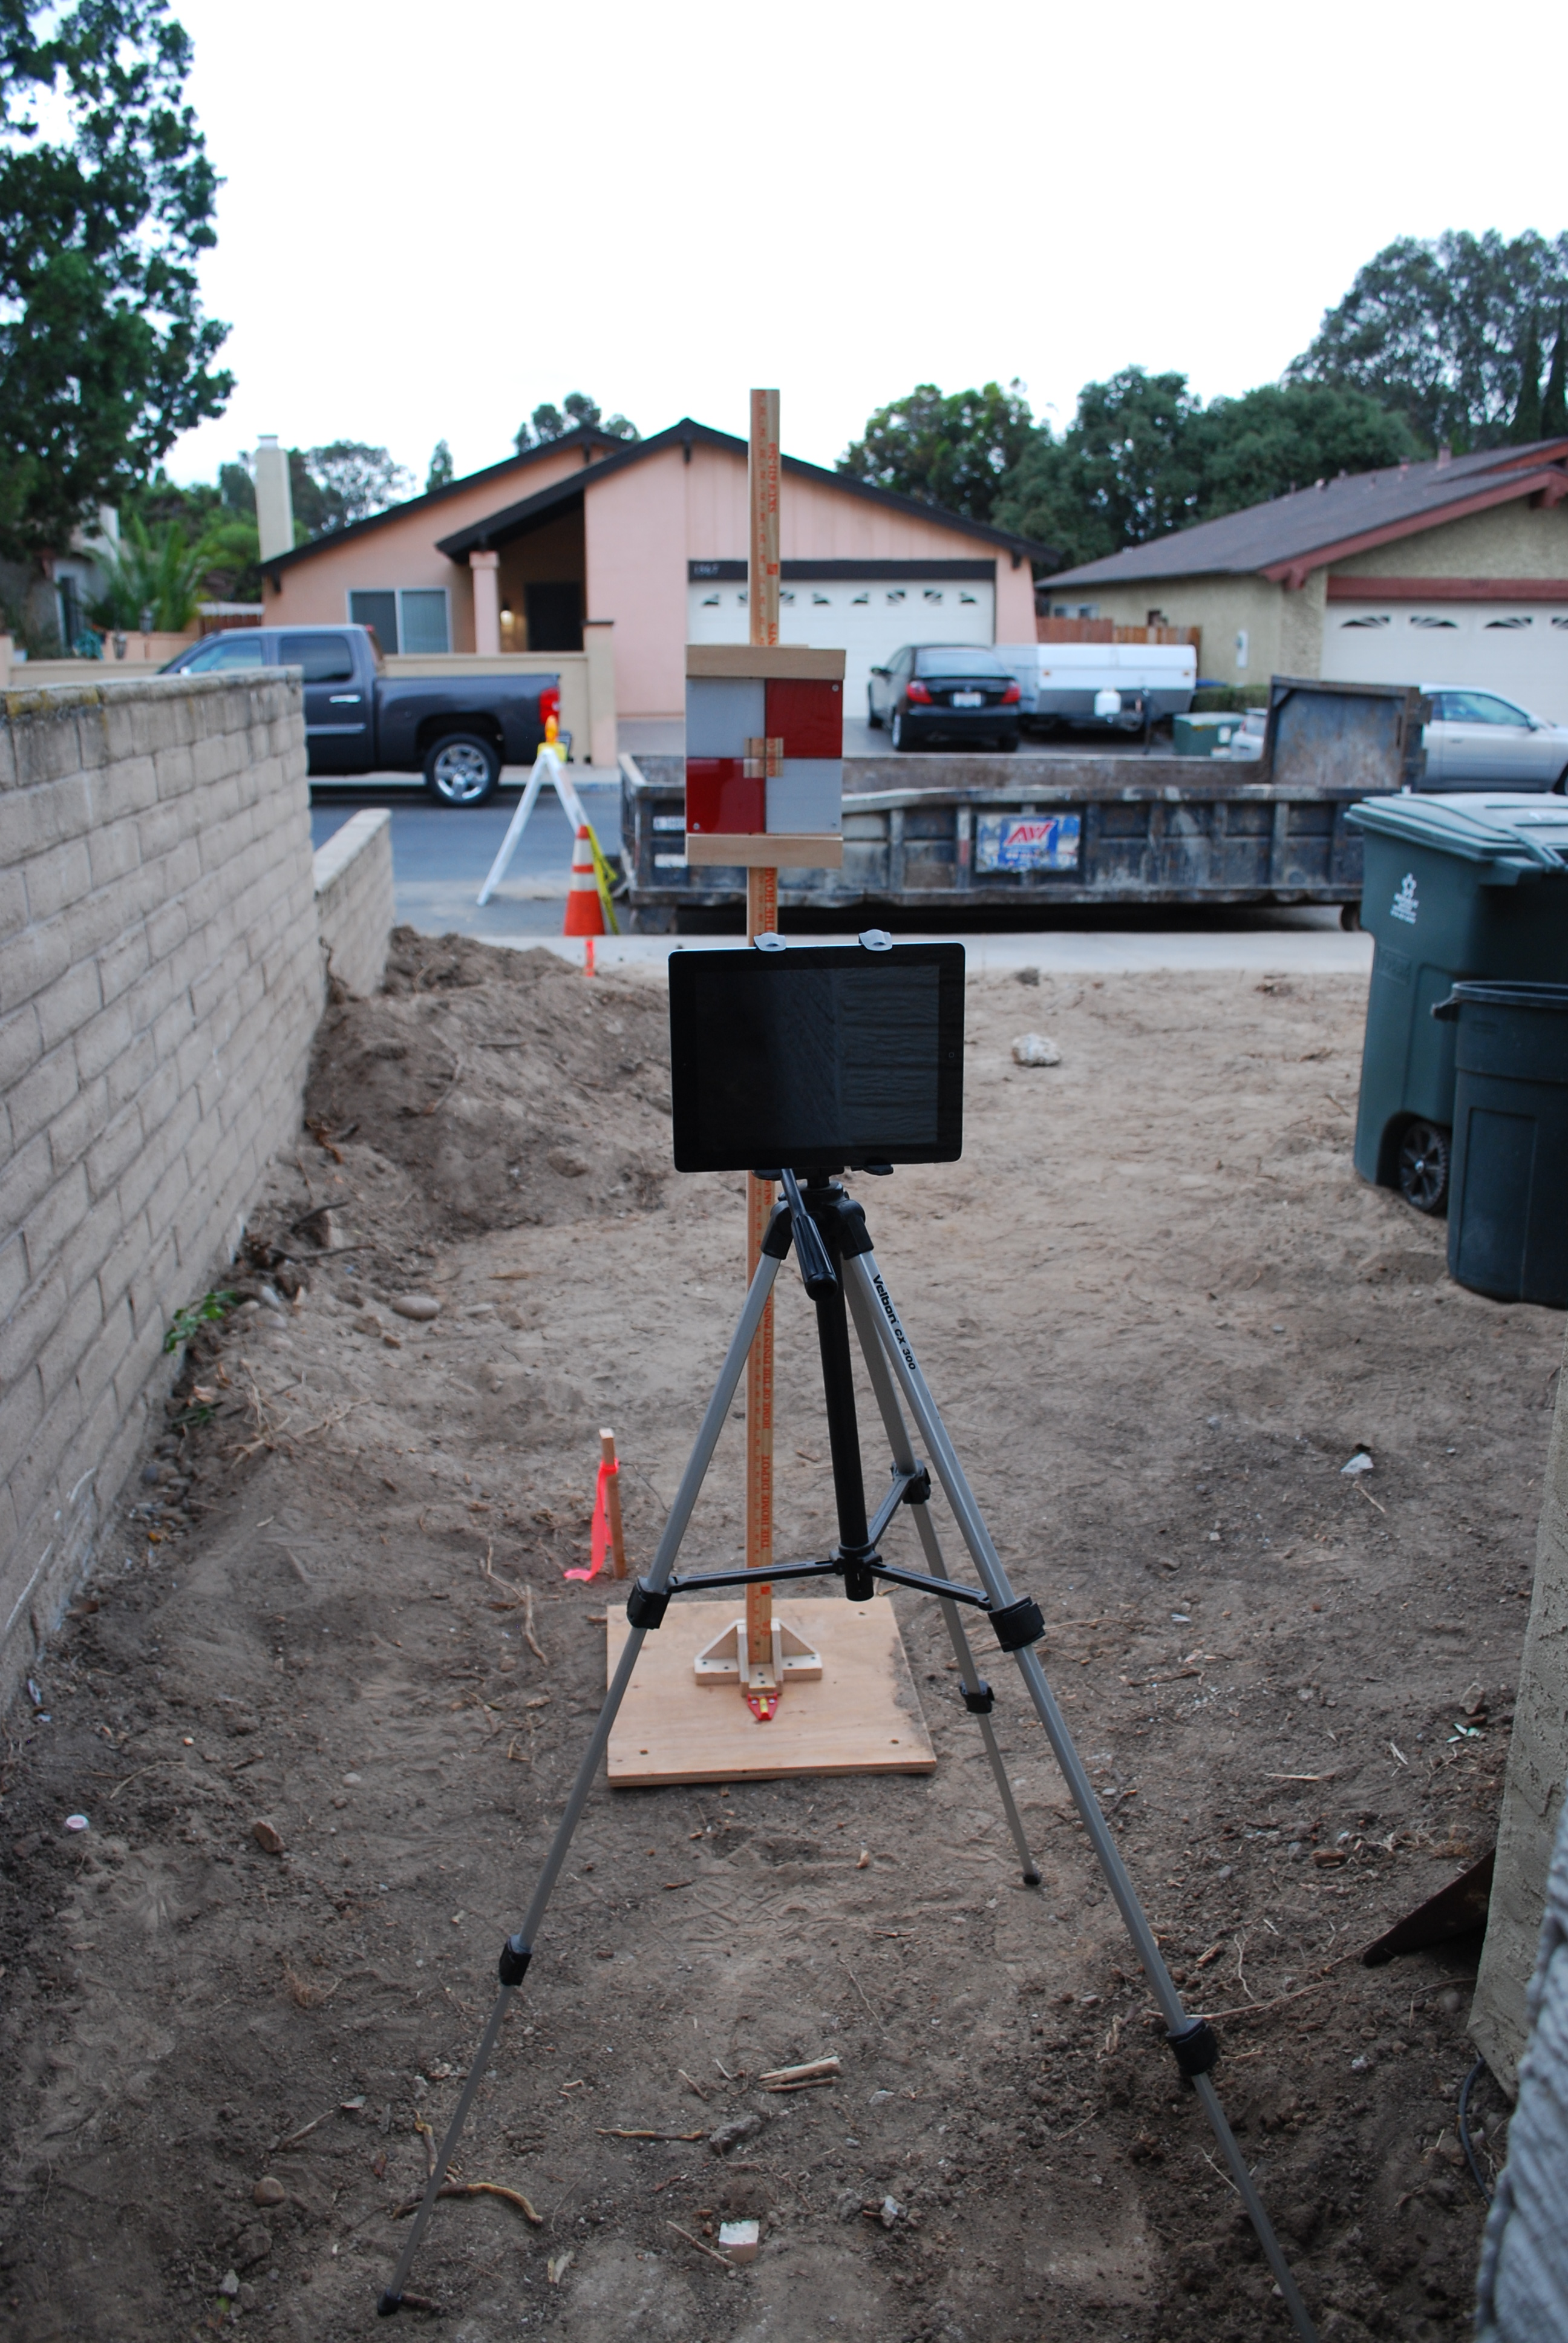
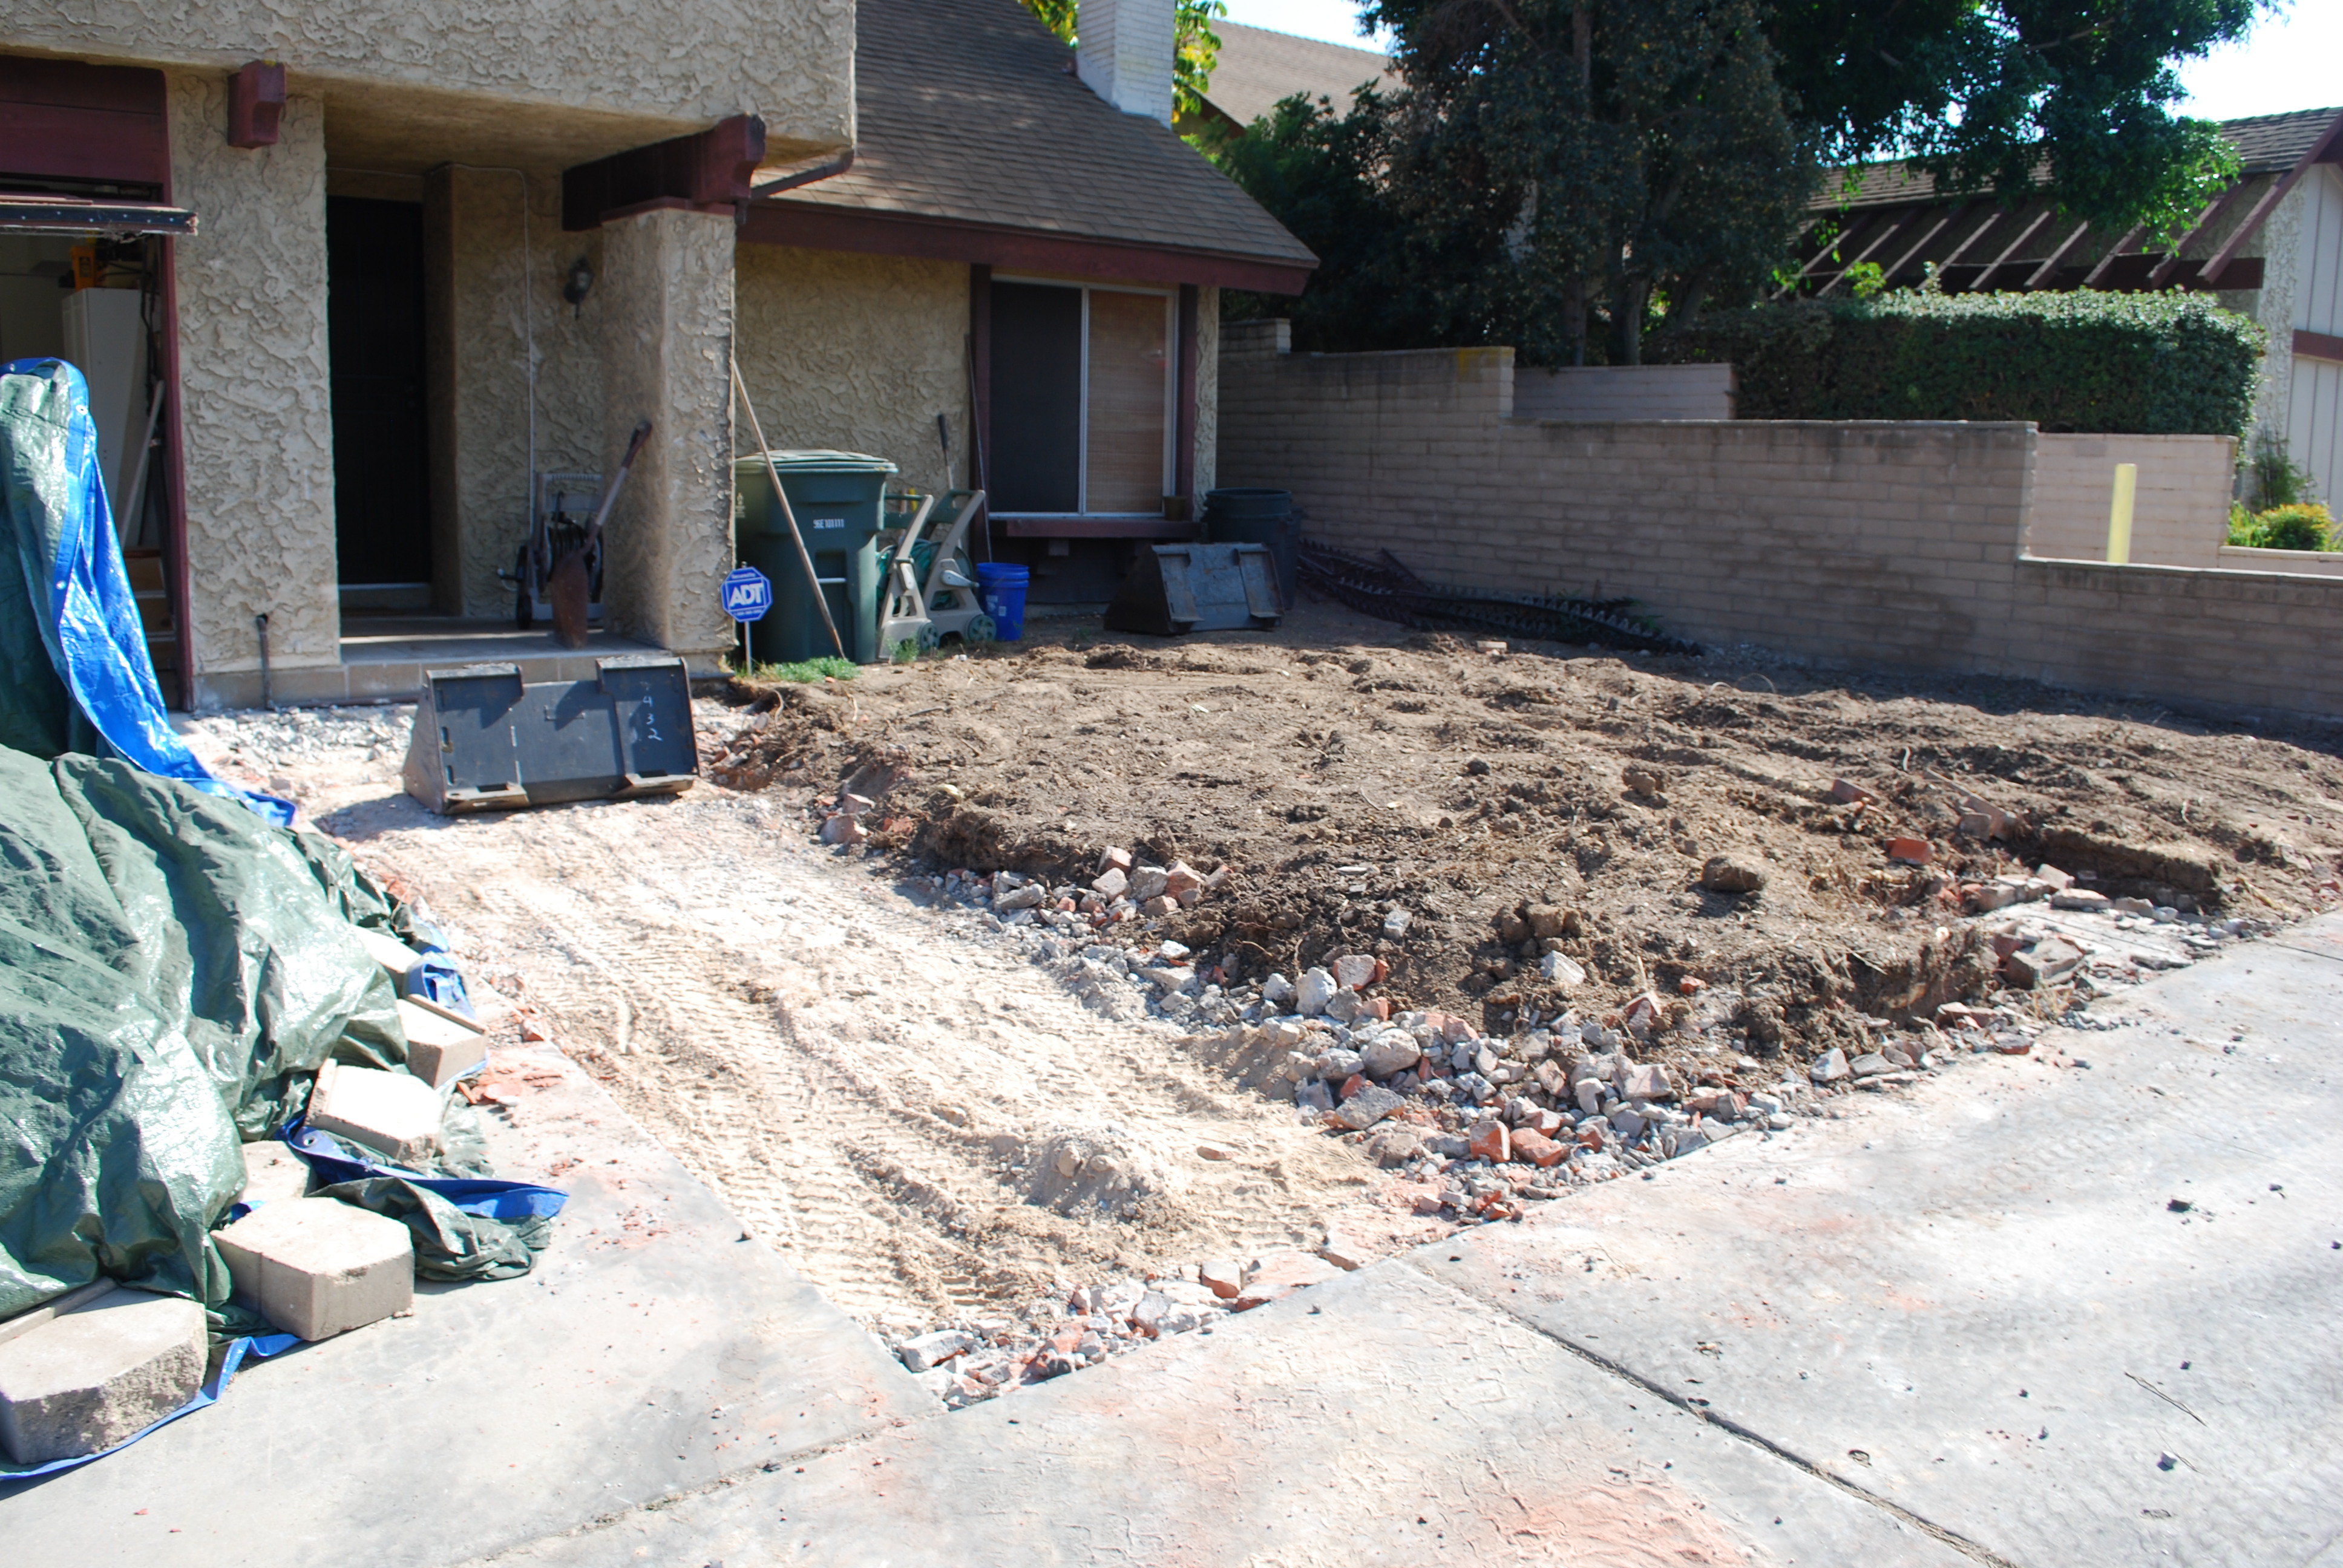
In the end, I learned how to get a full bucket (pile up your stuff, lower your bucket, and ram it while scooping the bucket (right foot) and lifting the arms (left foot). I learned how to cut (lower the bucket and aim down, push forward, but be careful about digging too deep). I learned how to fill (dump some dirt, and then lower your bucket and go backwards, then run over it a bunch to compact the dirt). Other variables include type of soil (this clay shit that I have to work with needs a jackhammer!), and proximity to existing objects (house, patio cover posts, trees….).  Bottom line is that I did OK with establishing the grade (using frequent measurements), I got rid of the dirt that I think I needed to, and (most importantly) I didn’t kill myself or anybody else. I consider that a worthy accomplishment. Here some “after” pictures:

Side Yard... Lots of handwork BC the skid steer wouldn't fit!

Side Yard… Lots of handwork BC the skid steer wouldn’t fit!


Nice grade for the driveway apron

Nice grade for the driveway apron

Front

Front yard. This was my practice place.


Catio

Backyard — no, I’m NOT installing a swimming pool!

Last Gasp

End of a long day. Full dumpster, and the skid steer ready to return. Tomorrow, they will vanish from this scene.


For those of you who were interested in seeing me actually operate the little skid steer beast, Here is my video on steer skid operation:

Here are some more videos of cool skid steer operators:

This guy is my hero. I learned SO MUCH from him.

This is how I learned how to cut and fill. PATIENCE!!

Here is a trickster. See what I mean about balance:

Even the pros F/U:

The other thing I learned is that many of these videos show how the operators make nice even contours given an expansive area. When you’re confined, it doesn’t matter how small your skid steer is. There are places where it won’t reach, and you’ll have to do the work by hand. So it turns out that I have a lot of work to do by hand! But, overall, I probably saved 90% (or more) of the backbreaking manual labor which I am getting ready to undertake as “residual” earthmoving.

In the end, you have to ask the question, was it worth it ? In other words, would this have been an activity that was better to hire out?  At first blush, I seemed to think so. Then, I looked up what the going price was for excavation services in my area. I spent about $5,000 between equipment rental, dumpster costs (5 x 15 yd = 75 yd of concrete/stone and soil detritus), and ancillary expenses (diesel fuel, measuring equipment, safety equipment). The cost for 75 yards of excavation was $10,000. So I saved $5,000. Well, I still have some scut work to do with manually finishing the job (that will take several weekends). I guess it hinges on what is most important to you. If you have a tight schedule to meet, then maybe spending $10,000 on hiring a service is OK. On the other hand, if you’re not so dependent on schedule, then maybe saving $5,000 is better. Of  course, there was the angst of worrying about the skateboarder who would suddenly appear just as my skid steer was emerging from the back and running into him (her) and killing him (her) and thereby losing what little remains of my fortune. But that didn’t happen, so the bullet was dodged, and I am happily putting aside this phase of the remodeling project. And moving onto the next one! Trenching and inspections. But only after I finish up the manual work of cleaning up the excavation. Wish me luck!


Home Fire Sprinklers — Why I Did It

When I was fiddling around in my “research” phase of what it would take to make my home compliant with contemporary standards, I stumbled across the requirement (in California at least) to have new construction homes be equipped with a fire sprinkler system. Being a veteran of the Navy, where there is a fetish about fire protection and safety — think about it, you’re surrounded volatile fuels and explosives in the middle of nowhere — it, needless to say, piqued my interest. I found out that IF you are involved in a fire (unlikely because I have been careful about minimizing the root causes of fire), then the statistics show that protection with a residential sprinkler system increases your survival rate by 80% and decreases your property damage by 70%. How could I not continue? Did I mention a fetish?

It turns out that installation of a residential fire sprinkler system is within the DIY realm. If you’re trying to go with a “modern” plumbing system, which has all sorts of headers and networks and PEX pipes, then it’s probably not DIY. If you don’t know what PEX or a networked plumbing system means, then it’s DEFINITELY NOT DIY. However, if it’s just a retrofit or a new construction, you can install a simple “tree-branch” design.

A “tree-branch” design is simply a source of water that has runs and branches to distribute the water to the individual sprinklers. The basic design mimics the design of a standard plumbing system. The source of the water needs to come from the main water supply to the house, and then branches off before the supply to the rest of the domestic water system. The sprinklers can be thought of as a “complimentary” plumbing system. So, if you can install plumbing using CPVC (Chlorinated Poly Vinyl Chloride) pipe, you’re GTG with a DIY installation. Except…..

There is a pesky requirement called a “hydraulic calculation” which involves a litany of limitations and specifications which, if followed, will ensure that your sprinkler system will spray the correct amount water over the area that it is designed to cover. There are a lot of variables, and the interaction of these variables (e.g., pressure, flowrate, pipe diameter, K-factor) can be intimidating if not fully understood.

FORTUNATELY (for me), this is right up my alley. My studies in chemical engineering involved fluid flow, so I had a good background in what the calculations were all about. I dug back into the recesses of my tiny brain, and , with the help of Wikipedia, reconstructed the seldom used  neural synapses to come up with a spreadsheet which helped me figure out the required water pressure at the street main, and the required water pressure of my design. So I called the water authority to get the pressure at my residence (105 psi) and I went merrily to work. I submitted my design, and got told that it was F/U.

First, the assumed pressure was wrong. I had to submit a request for the available water pressure at worst case conditions. It turns out that the fire department and water authority have this dance figured out. I was just not invited to it. Bottom line is that I had to request a “residual” pressure base on worst case conditions. Once I received that, I was back to ground zero. Second, I was not properly accounting for the pressure at the “second” sprinkler. Code requires that whenever you have two or more sprinklers in the same room (compartment), then you must use the most limiting flowrate from two of those sprinklers. I had to lick my wounds and remember the lessons that I learned (and apparently forgot) in my sophomore fluids flow class, and revise my handy-dandy spreadsheet to make it reflect reality.

With the new available pressure, and the right methodology with my spreadsheet, I had to re-do the entire design. In the end though, I actually was able to make the design easier and less expensive to install. The key was to make the k-factors similar. If you don’t understand what I’m talking about, then maybe you shouldn’t be designing a residential fire sprinkler system.

The upshot is that my sprinkler design was approved today. I’m actually quite proud of it because the majority of designers plug their designs into a computer program which tells them whether they are right or not. I did the calculations by hand, so I know that the design will work because I understand the underlying principles. OK, I used a spreadsheet, but I had to put the Hazen-Williams formulas in. I’m sure that if you contract a designer to provide a sprinkler plan for you, that it will be correct and will work just fine. It’s just that the designer won’t know exactly why. Let’s just keep that as our personal secret.

Here is my advice (for what it’s worth):

  • Get a residential fire sprinkler system. The cost is more than worth the peace of mind and the protection it offers your family and your home.
  • If you’re DIY, but perhaps not so interested in the nuances of hydraulic calculations, then try to hire a designer who will give you plans. Having said that, you’d better understand some of the nuances of fire sprinkler installation. There are very specific requirements for the mounting of the supply lines and sprinklers so that they don’t jump around when they get activated.
  • If you’re interested in the design, here are some references:

Residential Fire Sprinklers

Fire_Sprinkler-Installation_Instructions-English

ResidentialSprinklerInstallationGuide

Here are my plans:1370 BFD Fire Supression R 2.5

And the spreadsheet for the hydraulic calcs: 1370 BFD Hydraulic Calculation Worksheet CPVC

OK, I know I’m a geek at heart. I really do love to design and to manifest my ideas, in terms of numbers and letters (in the correct sequence) so that they can be created in the physical world. This is what I’m all about, and this is what I hope you can see as I take my next steps on the DIY highway.


P.S.  Did you notice that “Why I Did It” contains DIY backwards?

🙂

Staking Out Your Territory — How To Survey And Set The Grade

One of the challenges that any builder has is to transfer what is on the plans to the physical reality of what you happen to be working on. If you’re building a birdhouse, then you have to take the written dimensions on the plan and transfer them to the wood. Remember to subtract the width of the saw kerf! (My woodworker friends will appreciate this bit of free advice.) If you’re building a structure on a piece of land, you have to transfer those dimensions to the land. This is not a trivial endeavor,  because land is not necessarily level, square, or plumb. That’s construction terminology for orthogonal axes in a cartesian coordinate system, depending on your point of reference. But I digress.

The bottom line is that you first have to establish reference points, relative to your plans, to measure and mark your material. With wood, this pretty easy because typically  the raw material has reasonably straight and square edges. With land, you are on your own. The first priority is to establish a reference point. In the world of land surveyors, this comes down from edicts issued from backroom deals made among the wealthy and powerful who claimed the land and established certain boundaries, which may or may not have had any bearing on the indigenous people who currently occupied the land. So, because the rich and famous had guns and cannons. they displaced the indigenous occupants who had no concept of land ownership, and established the boundaries that you and I obey.   Again, I digress. Maybe this is a sign of old age.

So, if you follow the legal thread, you own property, which is documented precisely in the county records. Your deed specifies the plat (the drawing) that is the official and legal record of the land that you own. That plat has specifications which detail the dimensions of your land, as well as the precise locations of the corners of your property. If you are adventurous, you can probably take the data from the  records, and locate the surveyor’s marks on your property. If you are a city dweller, then you may see them as little nails in the sidewalk.

The builder of the house will transfer the dimensions of the corners of the property to the footprint of the house. There, the builder will begin excavation, pour the foundation, and build the house. All per the plans submitted to the city (or “building official”) and approved. It is with this thread that I start my measurements. My assumption was that the house was situated correctly on the property, and since my objective was to obtain proper drainage via a proper grade away from the house, I would use the corners of the house as the reference points.

But the problem remained: how to accurately locate the level of the land when the raw material was dimensionally random. For this, I had to learn a little bit about surveying. The basic geometry is middle school math, but the application is a bit more nuanced. How do you measure a level over a long distance? How do you mark the reference and set the other marks precisely relative to this reference? Professional surveyors use high-tech tools like laser levels and differential GPS theodolites. The equipment costs thousands and rents for hundreds. Was there a DIY solution? Well, yes. There is ALWAYS a DIY solution!

The first step was to take inventory of what I had. I had a laser measuring “tape” (I bought it when I needed to take the dimensions of the “as built” house for my plans.), a tripod, and an iPad. I checked out the apps that were available for the iPad and. lo and behold, somebody had developed a theodolite app. A theodolite is an instrument which will tell you the precise azimuth, elevation, and level from a given reference point. (If you don’t understand this terminology and how to convert polar coordinates into cartesian coordinates, then maybe surveying isn’t your thing.) The theodolite app was the ticket. All I had to do was to build a “surveyor stick”.

To explain: Surveyors need to measure changes in elevation over long distances. To do this, they set their measuring device (transit, theodolite) over a designated reference point, and then focus on a “stick” that is held by an assistant at the point they want to measure. That stick is essentially a ruler, which if the transit/theodolite is level, will measure the vertical distance between the observer and the stick.  If you combine this information with the azimuth (i.e., the angle from true North), you will have an EXACT location of that point on the earth. So, I needed a surveyor stick that was self-supporting because I couldn’t assume that I would have an assistant. I designed one, and the plans are here.SURVEYOR’S STICK. Once I was able to measure the difference in elevation, all I needed to do was to establish the grade, i.e., the slope, to allow the proper drainage. The slope is 2% away from the house, and 1% from front to back. So using my handy-dandy laser rangefinder, I simply multiplied my measured distance by the % slope to get the final elevation at the measured point.

All I had to do now was to research a bit of jargon with respect to grading and how to actually mark the property. The first thing I learned was that surveyors will mark the land using squat little stakes called “hubs” which are pounded level into the ground where you’re making your measurement. The vertical distance of the hubs are then measured between the hub and the reference (theodolite). You then take that difference and compare that to the plan. If the measured vertical distance is greater than the required distance, you need to fill (raise) the level of the land at that point. If it is less, then you need to cut (lower) the level. If you do this at several points, you can establish the contour (grade) that the plans specify. So at each hub, I would put a grade stake, with a mark that indicated a cut “C” or a fill “F” of a given dimension. Professional surveyors use 1/100 of a ft., but since my measuring devices were calibrated in inches, I used that standard. Whatever works.

The cool thing about all of this was that after all of the staking, I began to see the real outline of the plan manifested on my actual property. It was, perhaps, a turning point in the project because it represented a change in direction from demolition to construction. In my mind’s eye, I now have a glimpse of how the finished product will look like.

Here are some pictures:

Grade Stakes. Don't you like the colors?

Grade Stakes. Don’t you like the colors?

My Site Plans and Measuring Tools

My Site Plans and Measuring Tools

Theodolite App. Awesome!

Theodolite App. Awesome!

Theodolite and Surveyor Stick

Theodolite and Surveyor Stick

Empty dumpster. Ready for the next load!

Empty dumpster. Ready for the next load!


Demolition, Excavation, and Skid Steers

Now that I had the brush cleared and a dumpster to put my detritus, it was time to start demolition in earnest. The first step was to get rid of my retaining wall, sidewalks, and driveway apron made of cobblestones.

Basically any hardscape besides the driveway proper was going to go. In a blinding flash of naivete, I went ahead and rented a breaker (a.k.a jackhammer) and had the notion that I would be able to take care of this trifling demolition effort in a mere afternoon. 2 days later, I had barely made progress on that damned retaining wall, and it wasn’t looking good for the completion of the demo that weekend. I had to lift that heavy jackhammer and get it into all sorts of crazy positions in order to get proper purchase on the wall, and even then, it took forever to bust up the concrete — especially the foundation. So, I stopped the foolishness with the retaining wall and focused my remaining efforts in breaking up the sidewalk on the side of the house so I at least accomplished something during the weekend. I went back inside, cleaned up,  and nursed a beer while I licked my wounds and began plotting plan “B”.

The problem that I had was that I needed bigger tools and more power, preferably something that I didn’t have to lift and lug around. Fortunately, I rented a mini “skid steer” for use during the Columbus day holiday weekend, and I was initally planning to use the skid-steer to do excavation and grading. But these little beasties have all manner of attachments, and all I needed to do was to rent the companion breaker attachment. So, for a mere $700 extra (it was $800 for the skid-steer), I would be in business. Now, I just had to do some replanning and figure out how to operate the damned thing.

First, a little background on what a skid steer is. These are smaller versions of a standard power shovel, with a bucket on arms that can be used to scrape, scoop, push, pick up, and dump stuff. It has a small diesel engine that powers a hydraulic pump, and it has 4 wheels which are powered by hydraulic motors. These motors are controlled by handles on either side of the operator such that when you push both forward, the machine goes forward, and when you pull them both back, the machine goes back. And when you push one forward and the other back, the machine skids and spins around and does donuts. Hence “skid-steer”. The best thing about these little guys is, well, they’re little. Perhaps compact is a better work. They weigh about a ton and a half, but they’re only 36″ wide, which means they can fit into your living room through your front door. Not that you’d want to excavate your living room, but I’ve seen videos of folks driving them into garages and using them to bust up garage slabs. Which is where I got the idea to rent the breaker attachment to help me finish the demo work. Here are some pictures:

DSC_0058 DSC_0063 DSC_0057 DSC_0065


The day came when the rental company delivered the skid steer and attachments (hydraulic breaker and two buckets). I had downloaded and printed a copy of the operator’s manual, studied it, and watched some videos on operating it. With my hard had and safety glasses, I nervously strapped myself in the seat, checked everything out, and fired it up. After a few tentative moves, I found that it was very intuitive to operate, so I set the bucket down and disconnected it from the arms so I could mount the breaker attachment. Bad move. I went over some uneven ground and got stuck. Turns out that you need the weight of the bucket , or attachment, to balance things out. So the lesson is that you put all of your attachments in one place next to each other on level ground and make your changeouts there. I put on the breaker attachment, and then went to town on the front sidewalk. Awesome! That thing broke apart fairly quickly, and using the machine to pull out deeply buried chunks of concrete with the breaker was a real labor saver.

One of the conundrums I had to overcome was getting the little guy in the back yard. There was not enough clearance on the sides of the house (yep, less than 3′), but fortunately there is a common walkway on one side of the property, and there are gaps in the masonry wall that borders that walkway, covered with wood fencing. So all I had to do was remove the chunk of fence and I was in business, right?  Well… not so fast! The walkway is about 20″ higher than the level of the ground in my back yard. So I had to build a ramp. The first version looked pretty sturdy, but literally broke apart after a few uses. I had to build another one, at a critical time while I was still paying for use of the skid steer (that $1500 clock was ticking), and it was better lasting a whole day, but in the end, it didn’t cut it either. Plus it was too steep, so I was on the edge of doing wheelies going up with 1.5 tons of machine and another half ton of load. Not cool. Especially when I slipped off once, had to back up, and ended up bashing a support column on my porch cover. Ahh… the joys of DIY! At least I had to replace that column for other reasons, so NBD. I’m trying a new scheme  for next time which involves railroad ties. I figure if it can support a locomotive, it can support a measly skid steer!

Here are some pics of the failed ramp(s) and the broken post:

DSC_0071

DSC_0062 DSC_0070


In the end, I moved 2 loads of concrete and rocks (about 25 yards) and loaded up another 15 yard dumpster with excess earth. I still have some grading to do, so there will be more earth removal. And my grading skills suck. But I relish the chance to improve for next time, and I’m carefully studying YouTube videos as part of my heavy equipment apprenticeship program. Nonetheless,  one typically learns by doing. Either that, or I’m going to have a really bumpy landscape!


More pics:

DSC_0055 DSC_0067DSC_0056 DSC_0072

Some Thoughts About Having A Truck

This past weekend I needed a 4×8 sheet of plywood, and because I have a Prius instead of a truck, I had to do the good old Home Depot truck rental. Not really a bad deal, but I paid $12.00 for the material and $20.00 to rent the truck. On the surface, that may seem like a waste of money to pay more for “shipping” than for the actual product, but in the long term, owning a truck costs a lot more. My wife and I discussed this early on because I figure with a remodeling project, it sure could be handy having a truck whenever you need it. Plus it seemed like it would be a nice toy. But the numbers prove otherwise. Here is the run-down:

$10,000 for a used truck in reasonable condition (i.e., I’m not going to buy a $6,000 truck and have to put $4,000 worth of repairs into it).

$1,000 for insurance and registration ($500 per year for the two years of the remodeling project).

$2,500 for gas (5000 miles per year / 15 miles per gallon x $4.00 per gallon times two years).

$500 for maintenance

Total: $14,000

-$8,000 when I sell the truck after two years

$6,000 total ownership cost.

For $6,000 I can rent the Home Depot truck 300 times! That’s like every other day. I figure the max I’ll ever use that rental truck will be once a month, so $20.00 x 24 months = $480. That means I save $5,500 if I just rent the darned truck. That’s my new A/C system right there! (Or at least a good down payment on it.)

That being said, there are always a few complications such as somebody else has the truck when you need it. However, this is easily overcome by some planning and shopping strategy. Most DIYs get their stuff on Saturdays and Sundays, so try to avoid those times, and if you do need the truck, get there when the place opens and reserve it right away. Then do your shopping and get in and out.

Hey, trucks are cool.  Nothing wrong with having a truck if that’s what you like to drive. But unless you’re going to a jobsite every day and really using it, it just isn’t economical for a DIYer, so don’t kid yourself that you’re saving any money. It’s much less expensive, and more convenient, to have the suppliers deliver to the jobsite and on those rare occasions when you need to, just rent a truck for the specific need. Even if it is only $12.00 worth of materials. (OK, just this one time.) Besides, my Prius can hold a lot when it comes down to it. Just not 4×8 sheets of plywood!

The Dumpster Do-Si-Do

One of the (many) common denominators in a remodeling project is demolition. With demolition comes the necessity to get rid of the debris. There are two basic approaches for a DIY’er to address this requirement: (1) Pay somebody to come and do the clean-up and haul all the detritus away; (2) rent  a dumpster. A third option, which is not DIY, is to task your subcontractor to dispose of any waste generated by the job. This makes sense, especially if you’re dealing with things like brush removal, tree trimming, or hazardous waste, like asbestos, which is typically encountered with HVAC upgrades. But usually the folks who you will subcontract know how to deal with this, and again, it ain’t DIY.

Option one, paying somebody to come in and haul away your stuff, can be very useful, especially if you have a relatively small job. These folks are quick, efficient, tidy, and you don’t have to concern yourself with any of the codes, regulations, or liabilities of disposing your waste. The downside is that these folks are pretty expensive, and you lose some flexibility with respect to generating your waste on your own time schedule.

Option two, renting a dumpster, is fairly typical of what a remodeling contractor will do. The dumpster will be placed in front of the home, and you can add as your needs require. How simple can that be? Well…. NOTHING in remodeling can be so simple!

You just can’t plop a dumpster anywhere you want. If you have some space on your property, then consider yourself lucky as the requirements are typically less demanding. In my case, I have no room on my postage stamp sized property, so the only option was to place it on the street in front of my house. Now the fun starts.

Because the street is owned by the homeowners association, I had to get permission of the HOA board. They granted permission provided that I informed  my neighbors about the dumpster. Turned out that I had the opportunity to meet some of my neighbors (for the first time), so maybe that is a blessing in disguise. However, I also had to deal with the city ordinances, and the company who would supply the dumpster is contracted by the city, so there was no way out. When I first requested a dumpster from the waste services company, all of a sudden, I had to deal with additional complexities. (1) What type of waste? (general residential demolition). (2) Do you have any heavy waste? (Yes, I have concrete, stones, brick, and dirt. (3) Concrete, bricks, and stones go in a 15 yd dumpster. If you put dirt in it, we have to charge extra. (Well , at least they told me.) (3) Do you have a permit from the city? (No, but not required because, this is a private street). Here is where the plot thickens.

I tried, valiantly, to get an answer from the city as to whether I needed a permit or not. I left a message with somebody at public works, but I wanted to find out the answer, so I kept calling the city and eventually found a city employee who said “If it’s a private street, you don’t need a permit, but you have to place traffic barriers with flashing lights around the dumpster.” I inquired about the necessity for that requirement and was told that there had been a number of accidents whereby the drivers of certain vehicles have crashed into dumpsters parked on the street because they did not have the same kind of reflective markings that a parked car does. I am certain that alcohol was NOT a factor in any of these incidents. (The person on the phone chuckled appropriately.) In any case, I agreed to procure (purchase) traffic barricades and lights. Heck. They may be useful in other circumstances in the future.

So, I called back the dumpster company, and I reassured them that I did not need a permit, and that all I needed was a HOA letter telling them that it was OK to put a dumpster on the street. Then, 2 days before delivery, I get a call from the city saying that thee person whom I called was out and that they looked up my address and determined that I would need a permit. So much for inter-organizational communications! So I went to the place where they issue permits, got the permit, and e-mailed it to the waste disposal company to make sure that everything was square. I’m not sure what the $65 fee was used for other than supporting the city’s bureaucracy, but being a retired military officer, I should not be one to judge. I followed up with the dumpster company and was assured of prompt delivery on the date agreed upon. The dumpster came and I was ready to accept in all respects.

This is what I learned:

(1) A bureaucracy has a mind of its own, and you need to be flexible, and  be accommodating, to get what you want. Honey is better than vinegar.

(2) Your project has a mind of its own. After I took a lot of effort to setting up the dumpster, and equipment rental, I originally wanted to get all of the demoe’d hardscape into the dumpster the first day, but the backyard retaining wall was far more difficult to demo. I ran into serious trouble. My schedule was trashed, and  I had to quickly re-arrange my plan. The bottom line is that I did not have the right tool for the job. So I came up with plan “b”. Rent a hydraulic breaker with the steer-skid, and stop the manual demolition nonsense. Heavy equipment (on a DIY scale), will make short order of this problem.

More to follow….

Site Planning Complete — Digging Has Commenced!

Although I had to submit a “site plan” to the city for inclusion in the building permit plan set, I really didn’t have a plan that was detailed enough for me to work with. Additionally, when it came time to start digging, my wife and I took a second look at the front yard and decided to completely change it since it had to be gutted anyway. As mentioned in my previous post, I had to add an irrigation system, and I determined that all existing retaining walls had to be re-done because when I lowered the backyard grade to the correct level, it would undermine the existing retaining wall. Talk about project expansion! So, I went about revising the site plan, and I’ve uploaded it here: 1370 BFD LANDSCAPE PLAN R 0.0 for your reading pleasure.

The first action that I had to do was remove all of the bricks and sand from my existing patio. Rather than toss the bricks and buy new ones, which would be tremendously expensive and wasteful, I decided to pressure wash them and stack them up. For the sand, I needed a way to screen out all of the mess, and after some research, I came upon a website that had plans for a hand “trommel”. This is a device that was used by gold prospectors, and it turns out that there is an active hobby community that goes out and does this sort of thing. Hence, there are resources available. You could buy a motorized one, all assembled, for a lot of money, but a guy developed a plan for a real DIY trommel that is made of Home Depot (or Lowe’s) buckets, some PVC pipe and fittings, and some screen. Here is a link to his page, and here is a picture of my finished model.

Site Work 043

I also needed to get rid of all of the plants in front of the house. This would be no easy task as it was overgrown with agave and rosemary. They were pretty plants, and it was a nice ecosystem with zero maintenance (no watering), and buzzing with bees who were hard at work gathering rosemary nectar. (That would make awesome honey!) Alas, with heavy heart, we called in a landscaper to do the dirty work. Good thing because he got attacked by the bees and had to go to the drug store to get some benadryl. Plus, digging out that agave is a royal pain. It as well worth the $850 I paid him and his helper. Here are before and after pictures:

Front Yard After

Front Yard After

So, work is now well underway. There’s still a lot of site work to go, but I’ll have more updates along the way. Next up: Dumpsters and Steer Skids!

Front Yard Before

Front Yard Before


Irrigation — And How A Project Expands

This past week, I’ve been working on gutting my landscape. The reason for this is because the first order of business is to install a site drainage system. The reason this is first on the list is because I have to excavate in order to install my upgraded electrical power line from the power head on the street. I then have to cover it up and pour concrete because that is where I am going to place the temporary storage box for all the household crap I have to move in order to vacate my master bedroom to build out the addition. A real Chinese puzzle.  But I digress. So, if I’m going to excavate and break up concrete and hardscape, I better do this once. That means that I have to plan for ALL underground utilities, being it 12V lighting, drainage, or irrigation.

When I started looking into irrigation, I wanted to make sure that I was making a very conservative plan as water, especially for irrigation, is a scarce resource here in Southern California. My studies revealed that the two approaches which made most sense were drip irrigation with a xeriscape, and use of grey water from the laundry. First the xeriscape.

The idea of a xeriscape is not new. There are several high quality example gardens in our area, and we have visited them on more than one occasion. The idea is that you provide some drip irrigation to start the plants out, and as they mature, they require less and less water. Plus, drip irrigation is very efficient as it waters the roots directly, as opposed to spraying water all over the place and having the excess run down the storm drain. Let’s face it: if you live in Southern California, or any other place which is subject to drought, then you should be ashamed of yourself if you have spray irrigation. Especially if you have a lawn. If you like the expanse of green, then get artificial turf. The modern and smart way to landscape is with drip irrigation and water conservative plants.

The best reference I was able to come up with was a website called irrigationtutorials.com.  The person who writes this is a professional landscape architect, and his information is very detailed and practical. Regardless of what irrigation system you choose, you would do well to visit this site and to peruse, if not read thoroughly, what he has to say. I learned a TON about what to do, but more importantly, what NOT to do. Pay particular attention to the section on backflow prevention. This is serious stuff, especially if you don’t want your drinking water contaminated with whatever happens to be on or near your drippers. After all, animals, both domestic and wild, have to do their business somewhere!

The other thing I discovered, and I am STOKED about this, is the use of grey water for irrigation. Grey water is waste water from your house that is not sewage, e.g., not from your toilets. So, anything from your sinks, showers, dishwasher, or laundry, is considered grey water. Now, if you’re ultra conservative, you could set up a system that uses ALL of your grey water for irrigation purposes. But some of this requires permits and professional design. However, there is a low-cost DIY approach: using the effluent of your washing machine. Your washing machine uses a lot of water per load. If you have a top loader, then it’s 40 gallons per load (20 gal wash and 20 gal rinse). Even the high-efficiency front-loaders are 20 gallons per load. So, why not put all of that water to use in irrigating your property? The answer is that it’s pretty simple and definitely within the realm of a DIY project. First, there’s typically no permit required. Second, it’s relatively cheap. All you need is a 3-way valve, a vacuum breaker, some PVC pipe and fittings, some materials to make a bunch of mini-dry wells (perforated pipe, gravel, and circular pavers), and some inexpensive valves to regulate the flow such that you have an even distribution of water. There are some regulations that you have to be aware of, such as property line setbacks and having sufficient surface area to distribute water so that it doesn’t pool or overflow, but these requirements are spelled out very succinctly in a number of on-line articles. The best one is a manual that was produced by the city of San Francisco, CA (San Francisco Grey Water Design Manual) that is a very comprehensive guide. It includes detailed instructions for installation of a DIY laundry effluent grey water system. In my jurisdiction, Chula Vista, CA, the city took (plagiarized) elements of this manual for local guidance. So, if you care about water conservation and are in an area where drought is a concern, this something very simple and do-able for the average DIY.

The San Diego County Water Authority published a good guidebook on how to design a “water-smart” landscape (here). Additionally, the City of Chula Vista posted some professionally designed xeriscapes. Here is the link, but for some reason, it’s not working at the moment I’m writing this, so I’ve posted one of the plans here: wildlifefriendly-irrigationplanwildlifefriendly-planwildlifefriendly-plantimageswildlifefriendly-concept,

So, this was an expansion to the original project, but for several reasons, I think this is the way to go. I’ll have more details about my site plan in future posts.

Today Was A Banner Day!

Today, I picked up my building permit! I had to sign a bunch of stuff acknowledging the responsibilities and liabilities of an owner-builder, but I had done some research, so I have a pretty good idea of what I was signing up for.

California law allows for an exemption for homeowners who want to build on their own property. Basically, they are exempt from the requirements of the California Business and Professions Code, meaning that you DON’T have to have a license to build on your own property. That being said, there are a number of restrictions, most of which have to do with who has liability. All good stuff to know because understanding these details will help you avoid unpleasant legal actions should something go wrong. While there is a lot of legal gobbledygook involved, it boils down to some simple stuff.

(1) If you do you your own work, then you are responsible for the quality of that work, and if you sell the property, the buyers could conceivably come back after you if your work was shoddy. Unlikely in my case because I will be working under approved plans which will be inspected by the building department. Plus, I don’t do shoddy work as I will have to live with it. AND I don’t plan on selling the house. It will likely be inherited by my children (and THEY will have to deal with it).

(2) If I hire work to be done, then the work must be done by a licensed contractor OR I assume the responsibility of acting as a business and therefore have to pay for all of the liability insurance and taxes. Simple solution: Only hire licensed contractors. (And check them out ahead of time.) Yes, it may cost a little more up front, but it’s pennies on the dollar compared with an undocumented immigrant falling off your roof and permanently injuring his back. The immigrant may not do anything, but you can bet that the health care system will track you down and make you pay! This happened to an acquaintance of mine, and I felt very bad for him. But that was a big lapse in judgment on his part.

(3) There are some restrictions on selling the property or working on many properties at once. This is to discourage flippers. You have to own the property for a period of time and you can’t do it to many properties at once. Again, pretty much N/A in my case as this is really my home and not some quick-turn investment get-rich-quick scheme.

The other thing that happened to me today was that my car turned over  100K on the odometer. So I got the extra digit on the screen. It happened moments after I drove out of the civic center parking lot after getting my building permit. Coincidence? Yes,but a happy one. At least it put me in a good mood!

Detailed Design — How To Design A Structure

After the architectural design was complete, the next step was to actually figure out how to construct it. My plans needed to be detailed enough for the city building department to approve them. At first blush, one might think that pushing out a bedroom by seven feet is no big deal. Throw together a few trusses, use the existing flooring, build some walls with holes in them for windows, and you’re done.

Well, not really. The short story is that building codes have advanced, and when you build an addition, you are actually going to build a carefully engineered structure. If you’re really not a die hard DIY and/or don’t have any background or training in structural engineering or construction, then your best bet is to hire a designer to do the work. They aren’t cheap (I got a quote for $7,500 minimum), but it may be worth it, depending on the complexity of your project. Having said that, you don NOT have to be a structural engineer to design an addition , or any other structure for that matter. All you have to do is follow the prescriptive  methods contained in the applicable codes. This is essentially a “cookbook” method of designing a structure that includes a number of safety factors such that a design using these methods will withstand loads and stresses (people, wind, earthquake, etc.) that are expected for a residential home in a specific location. Here is where you can benefit from my experience. DO NOT try to get all fancy and design something that is not clearly specified in the codes and deviates from the “cookbook recipe”, then you will have to get a sign-off by a licensed Professional Engineer (P.E.). Again, this is expensive, and probably not worth it for a smaller project. So if you’re willing to spend some study time (and maybe even learn something!), a DIY solution awaits!

The best place to start is the building code that is applicable to your jurisdiction. The California Residential Code is actually reasonably easy to follow, but I found the American Wood Council Wood Frame Construction Manual (WFCM) a better resource for my purposes. Since the California Residential Code allows it, that is what I used. What really made a difference and put it all together for me was the WFCM Workbook, which has an example home design that steps you through the process. You will also have to determine the environmental conditions that your structure will need to withstand. This includes maximum wind conditions, seismic design category, whether or not you’re in a flood zone, maximum and minimum temperatures, termite infestation likelihood, and other factors. These are usually spelled out in the code and it makes sense to put together a little table for yourself so that you can refer to it when bouncing back and forth between the various parts of the code to get your numbers.

The approach that I used, which was taken directly from the WFCM workbook, was to start at the top and work my way down from the roof to the foundation. At each step you not only have to specify the materials (trusses, roof underlayment, studs, joists, etc.), but you ALSO need to show how these elements are connected. The code gives a table of fasteners (mainly nails) for fastening framing and sheathing, but when it comes to connecting major assemblies to each other, you typically have to use engineered specialty connectors (for example, roof truss to wall top plate). You have to be able to show, step by step, that the loads from each element are transferred through successive elements all the way to the foundation. So, roof to wall, wall to floor, floor to wall, wall to foundation.

A quick word about fasteners. The common nail is a very nuanced component. There are many types of many materials, and it is IMPORTANT that you use the right nail for the right purpose. The tables in the code tell you what to do, but therein are requirements for not only nail type, but spacing, and orientation, e.g., toe nail vs. face nail. Bigger and more is not necessarily better because you risk splitting the underlying wood member. So follow the instructions! In general, nails are better than screws, especially for framing. This is because they have significantly higher shear strength, and have some ductility which means that they will “give” a bit in a storm or an earthquake whereas screws tend to be brittle. Not that screws are bad. Just don’t use them for framing or shear walls. An exception to this are structural wood screws (SWS). These are larger screws made of heat treated steels that have higher quality control than your run-of-the-mill screw. The manufacturers of these screws have data sheets which detail their application. I used them in some places, a ledger board for example, but in general, I stuck with nails when I could.

One thing that was scary for me at the last was trying to figure out how to retrofit concrete anchors to bring the addition into compliance with seismic requirements. Fortunately, the folks who make these connectors also provide a method of anchoring these connectors with special epoxy into existing concrete. The only “downside” is that I have to have a certified inspector sign off on the installation. Well, maybe not a downside as it really has to be right. Just additional expense.

Although I spent many months getting to this point, and went down a few “rabbit holes”, I can definitely say that the effort was worth it, especially as a DIY’er. The process of designing showed me how to build it with all of the right materials, methods, and references. It’s going to be really pro!

Here is a link to my detailed construction plans.

1370 BFD Detail Views